
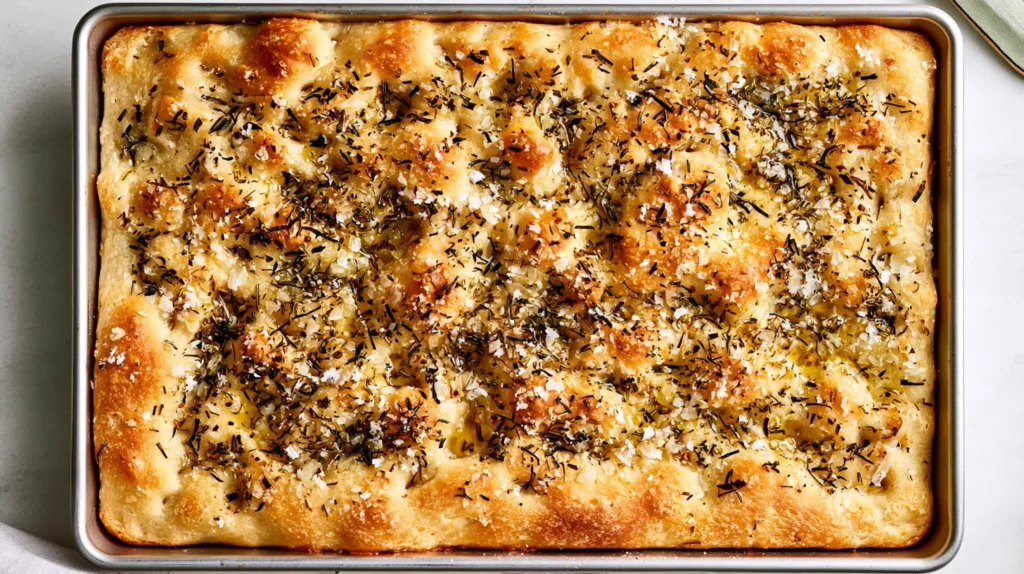
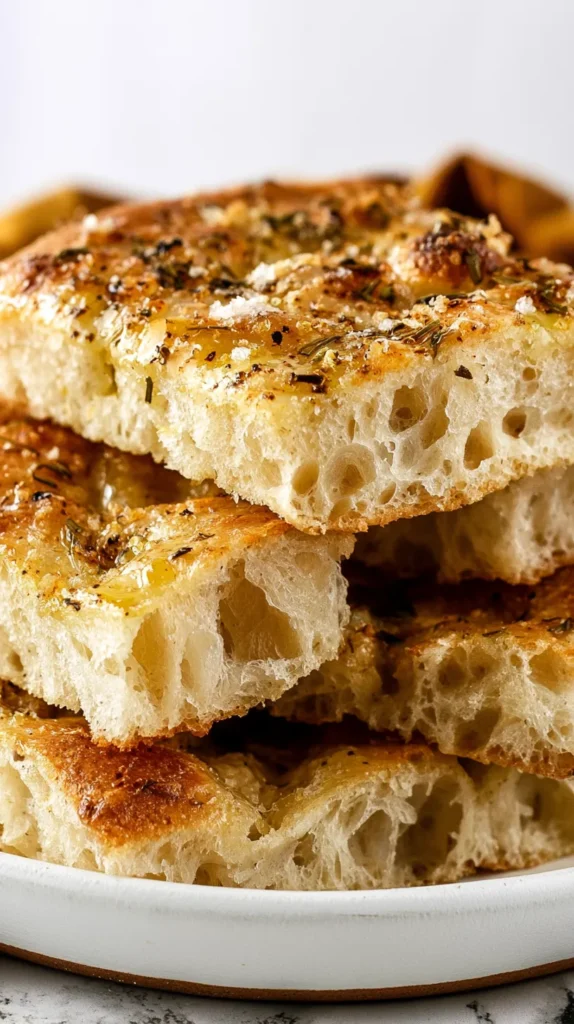
Some recipes walk into the kitchen acting fancy, and foccacia bread looks like one of them. It has the glossy olive oil top, tiny craters, crisp edges, and big “I own linen napkins” energy. Then you look closer and realize the whole thing starts with flour, yeast, water, salt, and patience. Patience, of course, sounds rude when dinner already needs attention.
I’ve found that bread recipes can make people nervous fast. The second yeast enters the chat, everyone starts acting like we need lab coats. But this one does not ask for perfect braiding, scary scoring, or a sourdough starter named Edith. It’s much more relaxed than that.
Living in Orlando makes me very aware of heat and humidity. Dough can rise fast here, like it heard a rumor. That can help with this recipe, but timing still matters. A warm kitchen moves dough faster, while a cooler room slows it down.
So, I’m taking this nice and chatty. We’ll talk dough, oil, bubbles, crispy edges, toppings, serving ideas, and the tiny details that matter. Not the fussy details. The useful ones. Also, we’re keeping the measurements friendly because nobody needs bread math at dinnertime. I want this process to feel doable, not precious.
And yes, one sneaky moment turns the dough from “wet blob” into “oh, this might be amazing.” Keep reading, because that part is weirdly satisfying. It also explains why this recipe looks harder than it really is.
Some of the links on this page are affiliate links. That means if you click and make a purchase, I may earn a small commission at no extra cost to you. If you’re curious about the fine print, you can check out my full disclosure.
Foccacia Bread Starts With One Wildly Simple Dough
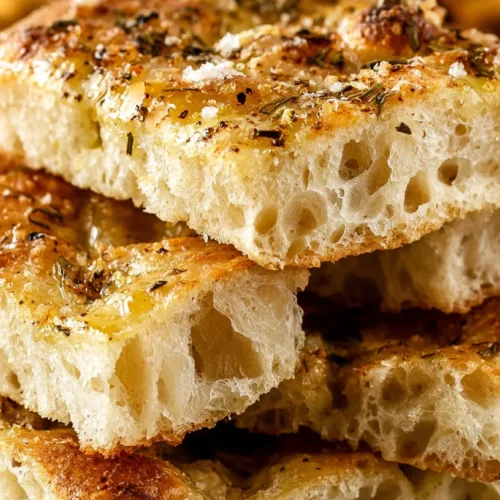
Foccacia bread starts with a dough that looks almost too wet at first. That’s normal, and I know it can look suspicious. A dry dough makes a tighter bread, and that’s not the goal here. We want airy, tender bread with crisp edges.
The big reframe is this: sticky dough does not mean you failed. It usually means you’re headed toward better texture. I tend to notice bread recipes get bossy about kneading. This one does not need that whole arm workout situation.
Instead, the dough uses time to build structure. You mix it until no dry flour remains, then let it rest. During that rest, the flour drinks in the water. Meanwhile, the yeast starts doing its quiet little job.
That short rest changes the dough more than people expect. It becomes smoother without you wrestling it. Then the folding step gives it strength. Skip the counter slapping. Avoid the flour storm. Save the dramatic kitchen soundtrack for dishes.
You also don’t need a stand mixer. I love that for anyone with limited cabinet space. A bowl, a spoon, and oiled hands can handle the job. Wet hands help, and so does a little olive oil.
The dough should look loose, stretchy, and a bit shiny after resting. It should pull instead of tearing right away. If it seems too shaggy, give it more time before judging it. Bread dough can be rude before coffee, apparently.
So, yes, the first stage looks humble. That’s part of the charm. A basic bowl of dough turns golden later, but it needs space first. The glow-up arrives after the weird part, which feels very on brand for homemade bread.
The Ingredients That Keep This Bread Cozy, Not Complicated
A good bread recipe should not require a grocery trip that feels like a scavenger hunt. This one keeps things simple, which I very much support. However, the few ingredients here still matter. Small choices can change the final bite.
I like this kind of ingredient list because each item has a clear job. Nothing sneaks in just to look important. You can make the base recipe plain, then add toppings once the dough behaves. That first plain loaf teaches you plenty.
For one 9-by-13-inch pan, gather these ingredients:
- All-purpose flour, 4 cups, spooned and leveled.
- Instant yeast, 2 teaspoons.
- Fine sea salt, 2 teaspoons.
- Warm water, 1 3/4 cups, about 105°F to 110°F.
- Honey or sugar, 1 tablespoon.
- Olive oil, 1/4 cup, divided.
- Fresh rosemary, 1 tablespoon chopped, optional.
- Flaky salt, 1 teaspoon for the top.
- Extra olive oil for your hands and pan.
All-purpose flour works well here, and bread flour also works. Bread flour gives a chewier bite, while all-purpose stays softer. Either way, do not pack the flour into the measuring cup. Packed flour can make the dough heavy.
Warm water helps wake the yeast, but hot water can damage it. Think warm bath, not lava soup. Honey or sugar gives the yeast a quick snack. Olive oil helps create those crisp edges everyone wants.
Fresh rosemary tastes lovely, but plain foccacia bread still deserves respect. Garlic, olives, tomatoes, onions, and parmesan can all work later. Still, start simple once. The toppings can wait their turn. That restraint sounds boring, but it pays off fast. Simple ingredients leave less room for weird surprises.
Why Foccacia Bread Loves Time More Than Fuss
Foccacia bread rewards the person who steps away. I adore that in a recipe. The dough does not need constant attention, which feels almost suspicious. But time gives this bread its airy middle and deep flavor.
The first rise matters because yeast needs room to work. As the dough rests, bubbles form inside it. Those bubbles help create the soft texture. Meanwhile, the flour keeps absorbing water, and the dough becomes easier to handle.
Here’s the part people often rush. They mix the dough, see it rise, and shove it straight into the oven. I get the urge. Warm bread smells like a life choice. However, the second rise in the pan changes everything.
During the pan rise, the dough spreads into the corners. It also relaxes enough for dimpling. If you dimple too early, the dough can spring back like a toddler refusing socks. Let it relax first, then press your fingers in gently.
Cold fermentation adds even more flavor. That means you can cover the dough and chill it overnight. The next day brings deeper flavor and a better chew. Meanwhile, the fridge slows the yeast without stopping the process.
You can make it the same day, though. No bread snobbery here. Same-day bread still tastes wonderful. Overnight dough just brings more flavor and better texture. Both versions deserve a seat at the table.
So, the trick is not doing more. It’s doing less at the right times. That’s a wildly pleasant bread lesson, and I’ll take it. Let time handle the drama while you do literally anything else. This is where patience starts looking shockingly useful. It’s not glamorous, but it works.
The Full Recipe With U.S. Measurements
Now we get to the part where the dough becomes dinner-adjacent. It can also become snack-adjacent. Maybe it becomes “standing near the counter” adjacent. This recipe makes one thick pan of bread, perfect for slicing into squares.
Use a metal 9-by-13-inch pan if you have one. Metal helps the bottom brown better than glass. However, glass still works if that’s what sits in your cabinet. Just watch the bottom and give it more time if needed.
Ingredients:
- All-purpose flour, 4 cups.
- Instant yeast, 2 teaspoons.
- Fine sea salt, 2 teaspoons.
- Warm water, 1 3/4 cups.
- Honey or sugar, 1 tablespoon.
- Olive oil, 3 tablespoons for the dough and pan.
- Top olive oil, 1 tablespoon.
- Fresh rosemary, 1 tablespoon chopped.
- Flaky salt, 1 teaspoon.
Process:
- Add flour, yeast, and fine salt to a large bowl.
- Stir warm water and honey together in a measuring cup.
- Pour the water mixture into the flour mixture.
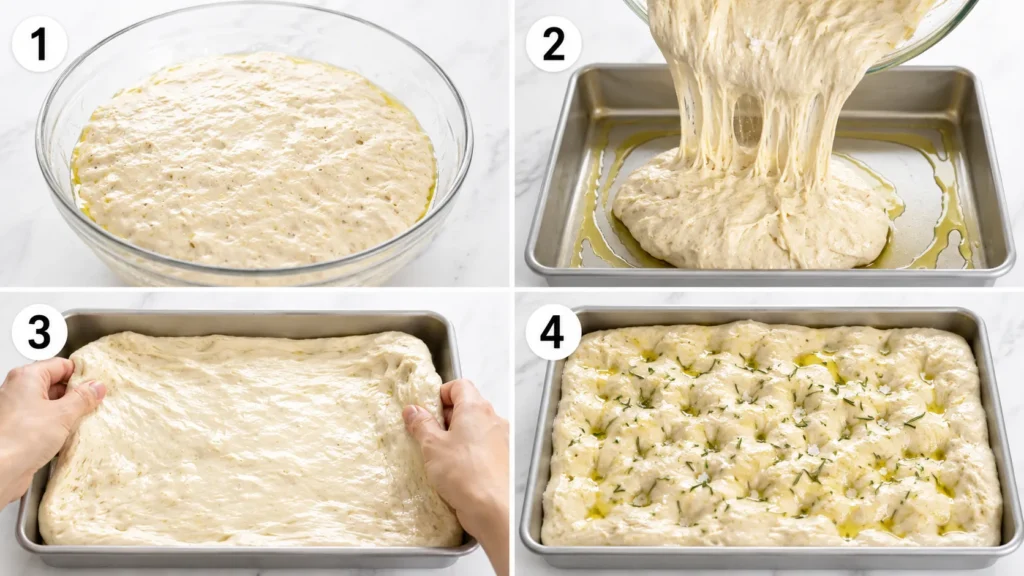
- Mix with a sturdy spoon until no dry flour remains.
- Drizzle 1 tablespoon olive oil over the dough.
- Cover the bowl and rest it for 20 minutes.
- Stretch one side of dough up, then fold it over.
- Turn the bowl and repeat three more times.
- Cover and rise for 60 to 90 minutes.
- Coat a 9-by-13-inch pan with 2 tablespoons olive oil.
- Move the dough into the pan with oiled hands.
- Let it rise in the pan for 45 to 60 minutes.
- Heat the oven to 425°F.
- Dimple the dough, then add oil, rosemary, and flaky salt.
- Bake for 22 to 28 minutes, until deep golden.
Let the foccacia bread rest for 10 minutes before cutting. That wait protects the soft inside. Yes, waiting near hot bread builds character.
Foccacia Bread Steps That Make The Texture Worth It
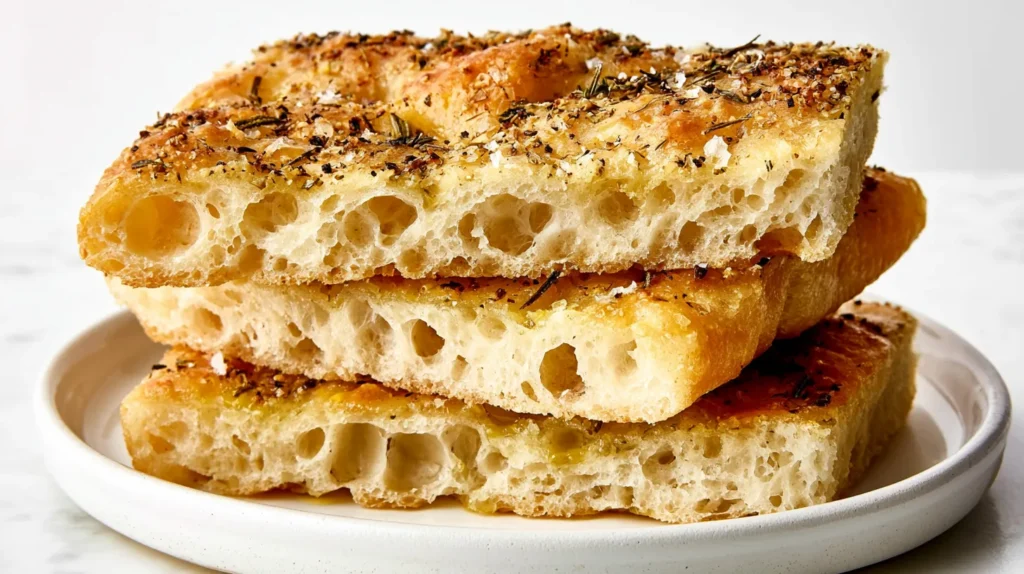
Foccacia bread looks casual, but the order of the steps matters. Not in a scary way. More in a “don’t skip the good part” way. The dough needs mixing, resting, folding, rising, dimpling, and baking.
Start with the mixing stage. You only need a sturdy spoon and a large bowl. The dough should look sticky and shaggy. If dry patches remain, keep stirring until the flour disappears.
Next comes the short rest. This part gives the flour time to hydrate. After 20 minutes, the dough should stretch more easily. Then use wet or oiled hands for folds.
Do the fold like this:
- Grab one side of the dough.
- Stretch it upward without ripping it.
- Fold it over the center.
- Turn the bowl a quarter turn.
- Repeat until you fold all four sides.
After that, cover the bowl and let the dough rise. Look for puffiness, not perfection. It may double, or it may rise a little less. Your kitchen temperature can change that.
Then move it into the oiled pan. Do not force it into every corner right away. Let it rest, then gently stretch it again. This keeps the texture lighter. Rushing this part can flatten the good bubbles. That tiny reset helps.
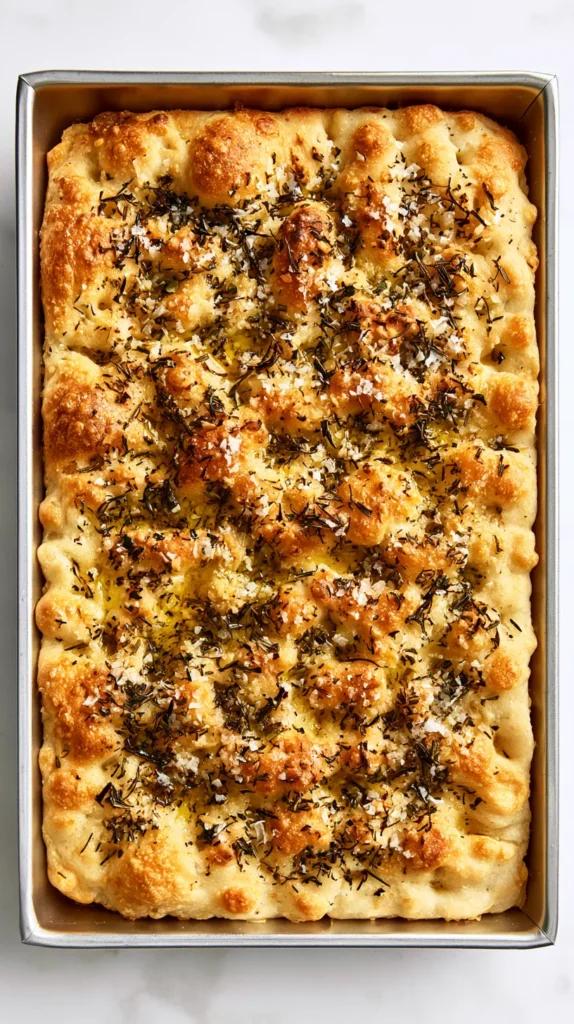
The dimpling step creates the classic top. Use both hands, press straight down, and avoid tearing the dough. Add oil before baking so the top browns well. That oil also helps the rosemary and salt settle into the surface.
Finally, bake until the edges look deeply golden. Pale bread may taste fine, but golden bread has better texture. That crisp bottom is the payoff. This is where patience gets a tiny applause.
Tips For Bubbles, Crispy Edges, And Less Kitchen Drama
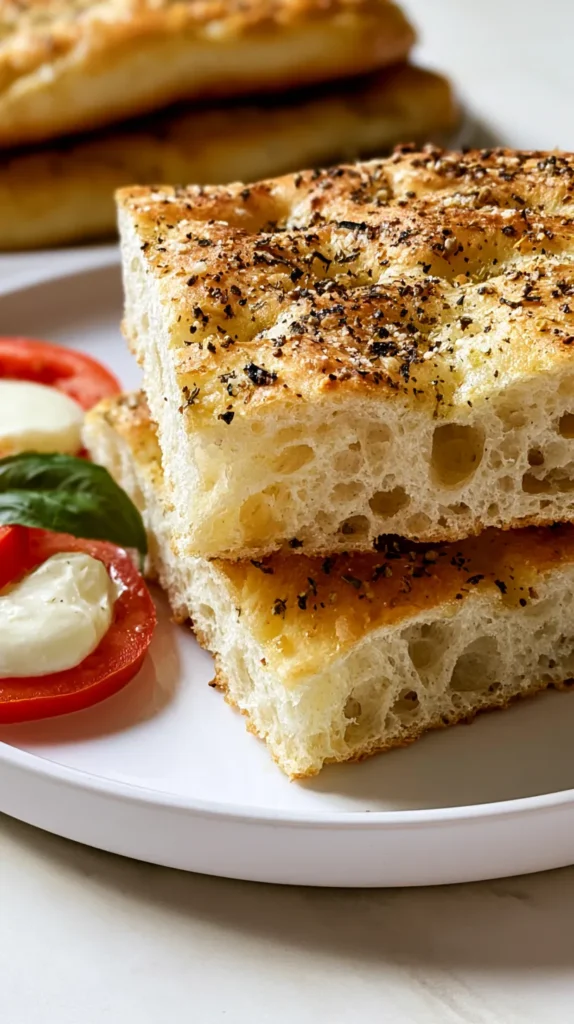
The biggest foccacia bread tip sounds too simple: use enough olive oil. I know. It looks like a lot. But olive oil helps the dough release from the pan and crisp underneath. Too little oil can cause sticking and sad edges.
Another key tip involves the pan. Darker metal usually gives stronger browning. Glass can work, but the bottom may stay lighter. If you use glass, bake on the lower oven rack. That helps the heat reach the bottom.
Dimpling also matters more than people think. Press your fingertips deep into the dough, but don’t poke holes through it. If the dough bounces back, let it rest ten more minutes. Relaxed dough accepts dimples better.
Salt needs a little attention too. Fine salt belongs inside the dough. Flaky salt belongs on top. If you only use fine salt on top, the surface can taste too sharp. Flaky salt gives little salty bites without taking over.
Toppings should stay light. I know, loaded bread sounds fun. However, too many wet toppings can weigh down the dough. Tomatoes, onions, and olives work best when you pat them dry first. A little restraint keeps the bread airy.
For storage, keep leftovers in an airtight container at room temperature. Use them within two days for best texture. Reheat slices in a 350°F oven for about eight minutes. Microwaves soften the crust, and that feels deeply unfair.
The real secret, though, is confidence. Bread looks dramatic before it looks done. Trust the rise, trust the oil, and trust the golden edges. The loaf tells you plenty if you look. If something seems odd, give it ten minutes before panicking.
Foccacia Bread Serving Suggestions That Do More Than Sit There
Foccacia bread can go casual or fancy, which makes it dangerously useful. It works with soup, salad, pasta, eggs, cheese boards, and snack dinners. I love recipes that do not demand a whole themed event. Very rude, very useful.
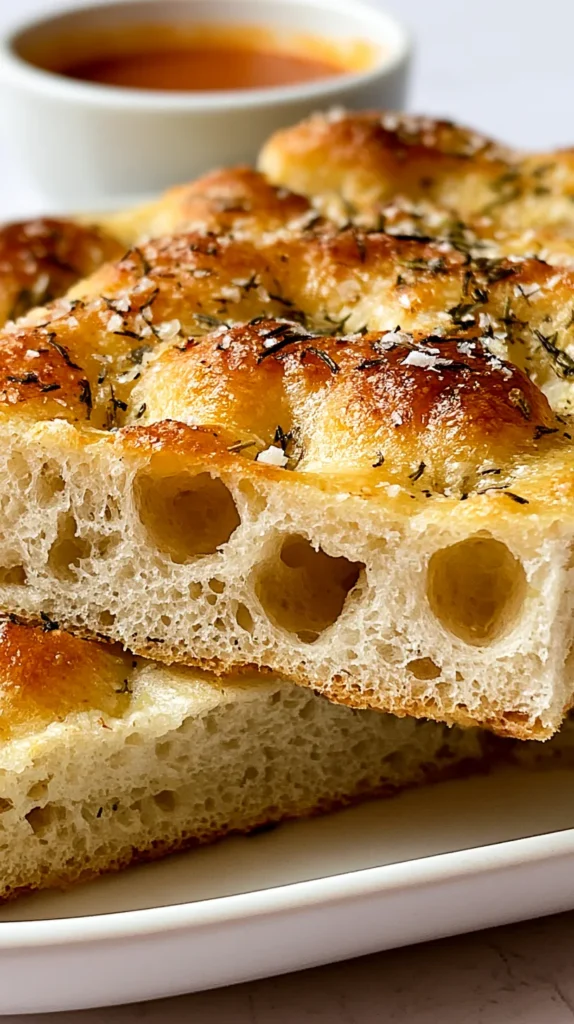
The simplest serving move is warm squares with extra olive oil. Add a tiny bowl of balsamic vinegar if you want café energy. Not required, but very welcome. A little cracked pepper also helps.
Try these serving ideas when you want options:
- Serve it with tomato soup for a cozy dinner.
- Slice it beside creamy pasta or baked ziti.
- Use it for turkey, ham, or veggie sandwiches.
- Cut it into strips for dipping into marinara.
- Add it to a brunch board with fruit and cheese.
- Serve it with scrambled eggs and roasted potatoes.
- Pair it with chili when cornbread feels expected.
- Cube leftovers into croutons for salads.
Sandwiches deserve a tiny extra note. Split the bread, toast the cut sides, and add fillings after cooling. If the bread feels too thick, cut each square into thinner slabs. This gives you better balance and fewer jaw gymnastics.
For parties, cut the loaf into small rectangles. Add a simple dip nearby, like whipped feta, pesto, or herbed cream cheese. People can grab pieces without needing forks. That always helps, especially when everyone treats the kitchen island like a dining table.
However, do not overthink serving. The bread already brings texture and flavor. Basically, it plays well with almost everything. Add one good pairing, and you’re set. That’s the joy here. It can support dinner without turning the evening into a production. A loaf like this earns its counter space.
FAQs For The Little Dough Mysteries
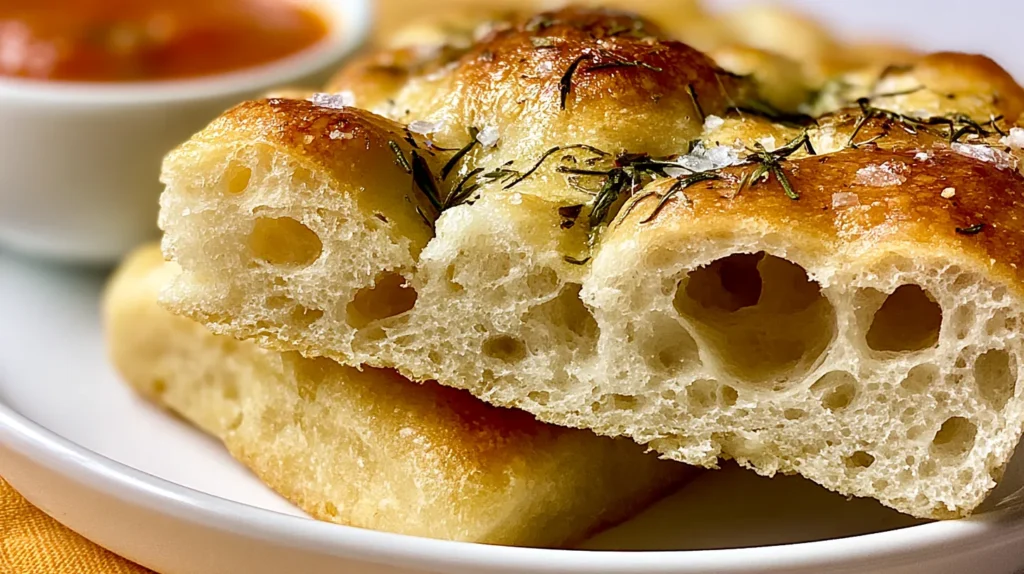
Why did my dough look so wet? Wet dough helps create a soft, open texture. It may look wrong at first, but that moisture matters. Use oiled hands instead of adding lots of flour.
Can I make this without instant yeast? Yes, you can use active dry yeast. Stir it into the warm water with honey first. Wait five to ten minutes, then mix it with the flour and salt.
Can I let the dough rise overnight? Yes, and the flavor gets better. Cover the bowl tightly and chill it after the first fold. The next day, let it sit at room temperature before moving it into the pan.
Why did my bread turn out dense? Dense bread often needs more rise time. Cold rooms slow yeast, so watch the dough more than the clock. Old yeast can also cause a flat loaf.
Can I add toppings before baking? Yes, but keep them light and dry. Pat tomatoes, olives, or roasted peppers with paper towels first. Heavy toppings can press down the dough.
How do I know when it’s done? Look for a deep golden top and crisp edges. The bread should lift from the pan without feeling soggy underneath. If needed, bake it a few minutes longer.
Can I freeze foccacia bread? Yes, freeze cooled slices in a freezer bag. Reheat them in the oven for the best texture. Skip the microwave unless you like soft crusts. No judgment, just concern.
What if I forgot the rosemary? Nothing terrible happens. Plain bread still works beautifully with flaky salt and olive oil. Add garlic butter later if you want more flavor. Sometimes the simplest version tells you the most.
Homemade Foccacia Bread
Ingredients
Dough
- 4 cups all-purpose flour spooned and leveled
- 2 teaspoons instant yeast
- 2 teaspoons fine sea salt
- 1 3/4 cups warm water about 105°F to 110°F
- 1 tablespoon honey or sugar
- 3 tablespoons olive oil for the dough and pan
Topping
- 1 tablespoon olive oil
- 1 tablespoon chopped fresh rosemary
- 1 teaspoon flaky salt
Instructions
- Add the flour, instant yeast, and fine sea salt to a large bowl.
- Stir the warm water and honey or sugar together in a measuring cup.
- Pour the water mixture into the flour mixture.
- Mix with a sturdy spoon until no dry flour remains.
- Drizzle 1 tablespoon olive oil over the dough.
- Cover the bowl and let the dough rest for 20 minutes.
- Stretch one side of the dough up, then fold it over.
- Turn the bowl and repeat the stretch-and-fold step three more times.
- Cover the bowl and let the dough rise for 60 to 90 minutes.
- Coat a 9-by-13-inch pan with 2 tablespoons olive oil.
- Move the dough into the pan with oiled hands.
- Let the dough rise in the pan for 45 to 60 minutes.
- Heat the oven to 425°F.
- Dimple the dough with your fingers.
- Add 1 tablespoon olive oil over the top.
- Sprinkle the dough with chopped fresh rosemary and flaky salt.
- Bake for 22 to 28 minutes, until deep golden.
- Let the foccacia bread rest for 10 minutes before cutting.
The Kind Of Bread That Makes Dinner Feel Handled
I like recipes that make regular food look more pulled together. Not fancy. Just a little more cared for. Foccacia bread does that without asking me to become a person who owns special bread tools. I respect that deeply.
There’s something satisfying about taking simple pantry ingredients and making something golden. It feels practical, but also a little showy. That’s my favorite cooking lane. Give me low effort with high “wait, you made this?” energy, please.
As a mom, I also appreciate food that can stretch across meals. This bread can sit beside soup one night, then become sandwiches the next day. That kind of flexibility matters when everyone wants something different. And somehow, everyone always does.
I also like how visual this recipe becomes. The dimples, oil, rosemary, and flaky salt all look very Pinterest without much styling. That helps when food needs to taste good and look like it tried.
Still, the best part is the confidence it builds. Bread can seem like a whole personality test. Yet this recipe proves you can make something beautiful without perfect skills. You just need time, oil, and a little trust in the messy middle.
So, if the dough looks sticky, keep going. When the pan looks oily, keep going. Once the edges turn golden and your kitchen smells ridiculous, congratulations.
That’s not a bread emergency. It’s dinner getting upgraded, one gloriously messy pan at a time. That little win counts, especially on busy nights.