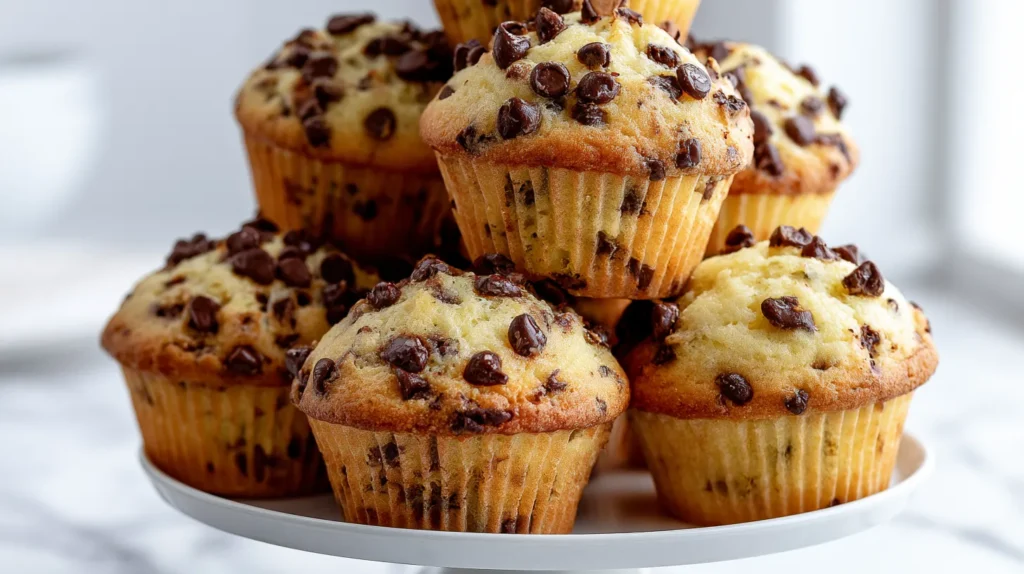
There is a very specific kind of joy that only chocolate chip muffins can bring. They look innocent, like breakfast made a reasonable choice. Then the chocolate hits, and suddenly this is not purely practical.
I’ve found that muffins live in the best little gray area. They count as breakfast before noon. After dinner, they become dessert. Near the counter, they are snack food with excellent branding. That is range, and I respect it.
As a mom, I appreciate any recipe that makes a normal morning seem less like a group project. Nobody needs a bakery run here. A bowl, a whisk, and pantry basics can create something warm and cheerful.
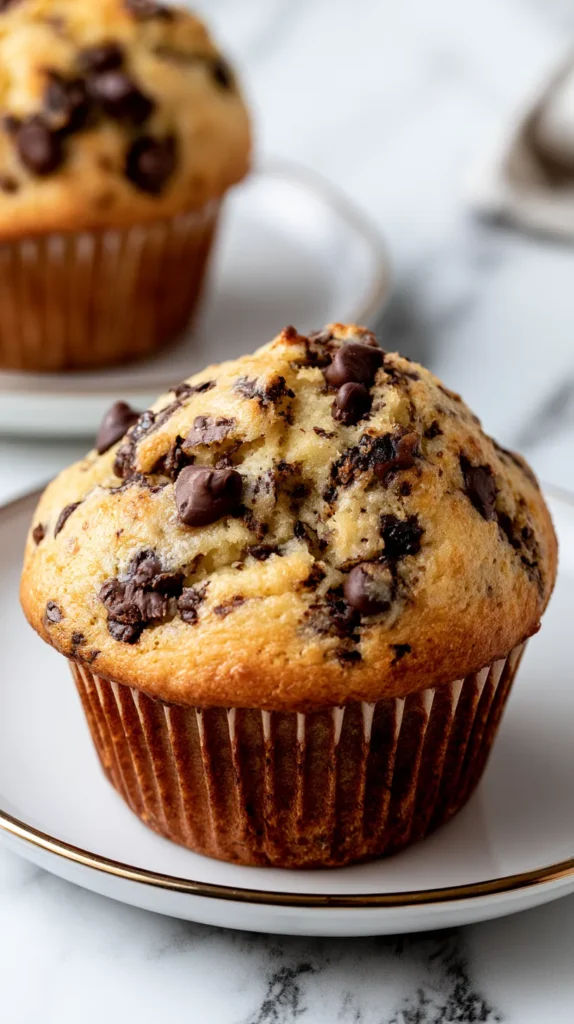
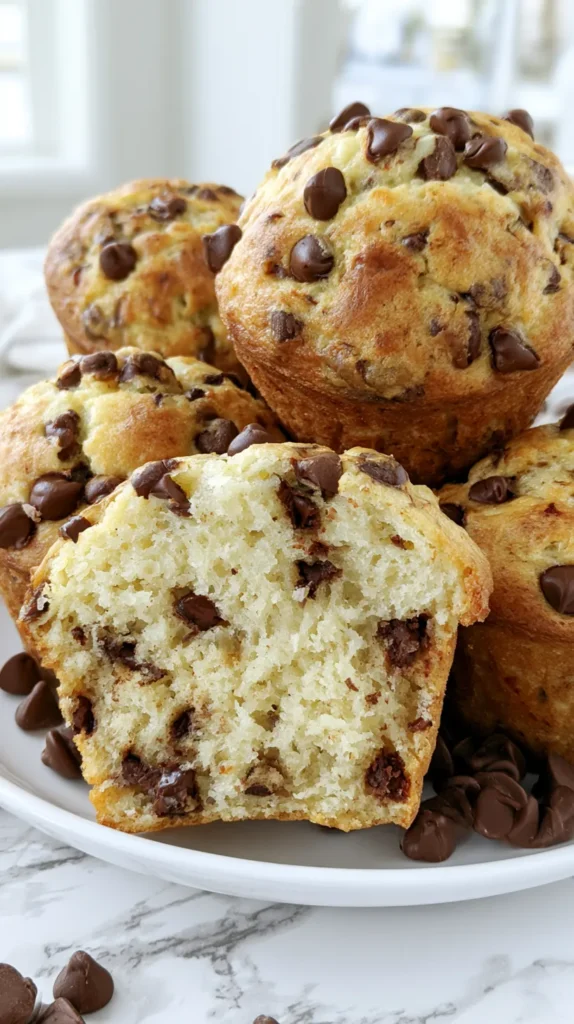
These muffins are soft in the middle, golden on top, and loaded with chocolate without going full cupcake. That matters because muffins should still taste like muffins, not frosting’s quieter cousin. They should look homemade in the nicest way. You know, cozy enough for a Tuesday, but cute enough for company. That little middle lane is the whole charm.
The best part is the batter does not ask for a mixer. I love my kitchen tools. However, I will not haul out heavy equipment for twelve muffins. Someone would need to bring coffee first.
Still, there is one tiny habit that separates soft bakery-style muffins from sad little pucks. It is not fancy, and it does not require pastry-school confidence. Better yet, it costs nothing and takes no extra time.
You just have to stop sooner than you think.
Some of the links on this page are affiliate links. That means if you click and make a purchase, I may earn a small commission at no extra cost to you. If you’re curious about the fine print, you can check out my full disclosure.
Why Chocolate Chip Muffins Deserve a Tiny Fuss
Great chocolate chip muffins do not need a dramatic backstory. They need a tender crumb, a rounded top, and enough chocolate to make each bite worth chewing slowly.
I tend to notice that people expect muffins to be easy, which they are. Yet easy does not mean careless. A muffin can go from soft to tough with a few extra stirs. That feels rude after you measured everything.
The tiny fuss comes from balance. Melted butter gives rich flavor, while a little oil keeps the texture soft after cooling. Sour cream adds moisture, and milk loosens the batter just enough.
That mix matters because dry muffins can ruin the mood fast. They look fine from across the kitchen, then betray you at bite one. Nobody asked for sweet packing material.
Here is the reframe. A muffin is not a cupcake without frosting. It needs its own texture, its own weight, and its own cozy little purpose.
These chocolate chip muffins taste sweet, but not heavy. The brown sugar adds depth, while granulated sugar keeps the flavor clean. Vanilla pulls everything together without turning the recipe fussy.
The chocolate chips matter too. Semi-sweet chips give that classic bakery taste. Dark chips work if you like less sweetness, and mini chips spread more evenly.
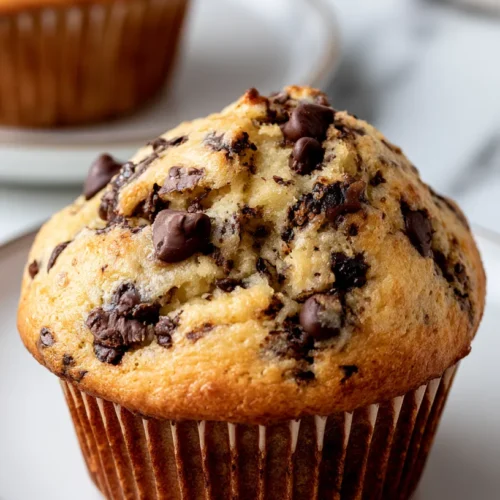
However, the top still deserves attention. Extra chips pressed on before baking make the muffins look finished. A little coarse sugar adds sparkle and crunch, which is very welcome.
So yes, I fuss a little. Not because muffins are difficult, but because small choices pay off. Warm centers prove the point later, right when you split one open. That is the whole little bargain.

The Ingredients That Keep Things Soft
This ingredient list for these muffins stays simple on purpose. I like a recipe that works with pantry basics. Nobody wants a muffin plan that requires three stores and emotional support.
Still, each ingredient has a job. Flour gives structure. Baking powder and baking soda create lift. Salt keeps the sweetness from tasting flat.
Use these U.S. measurements for 12 standard muffins:
- 2 cups all-purpose flour, spooned and leveled
- 2 teaspoons baking powder
- 1/2 teaspoon baking soda
- 1/2 teaspoon salt
- 1/2 cup unsalted butter, melted and slightly cooled
- 1/4 cup vegetable oil or canola oil
- 3/4 cup granulated sugar
- 1/4 cup packed light brown sugar
- 2 large eggs, at room temperature
- 2 teaspoons vanilla extract
- 1/2 cup sour cream or plain Greek yogurt
- 1/2 cup whole milk, at room temperature
- 1 1/4 cups semi-sweet chocolate chips
- 2 tablespoons extra chocolate chips for topping
- Optional: 1 tablespoon coarse sugar for topping
Now, let’s talk swaps before anyone panics. Plain Greek yogurt can replace sour cream, and it works nicely. For chocolate chip muffins, whole milk gives the richest result. However, 2% milk still gets the job done.
The butter should cool slightly before it meets the eggs. Otherwise, you risk making sweet scrambled eggs, which sounds like a breakfast crime. Warm butter is fine, but hot butter needs a minute.
Room temperature eggs and milk help the batter blend smoothly. If you forget, place the eggs in warm water for five minutes. For the milk, a few seconds in the microwave helps.
I prefer semi-sweet chips because they keep the flavor balanced. However, mini chips are great for smaller bites. Bigger chunks work too, but they make the muffins more dessert-like.
How to Make Chocolate Chip Muffins Without Drama
The process is simple, but the oven temperature does one sneaky little move. Start hot, then lower the heat. That first blast helps the tops rise before the centers settle in.
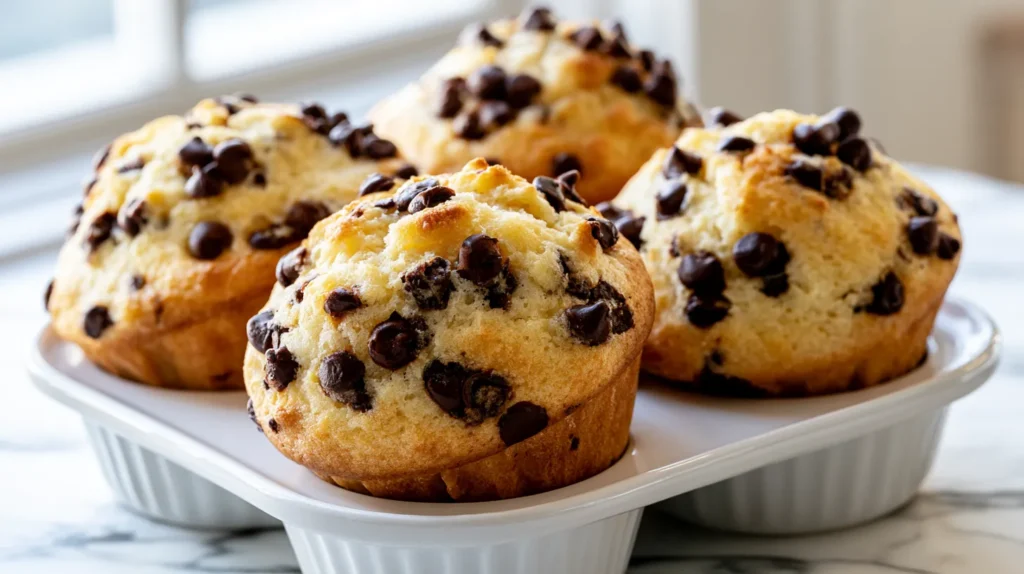
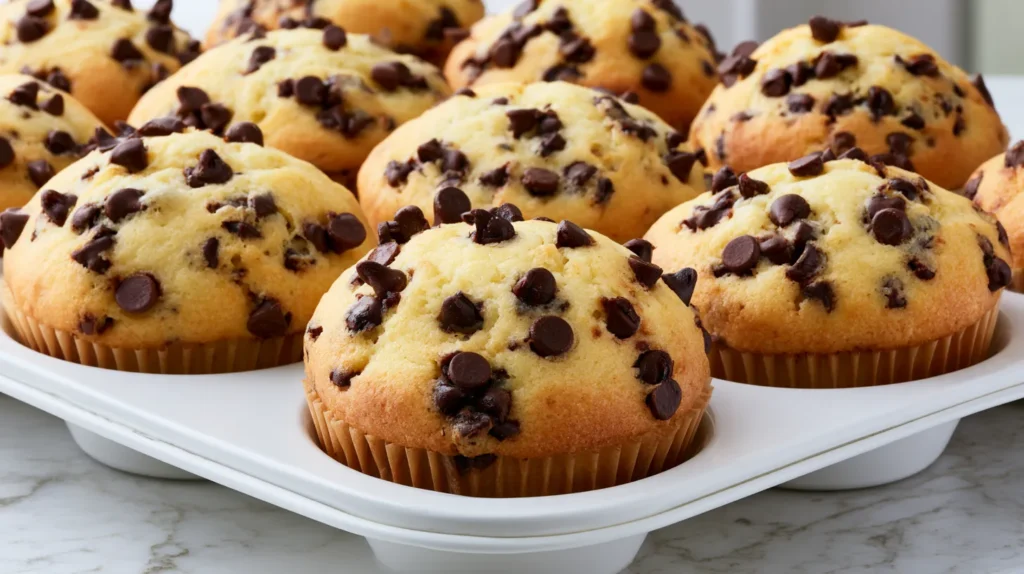
Heat the oven to 425°F. Line a 12-cup muffin pan with paper liners, or grease each cup well. Liners make cleanup easier, and I support anything that saves future scrubbing.
Follow these steps:
- Whisk flour, baking powder, baking soda, and salt in a medium bowl.
- In a large bowl, whisk melted butter, oil, granulated sugar, and brown sugar.
- Add eggs and vanilla, then whisk until smooth.
- Whisk in sour cream and milk until the mixture looks even.
- Add the dry ingredients to the wet ingredients.
- Use a spatula to fold the batter gently.
- Stop when a few flour streaks still remain.
- Add 1 1/4 cups chocolate chips and fold a few more times.
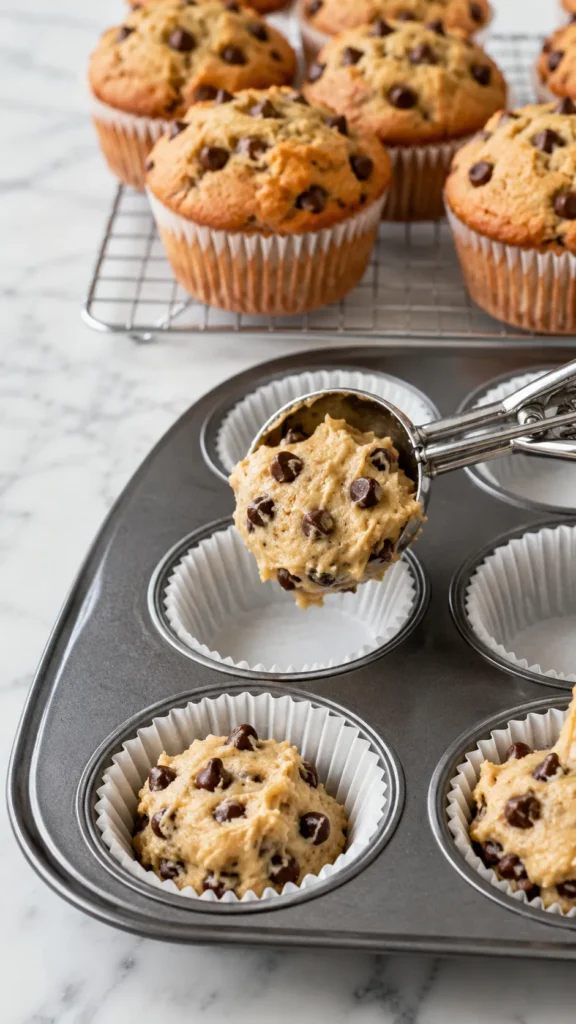
- Divide batter evenly among the muffin cups.
- Fill each cup almost to the top.
- Sprinkle extra chocolate chips and coarse sugar over the tops.
- Bake at 425°F for 5 minutes.
- Without opening the oven, reduce the heat to 350°F.
- Bake for 13 to 16 more minutes.
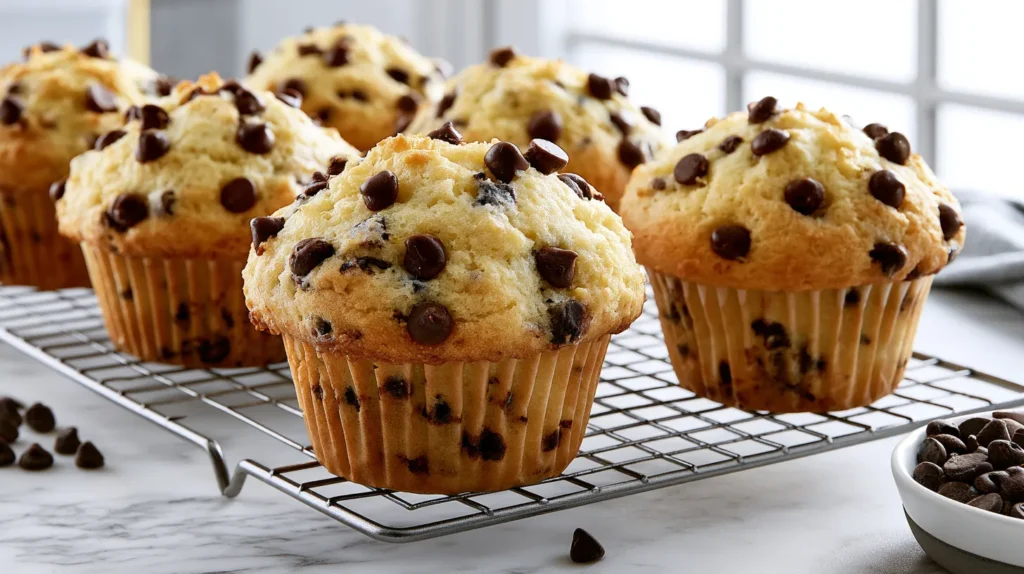
- Cool in the pan for 5 minutes, then move to a rack.
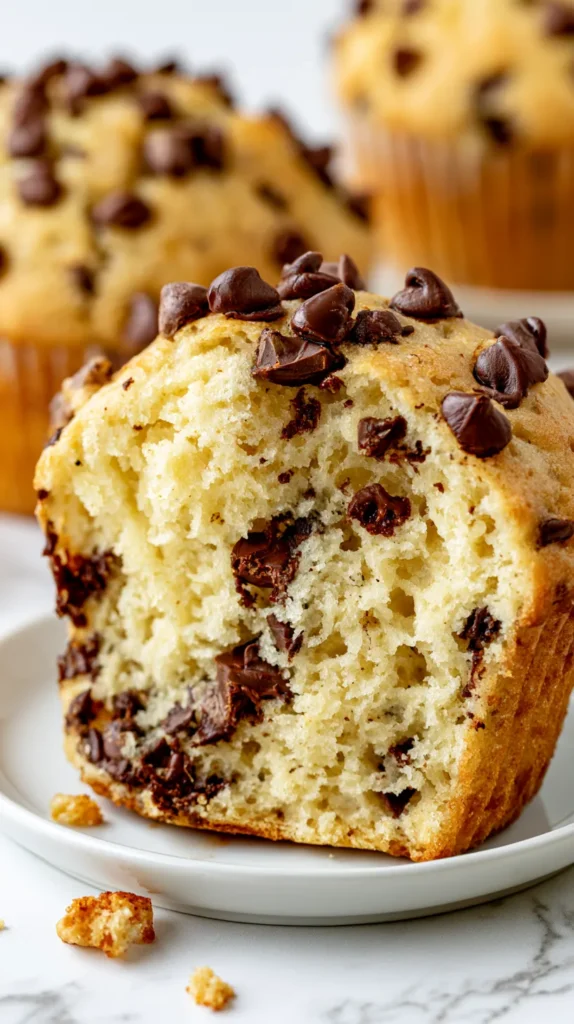
Use a toothpick to check the centers. You want moist crumbs, not wet batter. Try not to hit a melted chocolate chip, because that will confuse the whole situation.
These chocolate chip muffins keep setting after they leave the oven. So pull them when the tops spring back lightly. Overbaking steals softness, and we are not donating that today.

The Batter Moment That Changes Everything
The batter is where the whole recipe either gets charming or slightly tragic. I wish that sounded less dramatic, but muffin batter has a short temper when overmixed.
A good batter should look thick, soft, and a little lumpy. It should not look silky like cake batter. Smooth muffin batter usually means the flour had too much attention.
I’ve found that the hardest part is stopping while the bowl still looks imperfect. Your brain sees streaks of flour and says, “Keep going.” Sadly, your brain can be a menace with a spatula.
Here is the little trick. Fold until most of the flour disappears, then add the chocolate chips. Those last few turns will finish mixing the batter without overworking it.
Gluten forms when flour meets liquid and movement. A little gives structure, while too much creates toughness. That is why gentle folding matters more than speed.
Think of folding like turning the batter over itself. Scrape along the side, scoop from the bottom, and bring it over the top. After a few turns, check before doing more.
The batter should scoop into the muffin cups instead of pouring. If it flows like pancake batter, it may be too thin. Thick batter gives taller tops and better texture.
Also, fill the cups almost full. Many people stop at two-thirds because cupcake rules live rent-free in our heads. Muffins need a bolder scoop.
That fuller cup helps create the rounded top everyone wants. It also makes the muffins look generous, which matters more than we admit. Small muffin tops have their place, but not here. This batch deserves height, softness, and a little bakery-counter confidence. That tiny shift helps.

Smart Tips for Better Chocolate Chip Muffins
A few small tips can make chocolate chip muffins taste more bakery-style. Nothing here is complicated. The whole point is better results without turning baking into a personality test.
First, measure flour with care. Scoop flour straight from the bag, and you may pack in too much. That extra flour can make muffins dry and heavy.
Try these easy upgrades:
- Spoon flour into the measuring cup, then level it.
- Let melted butter cool before adding eggs.
- Use room temperature milk for smoother mixing.
- Rest the batter for 5 minutes before scooping.
- Fill muffin cups almost to the top.
- Add extra chocolate chips on top before baking.
- Avoid opening the oven during the first 10 minutes.
- Cool muffins on a rack, not in the pan.
- Store cooled muffins in an airtight container.
- Warm leftovers for 8 to 10 seconds before eating.
That short batter rest helps the flour hydrate. It can also give the tops a better rise. Just do not let the batter sit for ages, because the leavening starts working once wet meets dry.
The high oven start matters too. Baking at 425°F for the first few minutes gives quick lift. Lowering to 350°F lets the middle bake through without drying out.
If your chips sink often, toss them with one teaspoon of flour. This does not fix every situation, but it helps. Thick batter also keeps chips spread through the muffins.
These tips sound tiny because they are. However, tiny choices stack fast in baking. One careful scoop, one gentle fold, and one hot start can change the whole batch.
That is the good kind of fuss, the kind that still lets you bake in slippers.
The Texture I’m Chasing Every Single Time
Texture decides whether a muffin gets remembered or ignored. A pretty muffin can still taste boring, and that feels like false advertising. I want the bite to match the look.
For chocolate chip muffins, I want a tender middle and a lightly golden top. The crumb should break softly, not crumble into dust. Chocolate should show up often, but the batter should still matter.
Butter brings flavor, but oil helps with softness. Sour cream gives the crumb a little richness. Together, those ingredients keep the muffins from drying out too quickly.
The sugar mix also helps. Brown sugar adds moisture and a deeper taste. Granulated sugar keeps the muffins from getting too dense.
Here is the part that surprises people. More chocolate is not always better. Too many chips can weigh down the batter and make the muffins seem greasy.
I know. That sounds suspicious coming from someone who supports extra chocolate in most situations.
Instead of adding a mountain of chips, choose the right size. Mini chips spread through every bite. Regular chips give bigger pockets of chocolate. A mix of both works nicely if you want texture variety.
Cooling time also changes the bite. Warm muffins taste amazing, of course, but the crumb firms slightly after ten minutes. That little wait makes chocolate chip muffins easier to split and serve.
If you want softer leftovers, store them once fully cooled. Add a paper towel to the container to catch moisture. Then warm one briefly before eating, because room temperature muffins deserve a comeback.
The goal is simple. Soft, sweet, golden, chocolatey, and never dry. Anything less feels like a muffin missed its moment, and that is simply too gloomy for chocolate.
Serving Ideas for Chocolate Chip Muffins
Serving chocolate chip muffins should not become a whole event unless you want it to. They already bring enough charm. Add coffee, fruit, or a plate, and you have a plan.
For breakfast, I like them with berries or scrambled eggs. The fruit keeps things fresh, while eggs add protein. That combination makes chocolate chip muffins less like a solo sugar mission.
For brunch, tuck them onto a board with yogurt cups and sliced fruit. They look cute without much effort. Also, brunch loves a baked good with chocolate, because brunch has excellent priorities.
Try these serving ideas:
- Serve warm with salted butter.
- Pair with strawberries, blueberries, or orange slices.
- Add to lunchboxes with pretzels and apple slices.
- Set out for brunch beside yogurt and eggs.
- Pack for road trips or sports mornings.
- Wrap individually for bake sales.
- Serve with iced coffee for an afternoon treat.
- Split and toast the next day.
- Add a light dusting of powdered sugar.
- Serve with vanilla yogurt for an easy dessert.
Now, a tiny boundary. These muffins do not need frosting. Frosting pushes them into cupcake territory, and cupcakes already have their own empire.
A little butter, though, works beautifully. Salted butter balances the sweetness and gives the warm muffin a richer bite. Honey butter also works if you want extra sweetness.
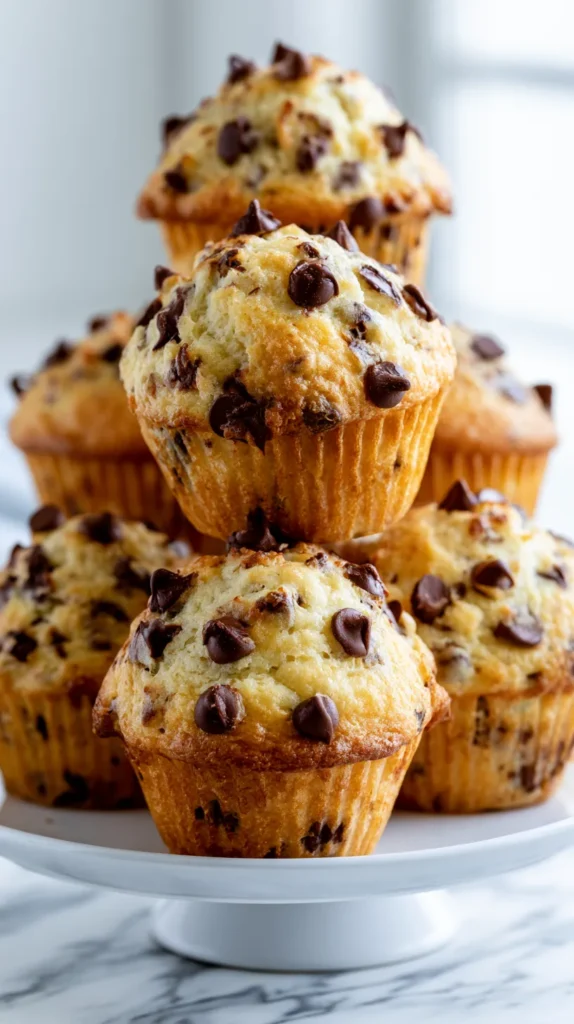
For parties, place them on a cake stand or tray. Sprinkle a few extra chocolate chips around the base if you like a styled look. Simple presentation still feels special.
Freezing helps too. Wrap cooled muffins one by one, then place them in a freezer bag. They keep well for up to two months, which feels like a gift from past you.
Questions I’d Ask Before Baking
Recipe questions tend to appear at the exact moment your hands are covered in batter. So let’s handle the common ones before the whisk gets involved. I support fewer kitchen surprises.
Can I use mini chocolate chips? Yes, mini chips work really well. Use 1 cup if you want balance, because they spread through the batter more evenly.
Can I use salted butter? Yes, but reduce the added salt to 1/4 teaspoon. Salted butter varies by brand, so this keeps the flavor steady.
Can I make these without sour cream? Plain Greek yogurt works as the best swap. Regular plain yogurt can also work, though the texture may be slightly lighter.
Why did my muffins turn out dense? Dense muffins often come from overmixing or too much flour. Spoon and level the flour, then fold gently next time.
Can I make the batter ahead? I would not make it far ahead. Baking powder starts reacting after mixing, so the muffins rise best when baked soon.
How should I store them? Cool them fully first. Then place them in an airtight container at room temperature for two to three days.
Can I freeze them? Yes, these freeze nicely. Wrap each cooled muffin, place them in a freezer bag, and freeze for up to two months.
Can I make jumbo muffins? Yes, but they need more time. Bake at 425°F for 5 minutes, then at 350°F for 20 to 24 minutes.
How do I know they are done? The tops should spring back lightly. A toothpick should come out with moist crumbs, not wet batter.
These answers are not fancy, but they save batches. That is enough glamour for me.
Chocolate Chip Muffins
Ingredients
- 2 cups all-purpose flour spooned and leveled
- 2 teaspoons baking powder
- 1/2 teaspoon baking soda
- 1/2 teaspoon salt
- 1/2 cup unsalted butter melted and slightly cooled
- 1/4 cup vegetable oil or canola oil
- 3/4 cup granulated sugar
- 1/4 cup packed light brown sugar
- 2 large eggs at room temperature
- 2 teaspoons vanilla extract
- 1/2 cup sour cream or plain Greek yogurt
- 1/2 cup whole milk at room temperature
- 1 1/4 cups semi-sweet chocolate chips
- 2 tablespoons extra chocolate chips for topping
- Optional: 1 tablespoon coarse sugar for topping
Instructions
- Preheat the oven to 425°F.
- Line a 12-cup muffin pan with paper liners, or grease each cup well.
- Whisk flour, baking powder, baking soda, and salt in a medium bowl.
- In a large bowl, whisk melted butter, oil, granulated sugar, and brown sugar.
- Add eggs and vanilla, then whisk until smooth.
- Whisk in sour cream and milk until the mixture looks even.
- Add the dry ingredients to the wet ingredients.
- Use a spatula to fold the batter gently.
- Stop when a few flour streaks still remain.
- Add 1 1/4 cups chocolate chips and fold a few more times.
- Divide batter evenly among the muffin cups.
- Fill each cup almost to the top.
- Sprinkle extra chocolate chips and coarse sugar over the tops.
- Bake at 425°F for 5 minutes.
- Without opening the oven, reduce the heat to 350°F.
- Bake for 13 to 16 more minutes.
- Use a toothpick to check the centers.
- Look for moist crumbs, not wet batter.
- Avoid hitting a melted chocolate chip when checking.
- Cool in the pan for 5 minutes.
- Move the muffins to a wire rack.
- Let the muffins cool slightly before serving.
One Last Muffin Thought Before The Crumbs Happen
I like recipes that make a normal day seem a little more put together. Not polished. Nothing perfect. Just warm, sweet, and worth clearing a tiny spot on the counter.
Chocolate chip muffins do that beautifully. They fit breakfast, brunch, snack time, bake sales, and those late afternoon moments when everyone suddenly needs something. The recipe feels useful without looking boring, which is my favorite kind of kitchen win.
As a mom, I love when one batch can solve more than one problem. Twelve muffins can cover a school morning, a quick treat, and a small Pinterest-worthy brunch plate. That range deserves respect.
The best part is how repeatable the recipe becomes. Once you notice the thick batter, gentle folding, and full muffin cups, the whole thing clicks. Then you stop second-guessing every stir.
I also love that these muffins do not need a mixer. A whisk and spatula keep the process simple. Fewer dishes always make baked goods taste better to me, and I will not be taking questions. Also, fewer dishes leave more time for eating one warm.
So make the batch, let the tops rise, and save one while warm. The chocolate will be soft. Every crumb will be tender. The kitchen will smell like someone made an excellent choice.
No mixer, no bakery line, no dramatic cleanup. Just a very good muffin doing exactly enough. That is the quiet little flex I want from baking. Save the complicated energy for something else.