There’s a moment at every party where I glance at the food table. I always think: this needs more color. Chips are fine. Dip is fine. But nothing perks up a spread faster than smart fruit platter designs that actually look intentional.
I’ve found that guests hover around a beautiful fruit tray first. They touch it before anything else, even the brownies (bold claim, I know). As a mom, I’ve hosted more birthday parties than I can count. I’ve learned a gorgeous platter buys me twenty quiet minutes, while kids graze instead of snacking nonstop.
My counter has seen some questionable arrangements over the years. Melon balls roll everywhere. Grapes escape their bowl like tiny green fugitives. Still, I keep experimenting, because turning plain produce into something intentional is oddly satisfying.
Maybe it’s the color. Or maybe it’s the shapes, I genuinely can’t decide. Whatever it is, I can’t stop rearranging fruit like it’s a tiny edible art project.
Here’s the thing nobody tells you: gorgeous fruit spreads aren’t about fancy tools. They’re not about rare produce either. It comes down to a handful of small tricks that make a big visual difference.
I’m going to walk you through everything I’ve picked up: the shapes, colors, and layouts. Plus the little cheats that make people ask, “wait, did you make this?” Grab a cutting board, because we’re about to make fruit look way fancier than it should.
Small Fruit Platter Designs That Still Wow
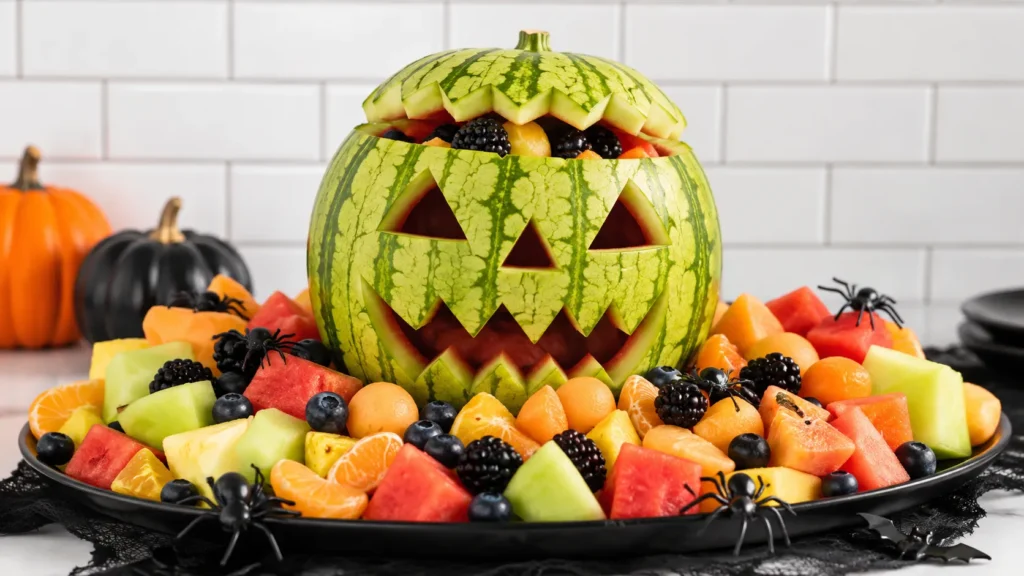
Small doesn’t mean boring. That’s the first myth I want to bust. A tight little fruit platter can look just as striking as a huge one. Sometimes it looks even better, and I mean that.
Oversized trays actually work against you when you’re feeding four or five people. The fruit dries out fast. By the end, the arrangement looks sparse, and nobody wants that. I’ve found that scaling down forces better fruit platter designs. You have to be intentional with every single piece, since there’s less room for filler.
Here’s what I reach for when building a small spread:
- A shallow, wide bowl or plate instead of a deep one, so nothing hides
- Three or four fruit types max, chosen for contrasting colors
- Sliced fruit fanned in overlapping rows, not dumped in a pile
- One hero fruit in the center, like a halved fig or berry cluster
- A tiny bowl of dip tucked into a corner, not centered
That last one surprised me the first time I tried it. Centering the dip seemed obvious, at first. Pushing it to one side lets the fruit be the real star. Small platters also photograph better for Pinterest boards, if that’s your thing (it’s absolutely mine, no shame).
Keep the colors punchy. Think red, gold, and deep purple, instead of three shades of green. Trust me, your eye will thank you. So will your Tuesday afternoon snack board, when it’s staring back at you looking chic.
I also think about what’s already ripe on my counter before buying anything new. A small platter built around what’s in season saves money and effort both. Simple fruit platter designs like this pull double duty: less waste, more color.
Creative Fruit Tray Ideas For A Slow Sunday
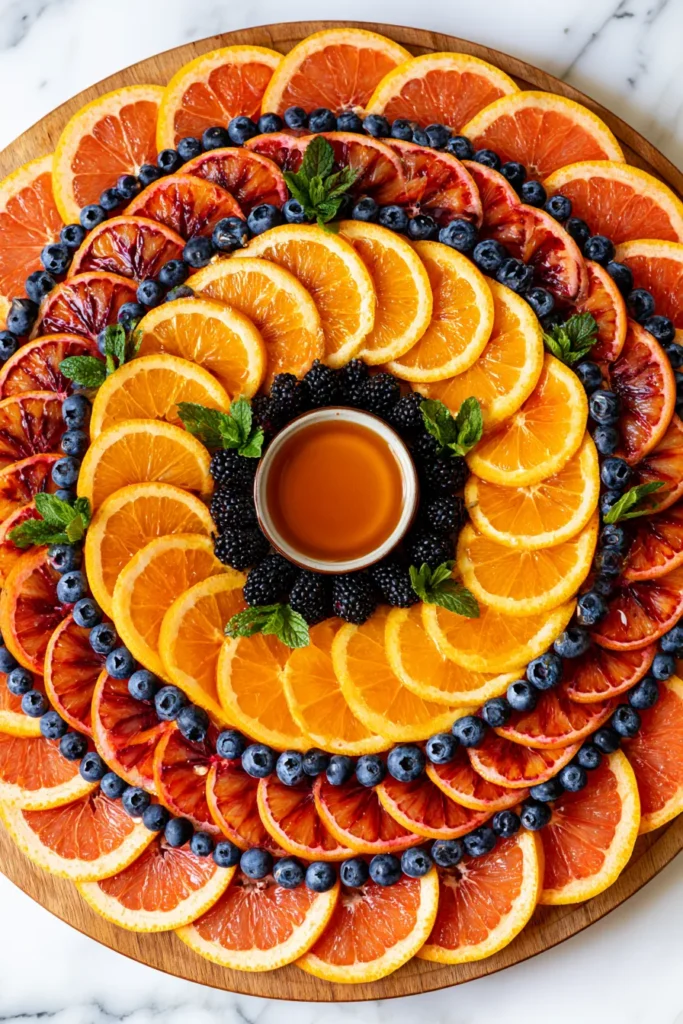
Sunday mornings are when I get weird with fruit, in the best possible way. There’s no party to plan and no guest list. It’s just me, a bowl of strawberries, and too much time on my hands. That’s usually when the best ideas show up.
A rainbow arrangement, sorted by color from red to purple, turns ordinary fruit into a tiny sunset. Watermelon cut into stars with a cookie cutter sounds silly. Then you see how kids react to it. My youngest once asked why the fruit looked “fancy,” which, fair question, it’s just a shape change.
One idea I keep coming back to is skewers. Fruit on a stick is an instant upgrade, no plating skills required. Another favorite is the fruit “flower,” where thin melon slices curl around a berry center like petals. It takes maybe three extra minutes and looks like you hired someone.
Here’s a genuinely underrated move: mixing textures on purpose. Soft mango next to crunchy apple next to juicy grapes keeps every bite interesting, not just pretty. I used to think fruit platter designs were only about how a plate photographed.
Now I think about how it eats too. A platter that’s all soft fruit turns mushy and sad by hour two. Creative doesn’t have to mean complicated. Sometimes it just means noticing what you already have, and turning it sideways for a completely different look.
None of this needs to look like a magazine spread. Casual fruit platter designs work just as well on a random Tuesday as they do for guests. I’ve started treating breakfast fruit the same way I treat party food. It just makes the whole morning seem a little more special.
Pretty Fruit Platter Designs Anyone Can Pull Off
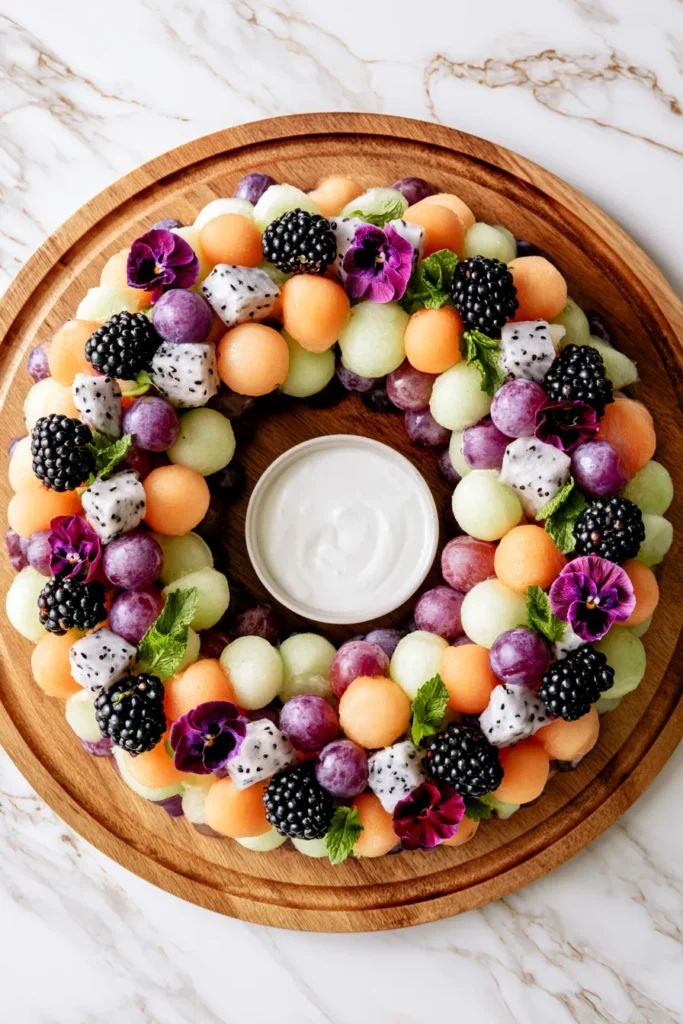
Pretty doesn’t have to mean fussy. I think that gets lost a lot in fruit content online. Some of the most gorgeous fruit platter designs I’ve seen use maybe five ingredients. Zero special tools required.
The trick is contrast: color contrast, shape contrast, and height contrast. Flat platters look nice, but adding a little height somewhere makes the whole thing pop. A few moves consistently make a platter look prettier than it took effort to be:
- Group fruit by color into loose sections, instead of scattering everything randomly
- Add one item with height, like a small stack of clementines or propped-up grapes
- Use fresh mint or basil leaves as green accents between fruit groups
- Vary the cut: some slices, some whole berries, some wedges, so the eye keeps moving
- Leave a little negative space on the plate instead of cramming edge to edge
That last point took me forever to learn. I used to fill every inch of the platter, thinking more fruit meant more impressive. It just looked cluttered and busy, and busy isn’t the same as beautiful.
Now I leave breathing room on purpose. Somehow it makes the fruit look pricier, if that makes any sense. Pretty platters also lean on natural fruit shapes instead of fighting them. A whole strawberry with the leaves left on looks more elegant than a chopped one. Simplicity, arranged with a little intention, wins almost every time, even on a busy Tuesday.
I still mess up plenty of platters, and that’s fine. Even a slightly wonky arrangement looks better than a bowl of loose fruit. Pretty doesn’t mean perfect, and that distinction has saved me a lot of stress.
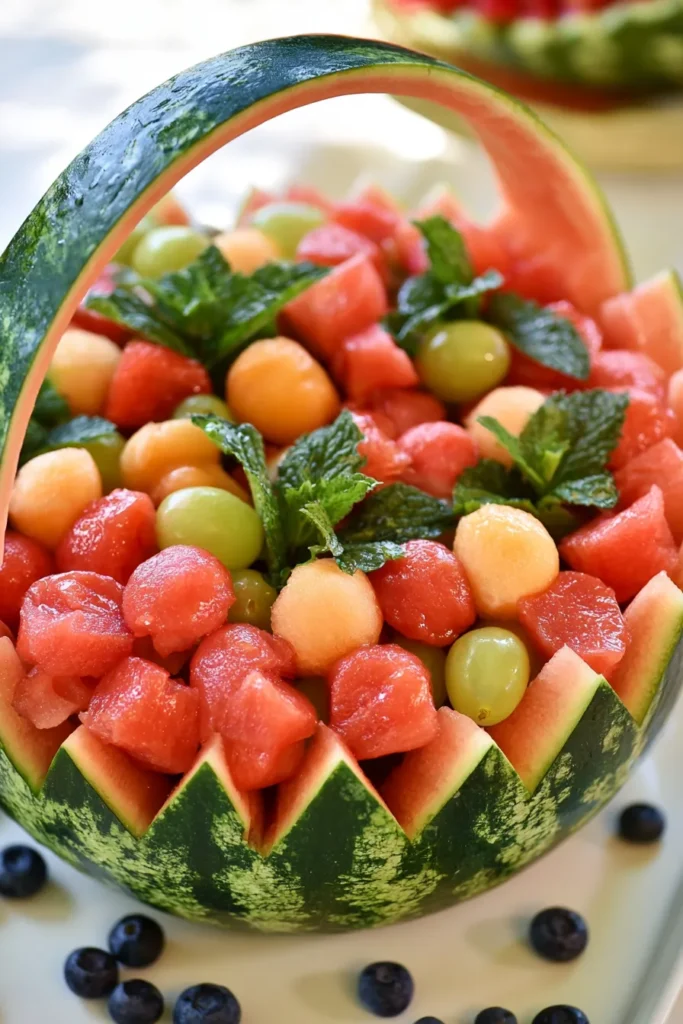
Food Board Ideas Borrowed From The Cheese Plate World
Charcuterie boards taught a whole generation that food arranged well is basically decoration. Fruit deserves the same treatment. It usually gets left off the fancy board conversation entirely. Borrowing a few cheese-board tricks completely changed how I build a spread.
Wooden boards instead of plates, for one. The texture alone makes fruit look warmer and more inviting. Small bowls tucked into open spots hold nuts, honey, or a soft cheese. That gives the eye somewhere new to land, and it makes the whole board look more generous.
I’ve found that mixing food board and fruit platter designs together makes both look more abundant. It doesn’t add much extra food, either. A cluster of dried apricots next to fresh peach slices creates a color echo. It looks planned, even when it wasn’t. Little clusters instead of long rows also read as more upscale, weirdly enough.
One thing I didn’t expect: crackers or breadsticks tucked between fruit sections add height. They bring a little crunch contrast too. It sounds like an odd pairing until you try a strawberry right after a salty cracker. That combo is genuinely great, and now I can’t unsee the appeal.
I don’t build full cheese boards for every gathering. That’s a lot of work on a weeknight. But stealing two or three cheese-board habits for a fruit spread takes minutes. The whole board ends up looking curated instead of thrown together. Nobody needs to know it took ten minutes, tops.
I don’t think fruit platter designs need to copy cheese boards exactly, either. Borrowing a trick or two is plenty. The goal is always the same: make something people want to reach for first.
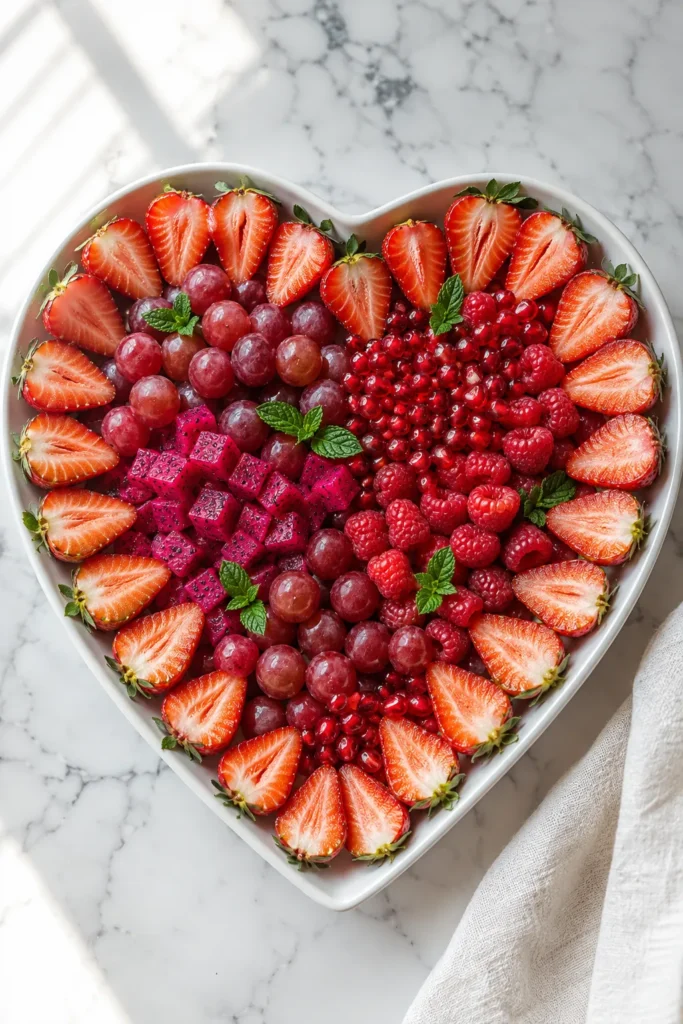
Fruit Plate Presentation Tricks I Swear By
Presentation is where most home fruit plates fall apart. It’s not because people lack taste, it’s because they rush the last step. I’ve noticed something about the gap between a good fruit plate and a great one. It usually comes down to five extra minutes of care.
Here’s my actual go-to checklist before any fruit plate leaves my kitchen:
- Pat fruit dry after washing, since wet fruit looks dull under lighting
- Cut fruit close to serving time so edges stay bright, not browned
- Angle pieces the same direction for a cleaner, more uniform look
- Add one unexpected texture, like toasted coconut or crushed pistachios
- Wipe the plate rim clean before it goes anywhere near guests
That last one is such a small thing. Yet it changes everything about how put-together a plate looks. A smudged rim makes even a gorgeous arrangement look sloppy. That seems unfair to the fruit that did nothing wrong.
Lighting matters more than people expect too. Natural light near a window makes color pop way more than harsh overhead light. I photograph most of my spreads near the same window, every single time, because I’ve learned what works. Presentation isn’t about being fussy, either. It’s about giving fruit the same respect you’d give a fancier dish, since it’s earned it.
None of these fruit platter designs require a culinary degree, just a little patience. I treat plating almost like a five-minute ritual before guests arrive. It’s become one of my favorite parts of hosting, weirdly enough. A little extra care at the end always shows, even when nobody can quite say why. I never skip it, even when I’m short on time.
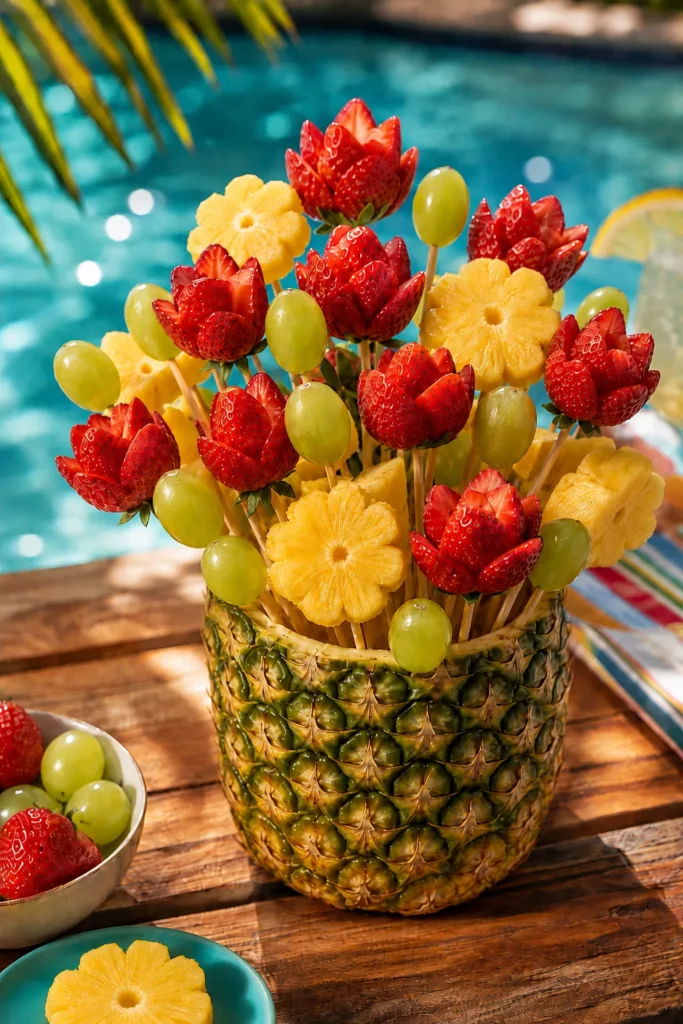
Cute Fruit Tray Ideas For Kid Parties
Kids do not care about elegance, and that reality reshaped how I plan fruit trays completely. What works for a baby shower falls flat at a seven-year-old’s birthday party. Shapes win with kids, full stop.
A watermelon cut into a rainbow arch beats an elegant fan of melon slices, every time. So do grapes threaded onto skewers like little caterpillars. I’ve noticed cute beats sophisticated whenever the guest list is mostly under age ten.
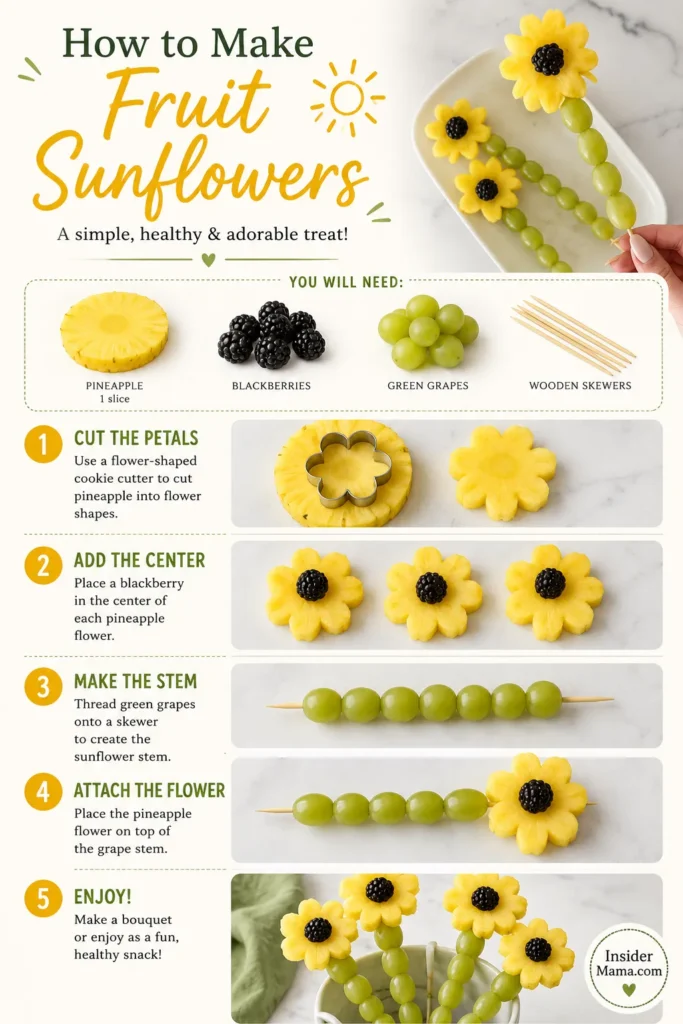
Fruit shaped like flowers turns a snack table into something photo-worthy. A few cookie cutters and some patience are all it takes. Kids photograph everything for their own accounts now, which is a strange new normal I’m still adjusting to. Bite-sized pieces matter more than people think too, since tiny hands don’t want to negotiate a giant strawberry.
One trick has saved more parties than I can count: naming the arrangement something silly. Try “dinosaur eggs” for melon balls, or “rainbow bites” for a color-sorted tray. Kids eat with their imagination first and their stomach second, weirdly enough.
Sturdy paper plates work better than fancy platters here too, since kid parties involve chaos. I stopped stressing over elegance years ago, and I leaned into whimsy instead. Every party got easier because of it. Cute wins over polished when the crowd is under four feet tall, and I’ve made peace with that.
I don’t overthink fruit platter designs for kid parties anymore, and that’s been freeing. The goal shifted from elegant to memorable somewhere along the way. A slightly messy, colorful tray that gets devoured beats a pretty one that goes untouched. It’s a trade I’ll make happily, every single time.
![200PCS Bamboo Skewers for Appetizers, [6 Inch] Long Cocktail Picks Fancy Toothpicks for Appetizers, Flat Paddle Wooden Skewers Food Sticks for Party Drinks Fruit BBQ, Charcuterie Boards Accessories](https://m.media-amazon.com/images/I/51ibWjKKeZL._SL500_.jpg)
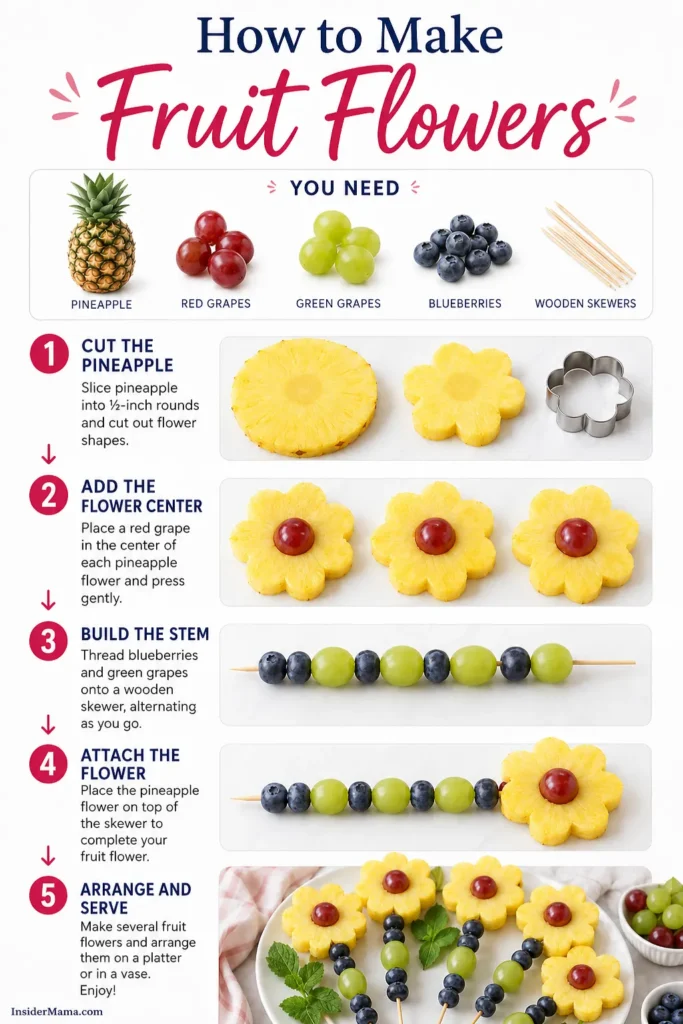
Fancy Fruit Platter Designs For Fancy-ish Occasions
There’s a version of fancy that doesn’t require caviar or edible gold. That’s the version I truly care about. Fancy fruit platter designs, in my experience, come down to precision more than expense.
Uniform cuts make a huge difference. Every strawberry gets sliced the same thickness. Each melon ball comes out the same size. It reads as intentional, even with just a paring knife and patience.
Color layering does a lot of heavy lifting too. Instead of scattering fruit randomly, I build gradient rows, moving from deep red to orange to pale yellow. It mimics the ombre effect people pay a lot for on cakes. Except it costs whatever fruit was already on sale that week.
Edible flowers, if you can find them, add a surprising amount of polish for very little effort. Pansies are shockingly cheap at some markets, which still surprises me every time.
I also swear by garnish restraint, which sounds contradictory for a fancy section, but hear me out. One well-placed sprig of mint reads elegant. Five sprigs scattered everywhere reads like a garnish emergency instead. Fancy fruit platter designs work best when every single element earns its spot on the plate.
Chilled fruit also holds its shape and shine longer under event lighting. That matters more than people expect at a longer party. I plan my fancier spreads about thirty minutes before guests arrive. Cutting nothing too far ahead keeps everything looking fresh. Fruit that sits too long loses its glow fast, no matter how it was cut.
None of this takes as long as it sounds. Most of my fancier platters still come together in under an hour, start to finish. Fancy comes from a few smart choices, not a whole afternoon lost to fruit.

Diy Fruit Platter Designs For Total Beginners
If you’ve never arranged a fruit platter before, let me talk you off the ledge a little. It’s genuinely not hard. The biggest beginner mistake is overthinking the layout before cutting a single piece of fruit. I’ve found that starting with what’s in season and on sale solves half the design decisions instantly. Limited options make choosing easier, automatically.
Here’s a simple beginner formula that works almost every time:
- Pick three to five fruits with different colors, not just different types
- Choose one plate or tray big enough that fruit doesn’t touch the edges
- Start with the largest fruit pieces first, then fill gaps with smaller ones
- Add height with one item, like a small pile of berries in the center
- Finish with a garnish, mint or basil, right before serving
DIY fruit platter designs don’t need a template. They don’t need a Pinterest tutorial memorized word for word. Instead, they just need a plate, some fruit, and permission to start placing things down.
My first few attempts looked lopsided and a little sad, if I’m being real about it. Every attempt since has gotten a little better, mostly through repetition. A few Pinterest scrolls for inspiration never hurt either.
The fruit doesn’t judge you for a wonky first try. That’s genuinely the best part of practicing on something edible. Give yourself one platter to mess up completely. The next one will already look better, I promise you that, cross my heart.
Every attempt at fruit platter designs teaches you something new, even the messy ones. I still learn tricks from platters that didn’t turn out right. That’s the most useful part of practicing anything by hand, genuinely.

FAQs
What’s the easiest way to start designing a fruit platter? Start with three colors and one shape idea, like fans or skewers. Simple beats elaborate for a first attempt, every time.
How far ahead can I prep a fruit platter? Most fruit holds up for a few hours if kept cold and covered. I’ve found citrus lasts longer than delicate berries.
What fruit browns fastest and should get added last? Apples, bananas, and pears brown quickest once cut. I add those right before serving, or toss them lightly in lemon juice.
Do I need special tools to make a fruit platter look professional? Not really. A sharp knife, a melon baller, and a steady hand cover almost everything I do, tools-wise.
What’s a good size platter for a small gathering? A twelve to fourteen inch plate works well for four to six people. Smaller platters also encourage better, more intentional fruit platter designs anyway.

Why I’ll Never Serve Plain Fruit Again
I didn’t expect to become someone with opinions about fruit platter designs, and yet here we are. What started as one desperate attempt to make a birthday party look put-together turned into a habit. I truly enjoy it now.
My kids roll their eyes when I rearrange grapes for the third time before guests show up. I don’t care, because the extra two minutes always pays off. There’s something weirdly calming about slicing fruit into neat rows while everyone else stresses about the cake.
None of this requires talent or expensive tools. It’s not some secret only professional caterers know. It just takes a little intention and a willingness to try a layout that might flop completely.
Some of my favorite ideas came from total failures I fixed halfway through cutting. I keep a running folder of favorites saved from Pinterest. It’s mixed in with a few experiments of my own that turned out better than expected.
So next time you’re staring at a bowl of fruit, just start somewhere. Pick a shape, pick a color story, and let the rest figure itself out as you go. Being a mom taught me that small, pretty details are often what people remember most from a party. Fruit deserves better than a sad pile in a bowl, and now, so does your next party platter.