When I first started baking at home here in Orlando, I thought pumpkin pie had to be complicated. It felt like one of those desserts you only buy at the store because it seems fussy and time-consuming. But I was so wrong. The truth is, pumpkin pie is simple at heart. It feels warm and cozy, like fall wrapped in a flaky crust. And once you try making it yourself, you’ll wonder why you ever paid extra for one that never tastes quite right.
I’ve found that making pie can feel a little scary at first. The mixing. The rolling. The waiting. But every step is easier than it looks. Kind of like learning a new card game. You pick it up as you go. The recipe becomes a rhythm once you do it more than once. And each time, the whole house fills with that sweet smell that makes everyone wander into the kitchen asking what’s baking.
There’s something special about using simple ingredients. Sugar. Spices. Eggs. A creamy filling that settles into the crust like it belongs there. When you slide the pie into the oven, it’s peaceful. When you pull it out, it feels like a tiny celebration. Even if it’s a random Tuesday.
I love how flexible pie can be. You can dress it up with whipped cream or keep it plain. You can serve it after dinner or sneak a slice with your coffee. No fancy steps needed. Just a little time and a steady stir. It’s comforting to know that great food doesn’t have to be complicated or expensive. It can be simple, familiar, and made right at home. And maybe that’s why baking pie feels so good. It’s a quiet way to say, we’re here, and life is sweet.

This site includes affiliate links; you can check the disclosure for more details.
Why Make Pumpkin Pie from Scratch?
I like knowing exactly what goes into my pie. Simple ingredients and honest flavors make it feel cozy from the start. Measuring and stirring turns a busy day into a calm little ritual. The house smells warm and sweet, and suddenly everyone drifts toward the kitchen to check what’s baking.
Homemade pie also gives me freedom. I adjust the spices, soften the sweetness, and build the crust the way I like it. Every layer feels personal. A clean slice that holds together just right feels like a tiny win, even on a normal weeknight.
Here’s what stands out when I make it myself:
- I control the ingredients.
- Spices can be bold or gentle.
- Crust style is totally up to me.
- Fresh dairy or dairy-free both work.
- Sweetness stays balanced.
- I bake it to a gentle wobble.
- Warm or chilled slices both taste great.
- It fits any budget.
Cold butter and cold water keep the crust flaky. If rolling feels tricky, extra chilling time smooths things out. The filling comes together fast with a simple whisk until everything looks silky. A soft center means it will finish setting as it cools.
In the end, the homemade version just feels fuller and brighter. Once you try it, the store version loses its charm pretty fast.

Making the Crust
The first step is to make the crust. Store-bought pie crusts are easy, but they don’t hold a candle to a homemade one. The key to a good pie crust is to keep everything cold. Cold butter and cold water make for a flakier crust. Here’s what you’ll need for the crust:
- 1 ¼ cups all-purpose flour
- 1 tablespoon sugar
- ½ teaspoon salt
- ½ cup unsalted butter, cubed and chilled
- 3-4 tablespoons ice water
Steps to Make the Crust:
- Mix dry ingredients: In a large bowl, combine the flour, sugar, and salt. Give it a quick mix to evenly distribute everything.
- Add butter: Toss in the cold, cubed butter. Using a pastry cutter or your hands, work the butter into the flour. You want to break up the butter until it’s in small, pea-sized pieces.
- Add water: Start with three tablespoons of ice water. Gently mix it into the flour mixture. Add more water, a tablespoon at a time, until the dough just comes together. Get the dough just right—not too wet, but it should stick together when you press it.
- Chill the dough: Form the dough into a disc, wrap it in plastic wrap, and stick it in the fridge for at least 30 minutes. Chilling the dough helps it firm up, which makes it easier to roll out.

Rolling Out the Crust
I start rolling the dough after it chills because the rest time keeps it firm. A cool dough holds its shape and feels easier to handle. Lightly dusting the counter helps it move without sticking. The goal is an even sheet, about 1/8-inch thick, wide enough to cover a standard 9-inch pie dish. Slow, steady passes with the rolling pin work better than heavy pressure. It’s a rhythm you pick up quickly.
Once it’s flat, I lift one edge and wrap it loosely around the rolling pin. That little trick makes transferring easier, especially if the dough feels delicate. Then I unroll it over the pie dish and ease it into the bottom. A gentle press helps it settle into the curves without tearing. If there’s extra dough hanging over, I trim it clean. Crimping the edges with fingers or a fork gives it a tidy look.
Here are a few things that help:
- Add just enough flour to prevent sticking.
- Turn the dough between rolls to keep the shape round.
- Patch small cracks with tiny dough scraps.
- Trim overhang before crimping.
- Light pressure keeps the dough tender.
Chilling the shaped crust again keeps it from shrinking. The butter resets and firms up, so the crust holds its edges in the oven. I tuck the pie dish back into the fridge while preparing the filling. A short chill is enough. It sets you up for clean edges and a sturdy base.
Rolling dough can feel fussy at first, but it gets easier. The more you practice, the calmer it feels. A quiet countertop, a little flour, and a few patient rolls are all it really takes.

Making the Pumpkin Pie Filling
Now, let’s move on to the star of the show: the pumpkin pie filling. The filling is simple, yet delicious. It’s made with canned pumpkin purée, but if you feel ambitious, you can roast your own pumpkin. Either way, the filling is smooth, creamy, and perfectly spiced. Here’s what you’ll need:
- 1 can (15 ounces) pumpkin purée (not pumpkin pie mix)
- ¾ cup sugar
- ½ teaspoon salt
- 1 teaspoon ground cinnamon
- ½ teaspoon ground ginger
- ¼ teaspoon ground cloves
- 2 large eggs
- 1 can (12 ounces) evaporated milk
Steps to Make the Filling:
- Mix dry ingredients: In a bowl, combine the sugar, salt, cinnamon, ginger, and cloves. This ensures the spices are evenly distributed throughout the filling.
- Add pumpkin and eggs: Stir in the pumpkin purée, followed by the eggs. Mix everything well!
- Add evaporated milk: Gradually stir in the evaporated milk. The mixture will be smooth and creamy. You’re now ready to fill the pie crust.

Assembling the Pumpkin Pie
I like to keep things calm at this point. The crust is chilled, so it feels firm and ready. I set it on the counter and give it a quick look for any cracks. If I see tiny gaps, I press a small scrap of dough over the spot. Then I grab the filling and give it one last stir. A smooth mix helps everything bake evenly. Pouring the filling feels simple. It slides into the crust and settles like it already knows where to go. I spread it gently so it reaches the sides without overflowing. This helps every bite taste balanced, and it keeps cleanup easy.
I always tap the dish once on the counter. That little tap pushes out any big bubbles. The pie looks calmer and smoother after. Then I check the edges. They should still feel cold to the touch. Cold edges help the crust keep its shape in the oven. I like knowing the base of my pumpkin pie is ready to go.
A few helpful things:
- Stir the filling right before pouring.
- Fix small crust cracks with scraps.
- Don’t overfill the dish.
- Tap the dish to settle bubbles.
- Keep the edges cold before baking.
The pie goes on the middle rack. Heat rises around it in a gentle way. I try not to open the door too often. A quiet oven helps the filling set. When the edges start to look firm, I peek again. The center should still wobble a little. That wobble tells me it will finish setting as it cools. If it looks too loose, I let it bake a few more minutes and check again.
Cooling matters more than it seems. The filling thickens as steam escapes. The crust holds steady and stays flaky. I let the pie rest until it feels comfortable to touch. Then I move it to a cool spot. A relaxed pie slices cleaner and tastes smoother.
Baking the Pumpkin Pie
I think of this stage as the calm payoff. The crust is ready. The filling looks smooth. The oven warms up while I clear space on the counter. A hot start helps set the crust, so I preheat to 425°F. The pie goes on the middle rack where the heat surrounds it evenly. After about 15 minutes, I lower the temperature to 350°F and let it bake for another 40–50 minutes. Slow heat brings everything together, almost like the flavors are settling into their new home.
The kitchen starts to smell like fall. Spices drift through the rooms. It’s the kind of scent that makes people pause and peek around corners. I love that part. Warm air, soft light, and the promise of dessert later. The top turns a deeper color while the edges look steady. Those little visual cues help me feel confident as the timer ticks down.
Here are a few helpful notes:
- Bake at 425°F for the first 15 minutes.
- Drop to 350°F to finish.
- Use the middle rack for even heat.
- Rotate the pie if one side browns faster.
- Shield the edges with foil if they darken too quickly.
Doneness can be tricky, so I look for gentle signs. The center should wobble just a little when I move the pie. A tiny jiggle means it will finish setting as it cools. If I slide a thin knife into the center, it should come out clean. That’s the moment I turn off the oven and reach for oven mitts. The pie looks humble on the rack, but it keeps changing as the steam fades.
Cooling is just as important as baking. The filling firms up. Flavors settle. I leave the pie alone for a while so nothing tears or sinks. A patient cool-down leads to cleaner slices and a silkier texture later. That quiet moment always feels worth it.

Letting the Pie Cool
This is the hardest part: waiting for the pie to cool. It’s tempting to cut into it right away, but letting it cool completely ensures the filling sets properly. You can leave it on a wire rack for a couple of hours or pop it in the fridge to speed things up.
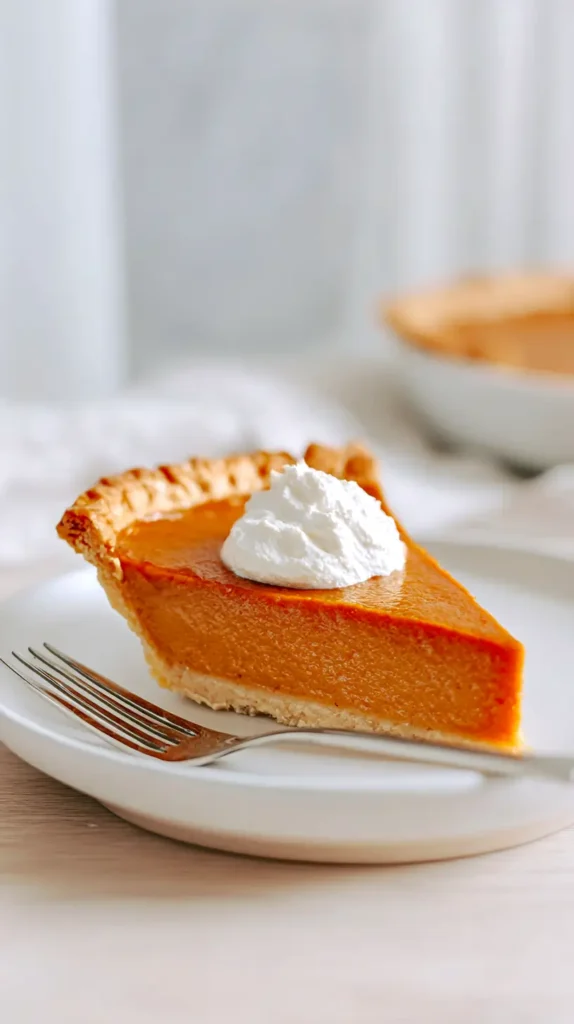
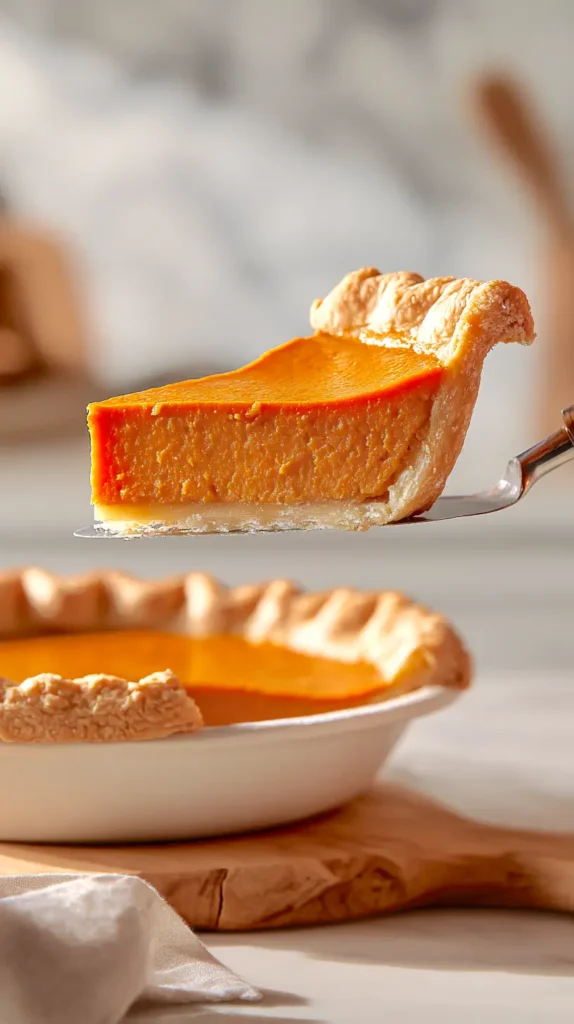
Serving Your Homemade Pumpkin Pie
Once your pie is cool, it’s ready to serve. You can keep it simple and serve it as is, or you can add a dollop of whipped cream on top. Either way, your homemade pumpkin pie is sure to impress. It’s the perfect way to celebrate fall, Thanksgiving, or even just a random Tuesday.
Making a pie from scratch might seem like a lot of work, but it’s really just a series of small, simple steps. Each step is easy to handle, and the result is a pie that’s filled with love, flavor, and the satisfaction of knowing you made it yourself.

Perfect Pumpkin Pie
Ingredients
Crust
- 1 ¼ cups all-purpose flour
- 1 tablespoon sugar
- ½ teaspoon salt
- ½ cup unsalted butter cubed and chilled
- 3-4 tablespoons ice water
Filling
- 1 can 15 ounces pumpkin puree (not pumpkin pie mix)
- ¾ cup sugar
- ½ teaspoon salt
- 1 teaspoon ground cinnamon
- ½ teaspoon ground ginger
- ¼ teaspoon ground cloves
- 2 large eggs
- 1 can 12 ounces evaporated milk
Instructions
Crust
- Mix dry ingredients: In a large bowl, combine the flour, sugar, and salt. Give it a quick mix to evenly distribute everything.
- Add butter: Toss in the cold, cubed butter. Using a pastry cutter or your hands, work the butter into the flour. You want to break up the butter until it’s in small, pea-sized pieces.
- Add water: Start with three tablespoons of ice water. Gently mix it into the flour mixture. Add more water, a tablespoon at a time, until the dough just comes together. The dough shouldn’t be too wet, but it should stick together when pressed.
- Chill the dough: Form the dough into a disc, wrap it in plastic wrap, and stick it in the fridge for at least 30 minutes. Chilling the dough helps it firm up, which makes it easier to roll out.
Filling
- Mix dry ingredients: In a bowl, combine the sugar, salt, cinnamon, ginger, and cloves. This ensures the spices are evenly distributed throughout the filling.
- Add pumpkin and eggs: Stir in the pumpkin puree, followed by the eggs. Make sure everything is well mixed.
- Add evaporated milk: Gradually stir in the evaporated milk. The mixture will be smooth and creamy. You’re now ready to fill the pie crust.
Baking
- Preheat oven to 425°F (220°C).
- Pour pumpkin pie filling into the prepared pie crust.
- Bake at 425°F for 15 minutes.
- Reduce the oven temperature to 350°F (175°C) and continue baking for 40-50 minutes, or until a knife inserted in the center comes out clean.
- Remove the pie from the oven and place it on a wire rack to cool.
- Allow the pie to cool completely before serving, about 2 hours.
- Store leftovers in the refrigerator for up to 4 days.
Storing Leftover Pie
If you have leftovers (and that’s a big if), they can be stored in the fridge for up to four days. Cover the pie with plastic wrap or aluminum foil to keep it fresh. You can also freeze pumpkin pie for up to a month. Just make sure it’s wrapped tightly to avoid freezer burn.
Crust Troubleshooting Tips
I remind myself that pie dough changes with temperature, humidity, and even my mood. Some days it feels easy. Other days, it pushes back. When the dough seems dry and crumbly, it usually needs a tiny splash of ice water. I add it a teaspoon at a time and fold gently. Over-mixing turns the dough tough, so light hands help keep the texture tender. A dough that feels too sticky often means there’s too much moisture. A little flour on the counter balances things out without weighing the dough down.
Cracking along the edges happens sometimes. A simple patch of extra dough smooths it out. Small problems rarely ruin a crust. They just need small fixes. If rolling feels uneven, turning the dough between passes helps keep it round. Slow, steady moves give you control and prevent stubborn sticking.
Here are a few tips I reach for:
- Add water in tiny amounts when dough feels dry.
- Dust lightly with flour if it feels sticky.
- Patch small cracks with scraps.
- Turn the dough often so it stays round.
- Mix gently to avoid toughness.
Shrinkage can be frustrating. It usually means the dough didn’t get enough time to rest. Chilling helps the gluten relax and keeps the crust from pulling in while it bakes. I like to chill it twice: once before rolling, and again after pressing it into the dish. That second chill makes a big difference. Cold butter holds its structure in the oven, giving the crust better shape and flakiness.
Another thing that helps is weight. A parchment sheet filled with pie weights or dried beans keeps the crust from sliding down the sides. The pressure holds the shape steady. After a short bake, I remove the weights and finish it as needed. A little patience goes a long way, and every crust gets easier with practice.

Pumpkin Pie Filling Troubleshooting Tips
Pumpkin pie filling can sometimes crack during baking. This usually happens when the pie is overbaked. To avoid this, keep a close eye on the pie as it bakes. The center should be just set, with a slight jiggle. The pie will continue to cook as it cools, so it’s better to pull it out of the oven a little early rather than letting it overbake.
Tips for Success
- Use cold butter: Cold butter makes for a flakier crust. Keep it in the fridge until you’re ready to use it.
- Chill your dough: Don’t skip chilling the dough. This helps with rolling and keeps the crust from shrinking.
- Don’t overmix the filling: Stir the filling just until everything is combined. Overmixing can cause the filling to crack as it bakes.
Make It Your Own
Once you’ve mastered the basics, feel free to experiment. Add more cinnamon if you like a spicier pie, or sprinkle a little nutmeg on top. You could even swap out the evaporated milk for coconut milk for a dairy-free version. The beauty of making your own pumpkin pie is that you can adjust it to suit your taste.
This recipe can accommodate a deep-dish pie, but you’ll need to make a few adjustments to ensure success:
For the Crust:
- Increase the crust ingredients: Add about 50% more of each ingredient (flour, butter, water, etc.) to ensure you have enough dough to cover the larger surface area and edges of a deep-dish pie dish.
- Roll the dough larger: Roll the crust out a little wider and thicker to fit the deeper dish.
For the Filling:
- Increase the filling ingredients: Double the filling ingredients if your deep-dish pie dish is significantly larger. Start by adding the filling gradually to avoid overfilling, as the exact capacity of the dish will vary.
- Adjust the baking time: A deep-dish pie will take longer to bake, especially the filling. After the initial 15 minutes at 425°F, reduce the temperature to 350°F and bake for 55-70 minutes. Check for doneness by inserting a knife into the center; it should come out clean.
Using these adjustments, your deep-dish pumpkin pie will be just as delicious with a perfectly thick layer of creamy, spiced filling!
Final Thoughts
Pumpkin pie just hits a little different when you’ve made it yourself. There’s something about pulling that warm, cozy beauty out of the oven that feels like you’ve unlocked a seasonal superpower. The scent alone? Cinnamon, sugar, and fall basically doing a happy dance in your kitchen. And yes, even in Orlando, I’ll take all the autumn vibes I can get, thanks.
I love how simple the whole thing really is. A flaky crust you rolled with your own hands. A filling that comes together with just a whisk and a few pantry staples. It’s low-stress, high-reward baking at its finest. And once you’ve sliced into a homemade pumpkin pie, the store version just seems… a little sleepy. Like it forgot to try.
Serving it is half the fun. Warm with whipped cream? Cute. Cold for breakfast? Honestly, elite behavior. I’ll never judge. I like that pumpkin pie shifts with the moment. Fancy Thanksgiving dessert? Done. Random Tuesday treat? Yes, please. It works every time.
My favorite part is how homemade pie brings people close. Everyone wanders into the kitchen, pretending they’re not waiting for dessert. You cut a slice, someone grabs a fork, and suddenly it’s a whole thing. Slow moments. Happy faces. Full hearts.
Pie also plays nicely with budget-friendly baking. Nothing wild or expensive. Just ingredients you probably already have and a little patience. I post plenty of recipes on Pinterest, but this one always feels extra cozy. Probably because it brings fall energy even when I’m wearing sandals.
So if you’ve been thinking about trying it, here’s your nudge. Make the crust. Mix the filling. Trust the wobble. Then grab a fork and enjoy the moment. Homemade pumpkin pie tastes like you cared — without making it complicated. And that’s my favorite kind of treat.