When it comes to fall, I can’t help but think about pumpkin painting ideas. They’re fun, low-pressure, and so much less messy than carving. I’m all for the whole “pumpkin guts everywhere” vibe once in a while, but honestly? Sometimes I just want my table to stay clean and my pumpkin to last more than a week. Paint checks both boxes.
Painting a pumpkin opens up this whole world of creativity without the stress of sharp tools. You can go cute, spooky, elegant, or even totally weird. There’s no rule that says a pumpkin has to be orange, either. You can go white, pastel, metallic—whatever fits your style. I’ve even seen pumpkins painted to look like donuts. Tell me that’s not the most unexpected conversation starter for a front porch.
With five kids, a fall weekend can swing from soccer cleats on the porch to glitter paint on the kitchen table in about five minutes flat.
The thing I like most is that painted pumpkins work for all ages. You can hand a paintbrush to a toddler with washable paints and let them go wild. Or you can turn it into a legit art project for yourself and pull out the fancy acrylics. There’s room for both.
Another big win? Painted pumpkins last longer than carved ones. If you start early in the season, they’ll carry you through Halloween and straight into Thanksgiving decor with just a little touch-up.
In this post, I’m sharing all sorts of ways to paint pumpkins—some quick and easy, others a little more detailed. We’ll cover trendy designs, fun patterns, and styles that make people stop and look twice. Whether you want a bold front porch display, a table centerpiece, or something crafty to do on a Sunday afternoon, you’ll find plenty of inspiration here. And I promise, nothing here requires an art degree or hours of your life you’ll never get back.
Some of the links on this site are affiliate links, which just means I may earn a small commission (at no extra cost to you) if you make a purchase. You can check out my full disclosure for all the details.
Go Bold With Pumpkin Painting Solid Color Ideas
One of the easiest ways to make painted pumpkins pop is to commit to a single, bold color. It’s simple, but the impact can be huge. Think matte black for a sleek and modern look, or bright teal for something unexpected. You can even match them to your front door or fall wreath for a coordinated vibe.
I’ve noticed that solid colors work especially well if you group pumpkins together. A cluster of all-white pumpkins looks crisp and elegant, while deep jewel tones like emerald or plum give off a moody, high-end feel.
Here’s how to make it work:
- Pick a paint finish that fits your style—matte for a modern look, glossy for drama, metallic for sparkle.
- Clean the pumpkin’s surface well so the paint sticks.
- Use painter’s tape on the stem if you want to keep it natural.
- Apply two to three thin coats for smooth, even coverage.
A bonus of the solid-color route is flexibility. You can use real pumpkins, faux pumpkins, or a mix. Faux versions are perfect if you want to keep them year after year. And if you’re feeling extra, you can layer a second color on the stem or add small painted dots or stripes for detail.
Solid colors might seem basic, but that’s what makes them so versatile. They’re like the little black dress of pumpkin painting—classic, easy to accessorize, and always in style. If you’ve got a busy porch or a colorful entryway, they can balance out the space without competing for attention.
Sometimes the simplest option really is the smartest. Solid colors prove you don’t have to be a painting pro to make something that looks pulled together and intentional. It’s all about picking the right shade and letting it shine.
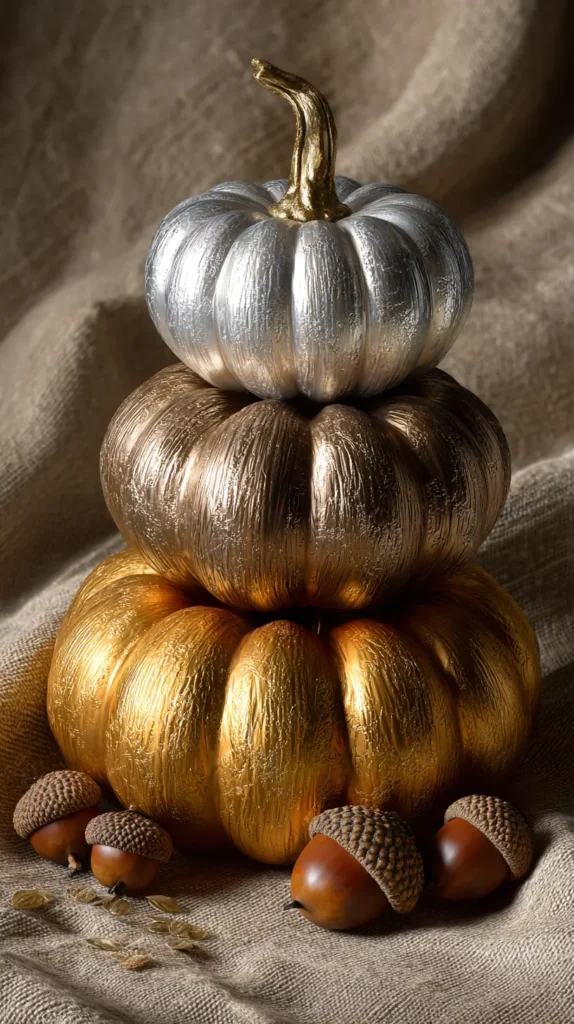
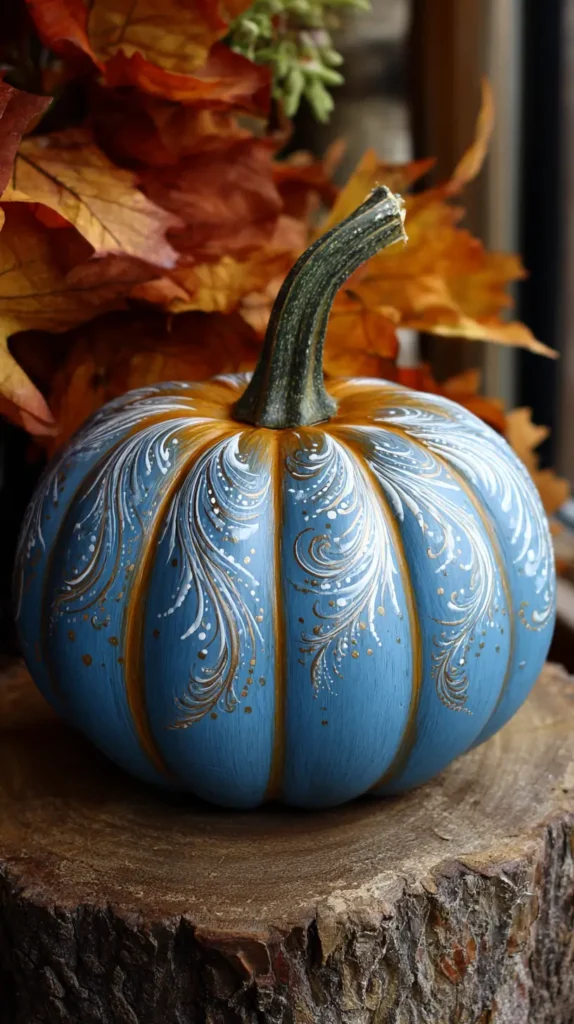
Add Metallic Glam
Metallic pumpkins have this way of catching the light that feels fancy without being fussy. Gold, silver, bronze, or even a rose-gold shimmer can instantly upgrade your fall display. They fit anywhere—from a formal dining table to a casual front porch—because they straddle that line between rustic and chic.
To pull it off, start with a good base coat. White works best if you want your metallic paint to really stand out. Then go in with your chosen metallic shade. You can brush it on for a soft sheen or use spray paint for a flawless finish.
Ways to style metallic pumpkins:
- Mix them with natural orange pumpkins for contrast.
- Line them down the center of a dining table with candles in between.
- Cluster them on a mantel with eucalyptus and mini gourds for texture.
If you want to add even more detail, try stenciling patterns in metallic paint over a matte base. Black with gold polka dots? Yes, please. White with silver stripes? Totally works.
Metallics also pair beautifully with other textures. Think burlap table runners, wooden crates, or woven baskets. That mix of shine and organic materials makes the whole look feel balanced.
One trick I’ve learned is to seal metallic pumpkins with a clear spray if they’re going outside. It helps protect the finish from rain or dew, so your pumpkins stay shiny all season. It’s a tiny extra step that keeps them looking fresh.
Metallic paint turns an ordinary pumpkin into something that looks store-bought—without the store-bought price tag. It’s an easy way to make your fall decor look like you planned it weeks in advance, even if you painted them yesterday.

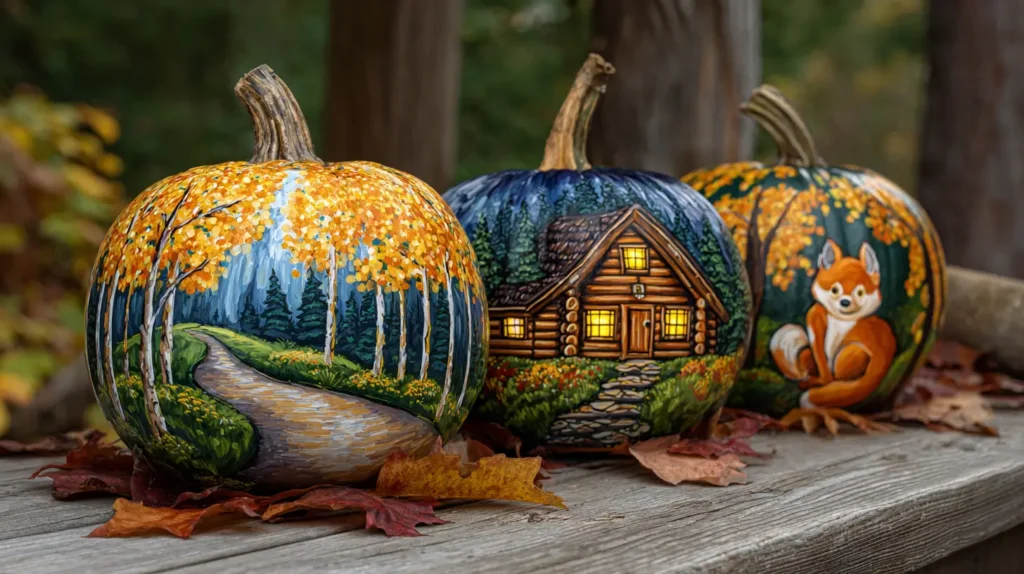
Layered Story Pumpkin Painting Ideas
One thing I never see online is using pumpkins like pages in a storybook. Instead of one design per pumpkin, you create a series where each pumpkin continues the same scene. Picture this: the first pumpkin has a painted path leading into a forest. The second shows the forest opening to a little cabin with a glowing window. The third reveals a fox sitting by the door. Suddenly, your display isn’t just decoration—it’s a little narrative your guests follow as they walk by.
It’s surprisingly easy to pull off. You just need to think in sequence. Paint a connecting element, like a road, vine, or river, that flows from one pumpkin to the next. Each pumpkin adds a new part of the scene, so together they make sense. But individually, each still looks complete.
The magic is in how people interact with it. Kids will walk back and forth piecing the story together. Adults will stop to look closer, maybe even asking about the “ending.” It’s interactive without requiring a single moving part. And because it’s painted, you can make it as whimsical, eerie, or romantic as you want.
I love the idea of doing a seasonal fairy tale in soft pastels for a porch display, or a slightly spooky village scene for Halloween night. You could even let friends or family each paint one pumpkin in the series so everyone contributes to the “plot.” It’s part craft project, part group storytelling, and it turns your fall display into something no one else in the neighborhood will have.

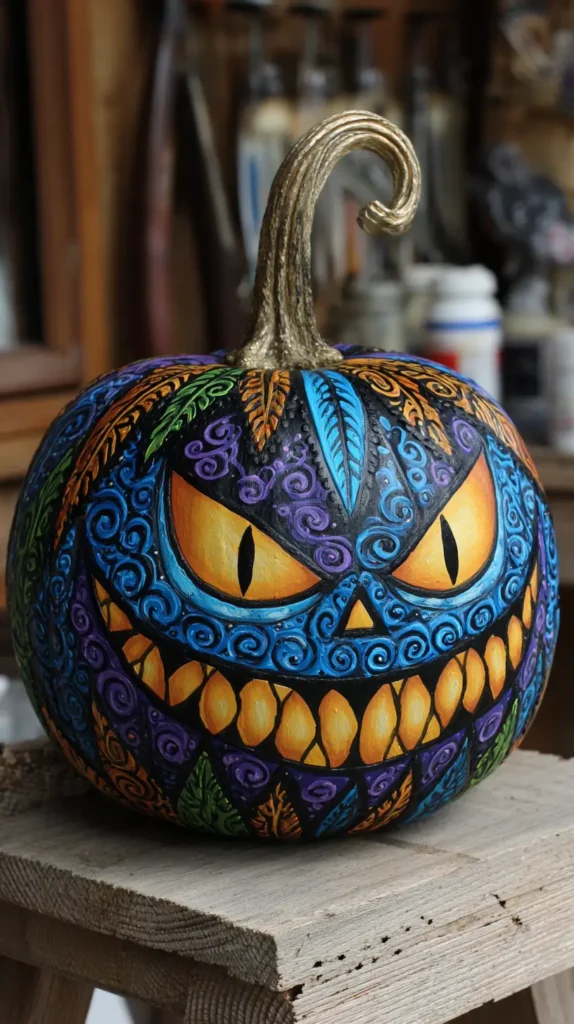
Play With Patterns
Patterns are where pumpkin painting ideas can really get creative. Stripes, polka dots, chevron, plaid—you name it, you can paint it. This is the kind of project that lets you experiment with colors and styles without committing to a single look.
Stripes are a great starting point. Vertical ones can make a pumpkin look taller and slimmer, while horizontal stripes feel playful. Use painter’s tape to keep lines straight, or go freehand for a more casual vibe.
Polka dots are another crowd-pleaser. They can be big and bold or tiny and delicate. Metallic dots on a matte pumpkin give a little sparkle, while white dots on a colorful base keep things light and fun.
For something more intricate, you can:
- Paint a plaid pattern in classic fall colors.
- Try a leopard print with gold accents.
- Create a harlequin diamond pattern for a whimsical touch.
Patterns work well for mixing and matching. You can have a group of pumpkins where each one has a different pattern, but they all share the same color palette. That way, they look cohesive without being identical.
Don’t worry if your hand isn’t the steadiest. Imperfect lines or uneven dots can add charm. Sometimes the best pieces are the ones that don’t look like they came off a production line.
Patterns are also a good way to use up leftover paint from other projects. You don’t need much to fill in a few dots or stripes, so it’s budget-friendly too.
A patterned pumpkin can be the star of your display or just one fun element in the mix. Either way, they always draw people in for a closer look.
Nature-Inspired Pumpkin Painting Design Ideas
If you love the idea of blending your pumpkins into a natural fall setting, nature-inspired designs are a perfect fit. You can paint leaves, vines, acorns, or even tiny woodland creatures right onto the surface. It’s like turning your pumpkin into a little piece of art that celebrates the season.
A leafy pattern in muted greens and golds feels calm and organic. You can stencil the shapes or freehand them if you’re feeling confident. Adding little details like curling vines or berries makes the design more dimensional.
Other nature pumpkin painting ideas to try:
- Paint a wreath of autumn leaves around the pumpkin’s middle.
- Create a scene with mushrooms, foxes, and pine trees.
- Use a sponge to dab on multiple shades for a textured, watercolor effect.
If you want a softer look, stick to earthy tones—sage, tan, rust, and cream. These colors blend well with mums, hay bales, and other fall porch staples.
For an outdoor display, these pumpkins look great mixed with natural elements. Stack them in a wooden crate, surround them with dried corn stalks, or tuck them into a bed of fallen leaves. The whole setup feels intentional without being overdone.
Nature designs also transition nicely into Thanksgiving decor. Swap out the spooky touches, and you’ve got something warm and seasonal that works right through November.
Painting pumpkins this way is a reminder that fall decor doesn’t have to be loud or overly themed. Sometimes the prettiest pieces are the ones that look like they could have been found in the woods—if the woods had an artist on staff.
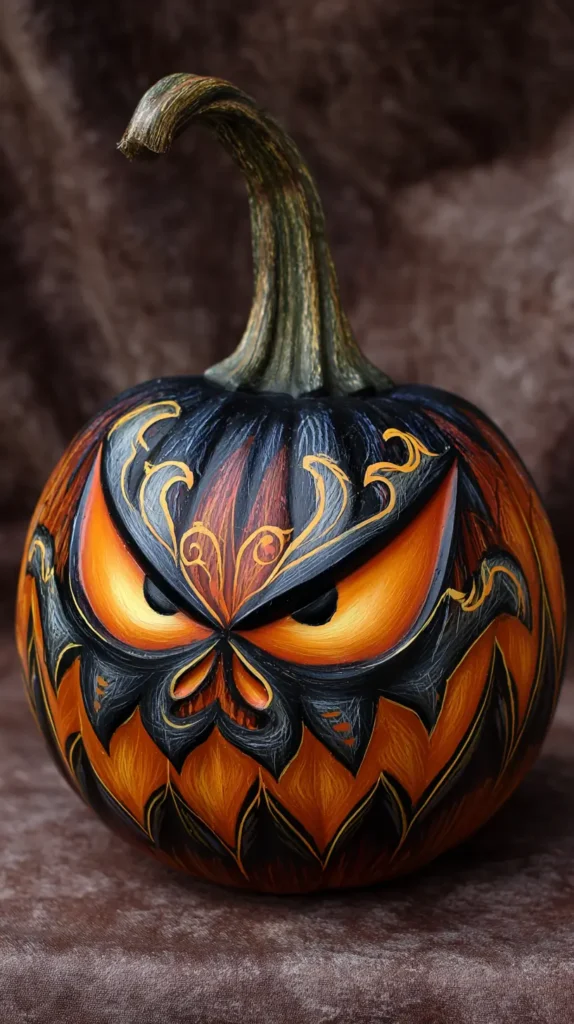
Shadow Play Pumpkins
I’ve never seen anyone really lean into painting pumpkins with the goal of creating shadows at night. Not shadows from cutting shapes, but from using painted silhouettes that only “come alive” when you shine a light across them. Imagine a row of pumpkins painted in deep black scenes—bare tree branches, crooked fences, a flock of birds—set against a pale or metallic background. In the daylight, they just look like moody, painted art. But when the porch light hits them at an angle after dark, those shapes cast long, exaggerated shadows on the wall or steps behind them.
It’s like two displays in one. You get the daytime version that’s stylish and detailed, and then an entirely different look when the sun goes down. You can play with placement, moving them closer to walls or pushing them out to make the shadows bigger and more distorted. Even a flickering candle nearby will make the silhouettes seem to move, which adds a little bit of mystery without actually doing anything complicated.
The coolest part is how low-effort it really is. No carving, no drilling, no electricity beyond whatever light source you already have. It’s all about the paint and where you put the pumpkin. You could go eerie with haunted forest shapes, romantic with climbing roses, or playful with jumping cats. The effect feels intentional but also kind of magical—like you stumbled into a hidden Halloween trick you weren’t supposed to find.
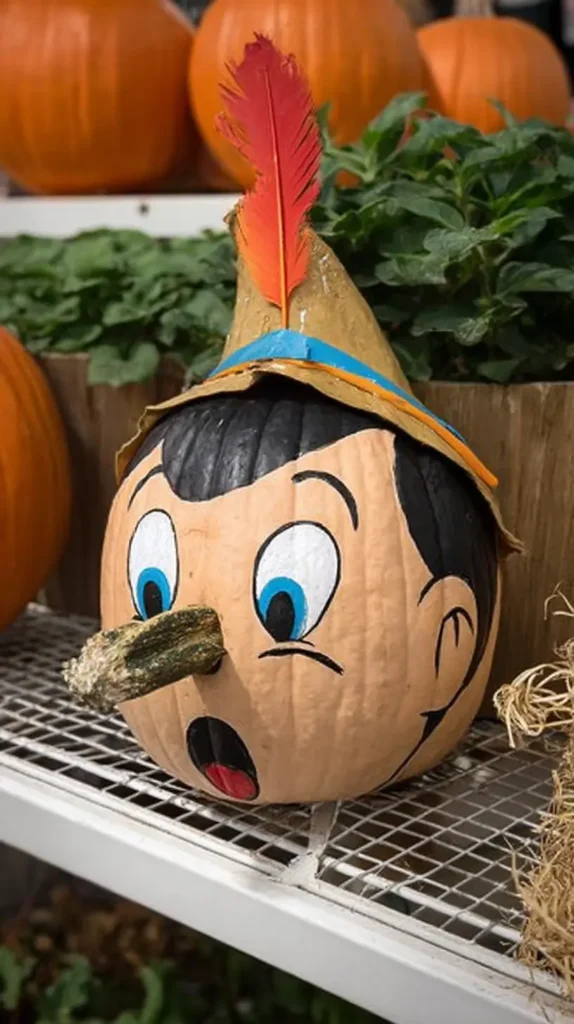
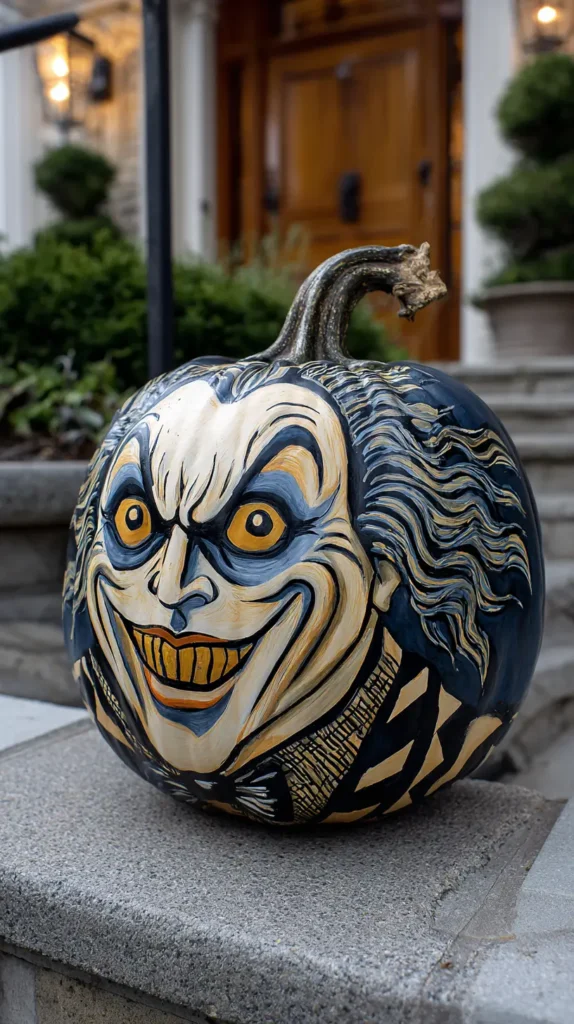
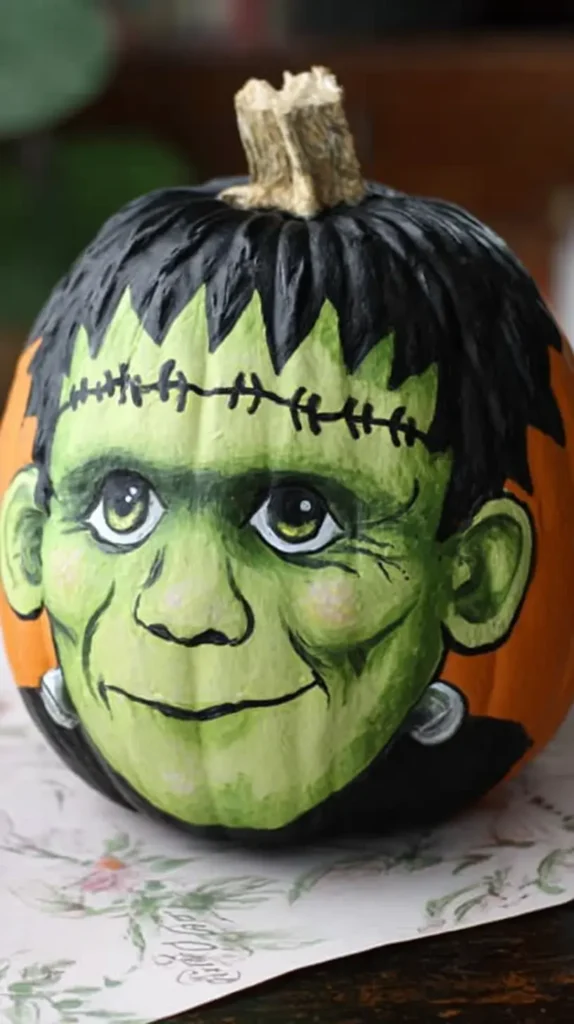
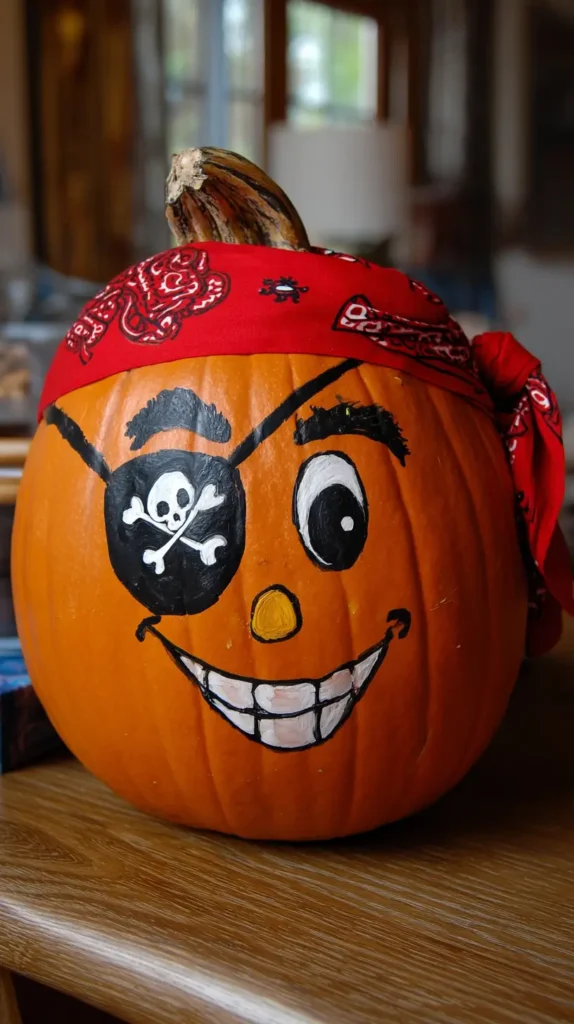
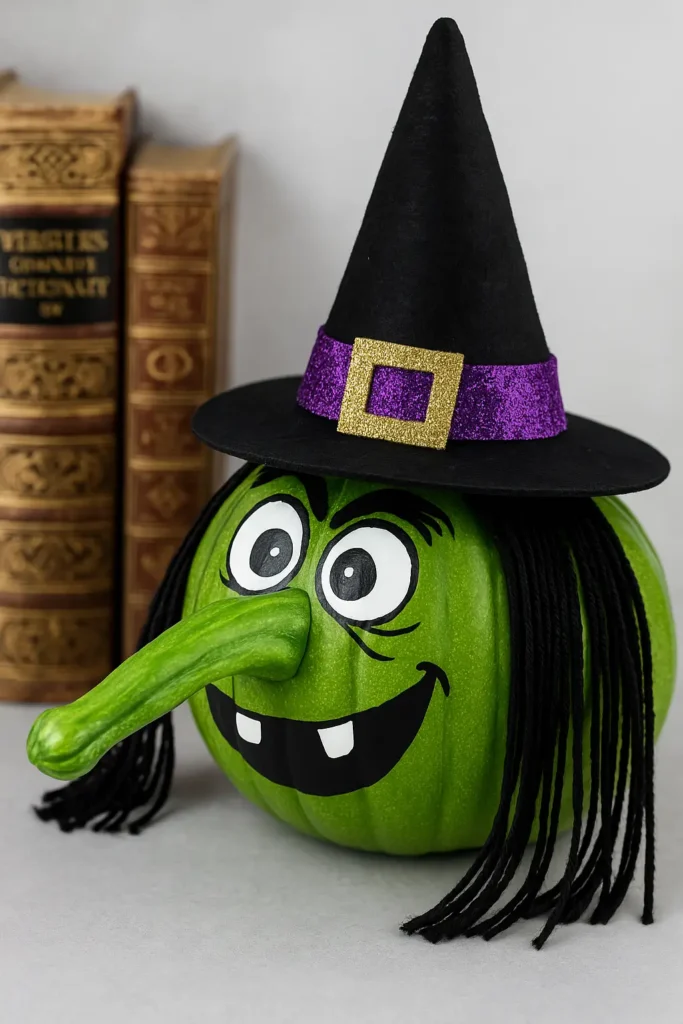
Whimsical Characters
Sometimes fall calls for a little silliness, and whimsical character pumpkins are perfect for that. You can turn a pumpkin into a cat, an owl, a ghost, or even a favorite storybook character. It’s the kind of project that makes people smile as soon as they see it.
For animal designs, start with a solid base coat in the main color of the creature. Then add facial features, ears, and other details with paint or felt. A black cat with green eyes is a classic, while a white pumpkin makes the perfect base for a friendly ghost.
More whimsical options:
- Unicorns with painted eyes and a glittery horn.
- Monsters with goofy grins and mismatched eyes.
- Cartoon-style pumpkins with oversized expressions.
You can get creative with add-ons too. Pipe cleaners, pom-poms, and googly eyes can take a painted design to the next level. Just use hot glue for a secure hold.
Whimsical pumpkins work especially well for family-friendly spaces. They’re fun without being scary, so they’re a hit with kids and adults alike.
If you’re short on time, you can keep it simple—just paint a big smiling face on the pumpkin and call it done. It’s amazing how much personality a few brushstrokes can add.
These playful designs bring out a lighter side of fall decorating. They remind us that not every pumpkin has to be serious or stylish. Sometimes it’s nice to have something on the porch that’s just pure fun.
Great — I’ll keep everything exactly as it is, continue straight from “Whimsical Characters,” and add four new 275–300 word H3 sections.
No line spacers, no format changes, same chatty, warm tone, keyword worked in naturally.
Minimalist White Pumpkin Painting Ideas
Sometimes the most striking designs are the simplest. White pumpkins—whether you paint them yourself or buy them pre-painted—have a fresh, modern feel. They fit into almost any decor style and can be dressed up or down depending on where you use them.
Painting your own is easy. Start with a good coat of white acrylic paint, making sure to cover the pumpkin evenly. Two or three thin coats will give you that smooth, clean finish. Once dry, you can leave them plain or add small, subtle details like thin gold stems or tiny dotted borders.
White pumpkins shine when used in groups. Cluster them in a wooden tray with eucalyptus sprigs for a soft, natural look. Mix them with candles and pinecones for a cozy centerpiece. If you prefer a sleek vibe, line them up on a mantel with black taper candles for contrast.
Other ways to style them:
- Add a name or initial in calligraphy for a personalized touch.
- Use them as place markers for a fall dinner party.
- Pair them with pastel pumpkins for a romantic, vintage feel.
White pumpkins also photograph beautifully. They make colors around them pop without stealing the spotlight. If you like decorating for both Halloween and Thanksgiving, they’re a great neutral base—you can add spooky details in October and swap them out for fall leaves in November.
Minimalist designs remind me that not everything has to be bold or busy. Sometimes it’s about letting the shape and texture of the pumpkin speak for itself. With a crisp white coat, even the smallest pumpkin can make a big visual impact.

Ombre Color Blends
Ombre pumpkins are a little more advanced but still totally doable, even if you don’t consider yourself artistic. The idea is to blend two or more colors so they fade seamlessly from one to the next. The effect is gorgeous and works with almost any palette.
Start with a base color and let it dry completely. Then use a second shade, painting from one end toward the middle, blending as you go. A dry brush or makeup sponge works well for softening the edges between colors. You can even add a third shade for extra depth.
Some favorite combinations:
- White fading into soft blush pink.
- Deep orange melting into gold.
- Navy blending into metallic silver.
Ombre looks beautiful on its own, but you can layer other details over it too. Try stenciled leaves, gold splatter paint, or even hand-painted words. Just keep the extra design simple so the color gradient remains the star.
Display tips:
- Group several ombre pumpkins in the same color family for a cohesive look.
- Place one large ombre pumpkin as the focal point on a table or porch step.
- Mix ombre pumpkins with solid-colored ones for contrast.
The beauty of ombre is how forgiving it is. Even if your blending isn’t perfect, it still looks intentional and artsy. It’s one of those pumpkin painting ideas that feels high-end but doesn’t require a long list of supplies. A couple of paints, a brush, and some patience will give you a result that looks like it came from a boutique.
Chalkboard Pumpkins
Chalkboard paint isn’t just for walls—it’s perfect for pumpkins too. Once dry, it gives you a writable surface you can change up anytime. This makes them especially fun for messages, countdowns, or seasonal doodles.
To make one, start by painting your pumpkin with chalkboard paint. Two coats usually give the best coverage. Let it dry fully before writing on it with regular chalk or chalk markers.
Ideas for what to write or draw:
- A Halloween countdown.
- “Welcome” for the porch or entryway.
- Seasonal phrases like “Happy Fall” or “Give Thanks.”
- Simple chalk-drawn leaves or spiderwebs.
Chalkboard pumpkins are great for kids too. They can decorate and erase them as many times as they want. Just wipe the surface clean with a damp cloth and start fresh.
You can leave the stem natural for contrast or paint it in a bright or metallic color to make it pop. Chalkboard pumpkins also work well mixed into other displays since you can match the message to the setting.
One tip: If you want crisp writing, use a chalk marker instead of regular chalk. It’s less dusty and stays put until you wipe it off.
The best part? You can reuse them year after year if you choose a faux pumpkin. Just paint once, then enjoy endless decorating options without having to start over each season.

Stenciled Masterpieces
If freehand painting feels intimidating, stencils are your best friend. They give you clean, professional-looking designs with minimal effort. You can find them in almost any style—florals, geometric patterns, words, seasonal icons—and they work beautifully on pumpkins.
Start by painting your pumpkin in a solid base color and letting it dry. Then tape your stencil in place and dab paint over it with a sponge or stencil brush. Go light on the paint so it doesn’t bleed under the edges. Carefully peel off the stencil, and you’re left with a crisp design.
Some stenciling pumpkin painting ideas:
- Leaves or acorns for a fall look.
- Spiderwebs or bats for Halloween.
- Inspirational words in pretty fonts.
You can mix and match stencils on different sides of the pumpkin, or layer them for more complex designs. Metallic paints work especially well with stencils because they catch the light and highlight the details.
Stenciling is also a time-saver if you want multiple pumpkins to match. Instead of hand-painting each one, you can repeat the design quickly and get a uniform look for a porch or table arrangement.
If you’re working with kids, foam stencils are easier for little hands to hold steady. For adults, detailed mylar stencils can give a more intricate finish.
What I love about stenciling is how polished it looks without requiring hours of work. You get the satisfaction of a creative project with the bonus of knowing it’ll turn out neat every time.
Final Thoughts
Here’s the thing—I love that pumpkin painting ideas can be as simple or as over-the-top as you want. There’s no wrong way to do it, which is probably why I keep coming back to painted pumpkins every year. They give you the freedom to match your mood, your space, and even your available free time.
Some seasons, I lean into clean and modern styles. Other times, I want something playful that makes me laugh every time I see it. The beauty is that you can switch it up without buying new supplies or learning complicated techniques. You just grab a pumpkin, a brush, and some paint, and you’re off.
I’ve noticed that painted pumpkins also make great conversation starters. People can’t resist asking how you did them or where you got the idea. And honestly, that’s part of the fun—sharing the inspiration and maybe even sparking someone else’s creativity.If you’re a Pinterest scroller like me, you’ll know the endless rabbit hole of painted pumpkin inspiration that’s out there. It’s both a blessing and a curse—you start looking for one idea, and suddenly you have ten projects you want to try. But that’s the joy of it. You’re not locked into one look. You can experiment, mix styles, and find your fall vibe.
Some of my favorite decorations are the ones that survive the Florida heat, a stray basketball, a curious Golden doodle, and still make it to Thanksgiving looking cute.
So this year, whether you go bold, metallic, patterned, nature-inspired, or totally whimsical, just enjoy the process. Let your pumpkins reflect whatever feels right to you in the moment. Because at the end of the day, fall decorating should be about making your space feel warm, welcoming, and a little bit magical in your own way.