Easter is such a fun time to gather with family and enjoy the fresh start of spring. Whether you’re hosting a big brunch or just planning a simple day at home, an Easter charcuterie board can make everything feel extra special. It is a treat for both your eyes and taste buds, and super easy to whip up!
Charcuterie boards are great because they’re so versatile. You can include:
- Fresh fruits like strawberries, grapes, and pineapple slices
- Crunchy veggies such as baby carrots, snap peas, and cucumber ribbons
- A mix of cheeses, from soft Brie to sharp Cheddar
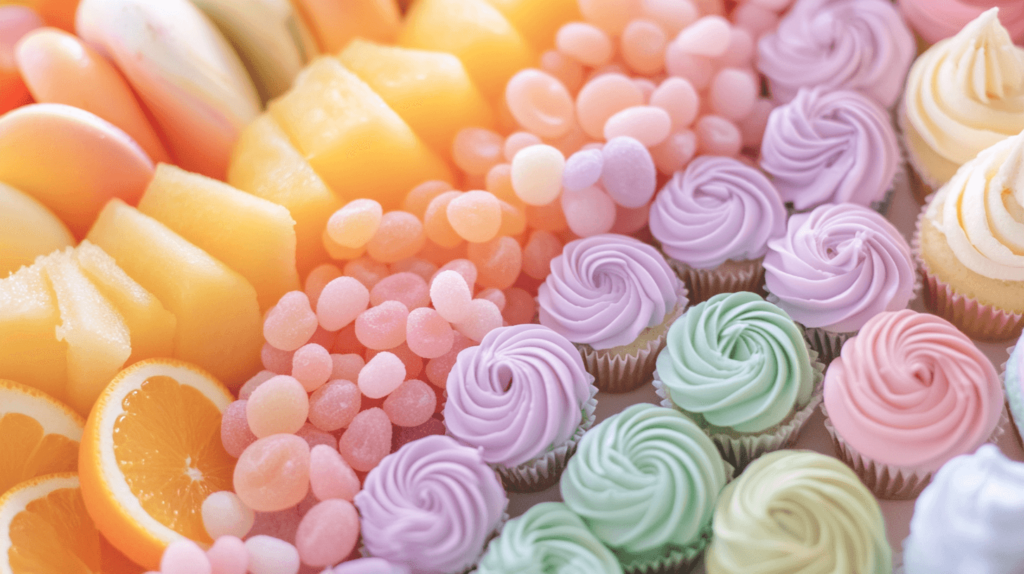
- Sweet treats like chocolate eggs, jelly beans, or even mini cupcakes
- Savory options like salami, prosciutto, and deviled eggs
The best part? You don’t need to be an expert to make it look amazing. All it takes is a little creativity and a few simple tips. Add some fun to Easter with bunny-shaped cheese slices, pastel candies, or edible flowers to really make it stand out!
This post will guide you through creating a stunning Easter charcuterie board step by step. We’ll talk about arranging your items, adding fun seasonal details, and making sure there’s something for everyone to enjoy. It’s a simple way to bring a little extra joy to your celebration.
By the end, you’ll have a centerpiece that’s not just beautiful but also delicious. Let’s get started and make your Easter spread unforgettable.
This site includes affiliate links; you can check the disclosure for more details.
Getting Started With an Easter Charcuterie Board
I’ve found that the easiest boards start with one simple decision. Bigger is better than prettier here. A big board gives an Easter charcuterie board room to breathe. That matters more than using something fancy. If it feels cramped, the whole thing looks picked over too fast.
Once I have the base, I think about contrast first. Soft cheese, firm cheese, salty meat, juicy fruit, and something crunchy make the board make sense. Brie or Camembert brings the creamy part, while Cheddar or Gouda adds more bite. Then I add mozzarella or Swiss for a milder option. Not everybody wants a bold cheese first thing.
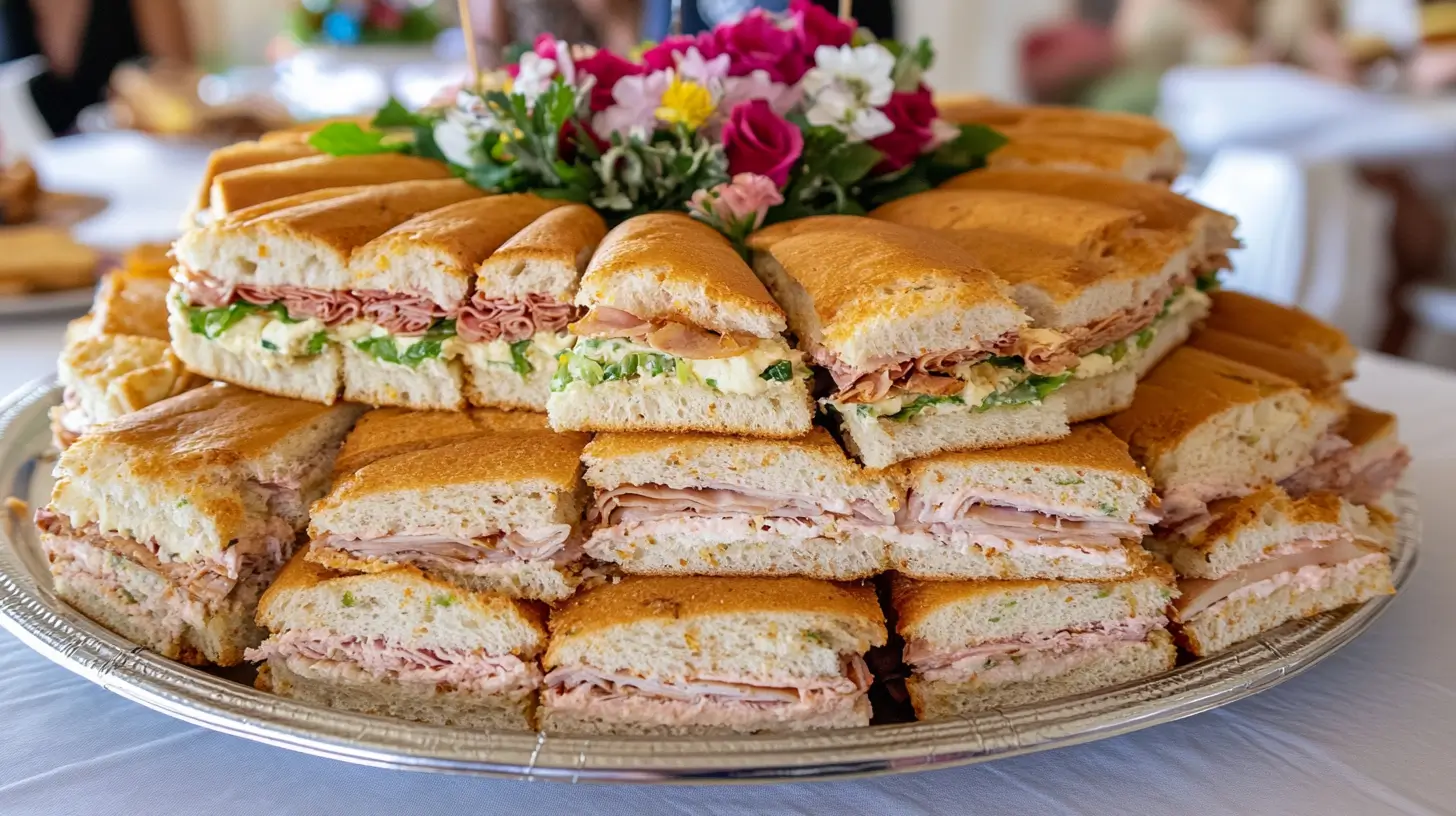
After that, I start filling the board so it actually looks generous. Folded salami, prosciutto, ham, turkey, or smoked salmon all work well. Strawberries, grapes, and blueberries wake up the color right away. Meanwhile, almonds, walnuts, or cashews tuck into little spaces. Dried apricots or dates help too, especially when the board needs more chewiness.
One thing I tend to notice is that people overthink Easter boards fast. They assume every section needs a trick or tiny decorative detail. It really doesn’t. A good Easter charcuterie board looks fresh, full, and easy to eat. That simple shift also helps keep the whole thing more budget friendly.
When I start placing food, I go from big items to small ones. Cheese goes down first, then meat, then fruit. That order keeps me from chasing empty gaps later. It also keeps the board looking balanced instead of randomly packed.
Next comes the part people always reach for. Crackers, pita chips, and baguette slices turn pretty ingredients into real bites. I also like one festive sweet, maybe chocolate eggs, jelly beans, or mini pastries. Too much candy can throw the whole board off. Once the base is right, the Easter extras land better.
Presenting Your Easter Charcuterie Board
This is the part where the board stops looking like groceries and starts looking pulled together. I always place the biggest items first because they set the rhythm. On an Easter charcuterie board, that usually means cheese, meat, and any small bowls. Once those pieces land, everything else has somewhere to go.
I spread the cheeses and meats across the board instead of crowding one side. That keeps the whole thing balanced and much easier to grab. Brie near crackers, salami near fruit, and deviled eggs near vegetables usually works well. It looks thoughtful without trying too hard.
Then I fill the open spaces with the foods that bring color and texture:
- strawberries, grapes, blueberries, or cantaloupe for fresh color
- almonds, walnuts, or cashews for crunch in the smaller gaps
- jelly beans or chocolate eggs for a light Easter touch
- olives, pickles, honey, or dip in ramekins to keep the board tidy
If one corner looks heavy, I move color across the board instead of adding more food. Blueberries next to pale cheese fix that fast. So does one bright fruit near a plain cracker section. Most people need less garnish and more contrast.
I also think about how people actually eat. Crackers should sit near soft cheese. Fruit should land near salty bites. Dips need a spoon nearby or things get messy fast. Pretty matters, sure, but easy to grab matters more. Nobody wants to work that hard for one bite.
I do not chase perfect symmetry anymore. It usually makes the board look stiff. A slightly uneven Easter charcuterie board looks more relaxed and more generous. Then I add herbs only where the board needs green. Parsley, dill, or rosemary can help, but I keep them light.
If edible flowers are part of the look, I use just a few. Too many can make the whole thing look busy. Once the colors look balanced and the sections look full, I stop. That is usually when an Easter charcuterie board looks polished without looking fussy.

Creating an Easter Brunch Charcuterie Board
I’ve found that brunch boards need a different kind of balance. They cannot lean too savory or too sweet. An Easter charcuterie board for brunch should look festive, but it also needs real breakfast energy. Otherwise, it starts reading like leftovers and candy on a platter, and nobody wants that at 10 a.m.
I like to build this kind of board around foods people already reach for at brunch. Brie, Camembert, Cheddar, Gouda, and goat cheese all work well here. Then I add ham, turkey, bacon, prosciutto, or smoked salmon, depending on the mood. That mix keeps the board from getting too heavy. It also makes the whole thing look more generous, which matters more than people admit.
Then I start layering in the brunch part, because that is where this gets fun:
- mini croissants, bagel halves, or baguette slices
- strawberries, grapes, orange slices, and blueberries
- cucumber ribbons, cherry tomatoes, and baby carrots
- mini pancakes or waffles with syrup or honey
- whipped cream cheese, jam, honey butter, or maple syrup in small bowls
- a few chocolate eggs or pastel candies for that Easter look
One thing I tend to notice is that people assume a brunch board needs fancy pastries everywhere. I do not think that helps. A few pastries go a long way. Danish pieces or scones can work, sure, but too many sweet breads make the whole board look chaotic fast.
I place the cheese and breads first, then add meats, fruit, and vegetables around them. After that, I tuck bowls into the open spaces. That part matters because spreads can get messy fast. I also keep syrup close to waffles and jam near the croissants. It sounds obvious, but it saves the board.
When it all comes together, an Easter charcuterie board for brunch should look full, easy, and just a little extra. Not stiff. Not fussy. Just pretty enough to make people stop mid-sentence and go back for another bite.

Springtime Easter Celebration Charcuterie Board
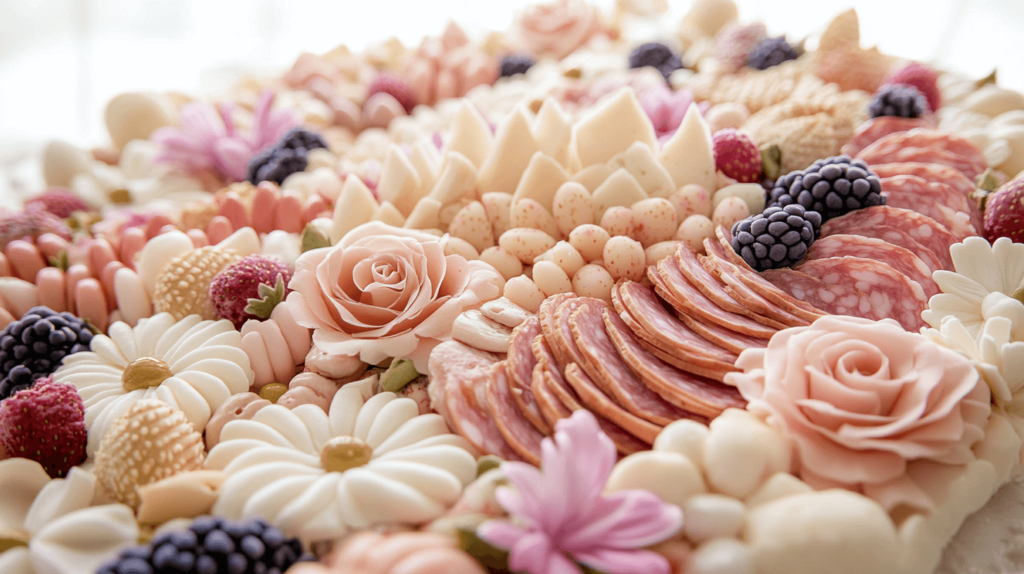
This is the board style that really leans into Easter. It is colorful, cheerful, and just a little extra. I’ve found that a spring board works best when the colors do some of the heavy lifting. Soft cheese, bright fruit, pastel sweets, and a few classic Easter bites make the whole thing look finished fast.
I usually start with Brie in the middle because it gives the board an easy focal point. If I want a softer spring look, I add a few edible flowers on top. Then I bring in herb-coated goat cheese and bunny-shaped Cheddar for more color and texture. That mix keeps the Easter charcuterie board from looking flat or too beige, which happens more than people think.
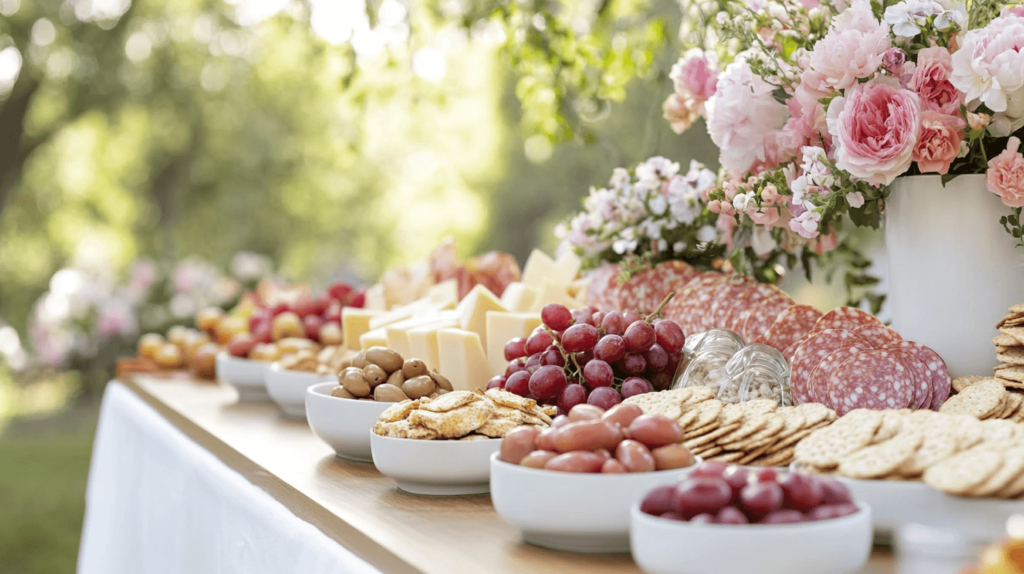
For the savory side, I like foods that look pretty without much effort:
- rolled prosciutto
- folded salami or pepperoni
- deviled eggs
- olives and pickles in small bowls
- honey or mustard for dipping
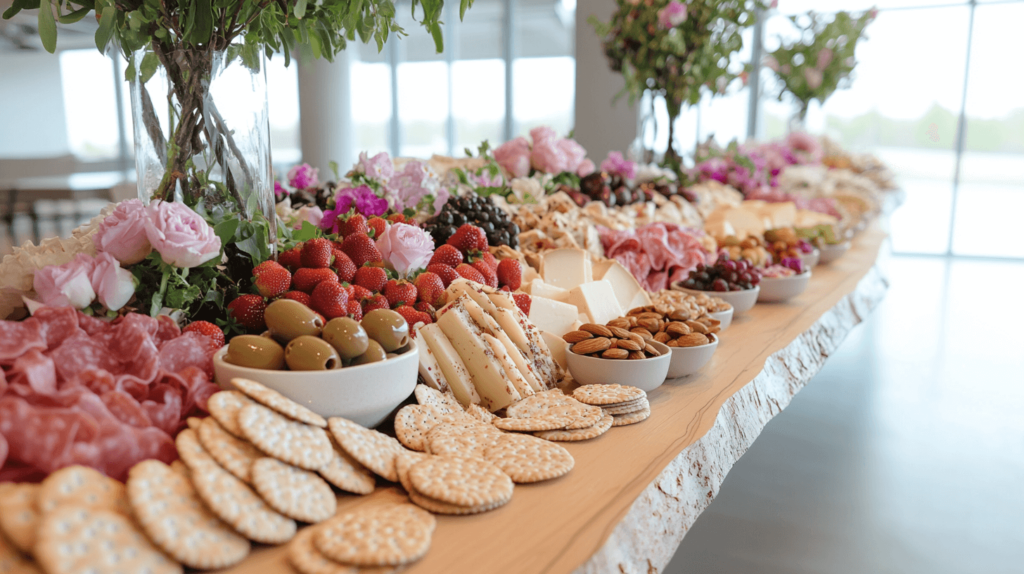
After that, I fill the board with the bright foods that make it read like spring. Strawberries, blueberries, raspberries, grapes, carrot sticks, and cucumber ribbons all help. Mini hot cross buns and seeded crackers make the board more useful, too. Pretty is nice, but people still want something they can actually build a bite with.
Then I add the Easter extras, but lightly. A few chocolate eggs, mini cupcakes, or jelly beans go a long way. Too many sweets can make the board look more like a candy tray than an Easter charcuterie board. That is usually where things go sideways.
When I arrange everything, I keep moving around the board instead of finishing one section at a time. That helps the colors spread out better. I also like to step back halfway through and check for balance. If one side looks too heavy, fruit usually fixes it. Once it looks fresh, full, and easy to eat, I stop.ith herbs and edible flowers for a polished finish.
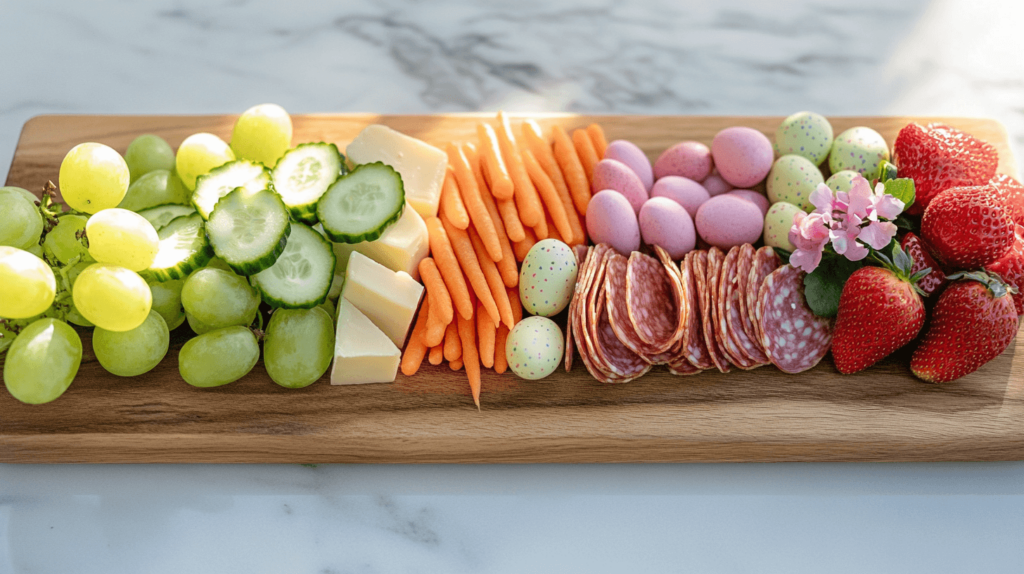
Easter Egg Charcuterie Board Design
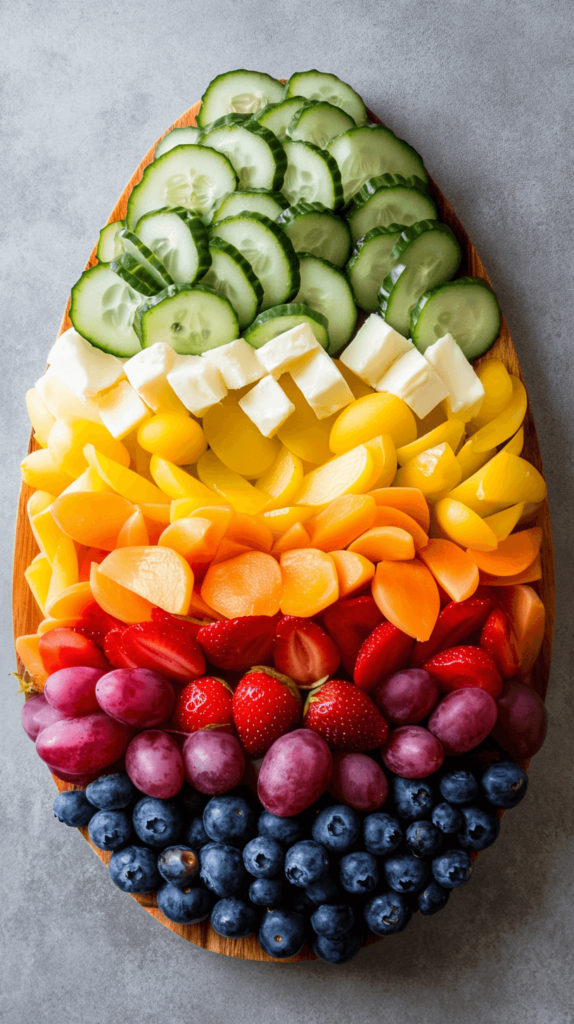
I love this idea because it looks festive without being hard to pull off. A rectangular board gives the shape more room. That matters here. If the outline looks clear from the start, the whole Easter charcuterie board comes together much faster.
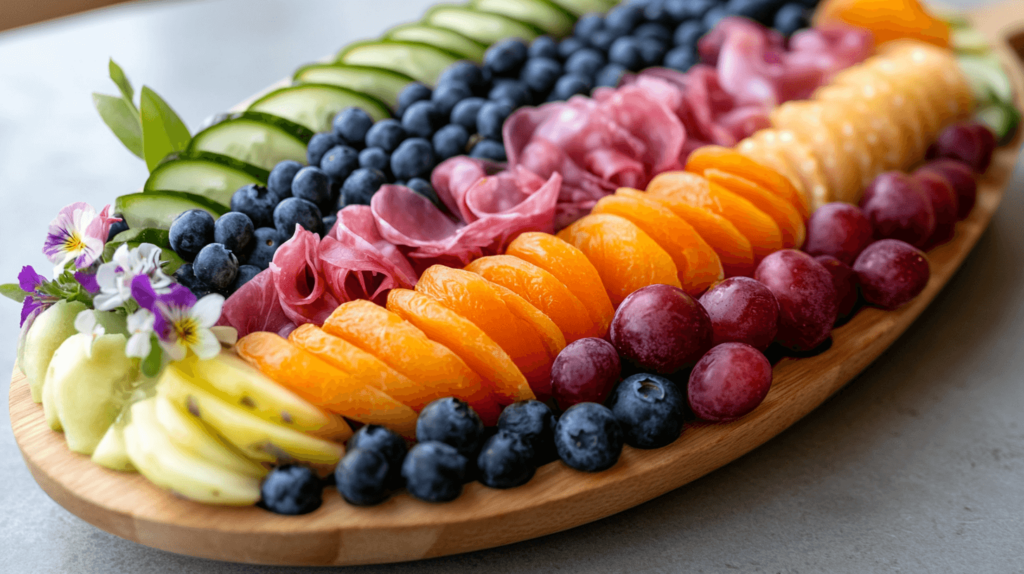
I begin by picturing one large egg shape in the center. Then I build the design in horizontal stripes so the pattern stays obvious. Cucumber ribbons make a soft green band at the top. After that, blueberries, sliced strawberries, Brie pieces, dried apricots, and folded meats create the rest of the color.
These foods work especially well for the design:
- cucumber ribbons for a fresh green stripe
- blueberries for a deep blue layer
- sliced strawberries for bright color
- Brie pieces for a pale creamy section
- dried apricots for warm orange contrast
- prosciutto, salami, or pepperoni for the savory stripe
- Cheddar cubes, goat cheese, and grapes for filling open spaces
One thing I’ve found is that the gaps matter more than people expect. If the shape starts looking spotty, I tuck in grapes, Cheddar cubes, or goat cheese rounds. Carrot sticks can help sharpen the egg outline too, especially around the curves. Then I add only a few chocolate eggs or jelly beans, because too much candy pulls the design off track fast.
I keep crackers, hot cross buns, and any small bowls outside the egg itself. That helps the Easter egg shape stay easy to see from across the table. A little dill or parsley can help if the board needs green. Still, I use garnish lightly, because the food should do the heavy lifting here.
When everything is in place, I step back and check the balance. If one side looks too heavy, fruit usually fixes it. If the colors look flat, I add one brighter ingredient nearby. The goal is a board that looks playful, polished, and easy to eat, not overly styled for no reason.
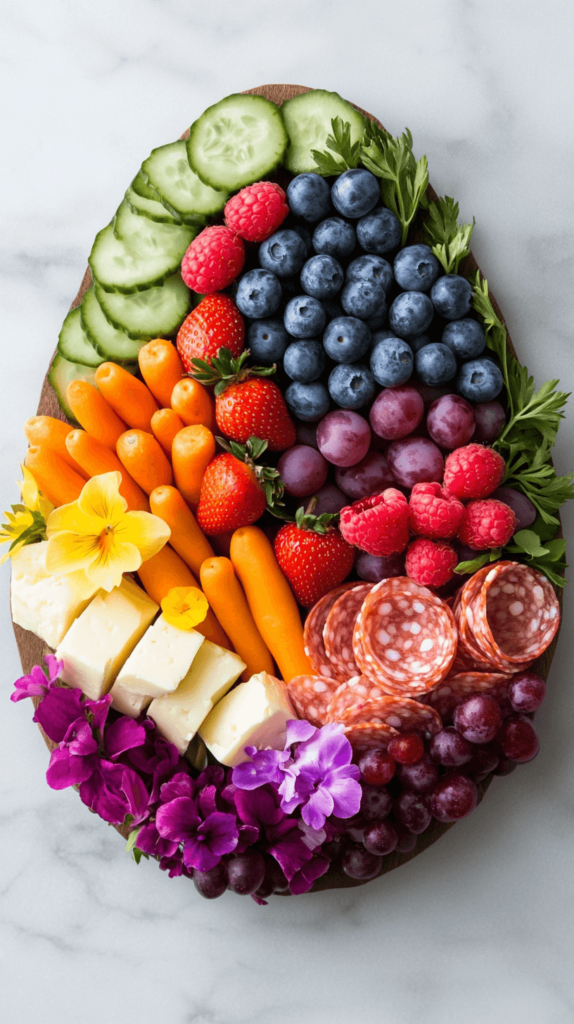
How to Make an Easter Egg Shaped Charcuterie Board
This board works because the shape does the decorating for you. That is the whole appeal. An Easter charcuterie board like this already looks festive before you even add candy, herbs, or anything extra. So I do not try to get too cute with it.
I start with a rectangular board and picture one big egg in the middle. Not a tiny egg. A generous one. If the shape is too small, the whole board starts looking skimpy, and that ruins the effect fast.
Then I build the egg in stripes, because stripes read clearly from across the table:
- cucumber ribbons for a green band
- blueberries for a bold blue layer
- sliced strawberries for bright color
- Brie pieces for a pale creamy stripe
- dried apricots for warm orange contrast
- folded prosciutto and salami for the savory section
After that, I look for the awkward spots. Every board has them. Those little empty patches can make the egg look messy if they stay empty too long. I usually fill them with Cheddar cubes, goat cheese rounds, or clusters of grapes. That fixes the shape and adds more texture at the same time.
Here is the part people tend to overdo. The extras. A few foil-wrapped chocolate eggs or jelly beans are plenty. A little dill or parsley can help too. But if the candy and garnish start taking over, the egg design gets lost, and then the whole point disappears.
I also think this style looks better when the foods stay inside the shape instead of spilling everywhere. That makes the egg stand out more. It also keeps the Easter charcuterie board looking intentional, not chaotic.
Once the colors look balanced and the shape reads clearly, I stop. That is usually when it looks the best anyway.
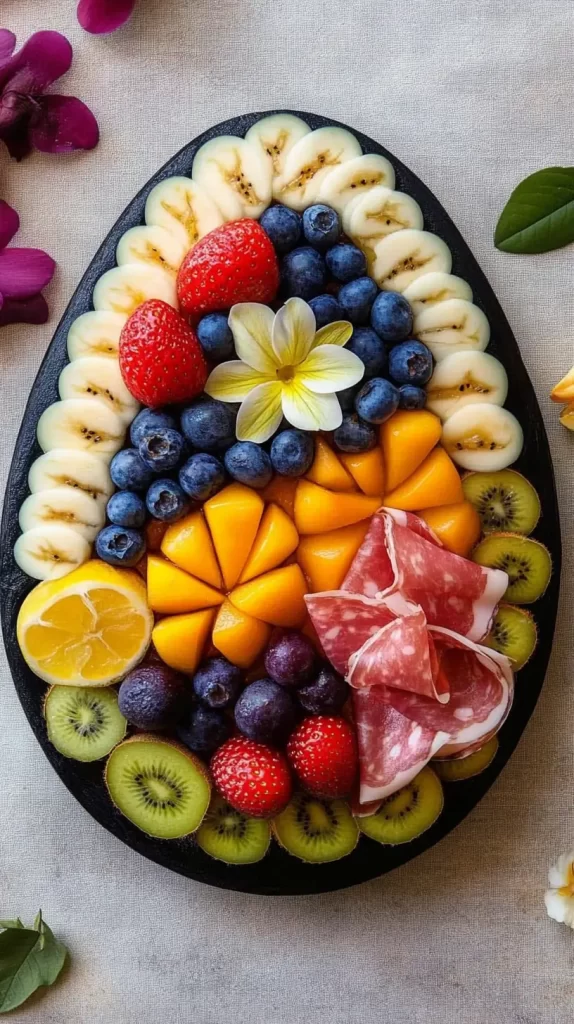
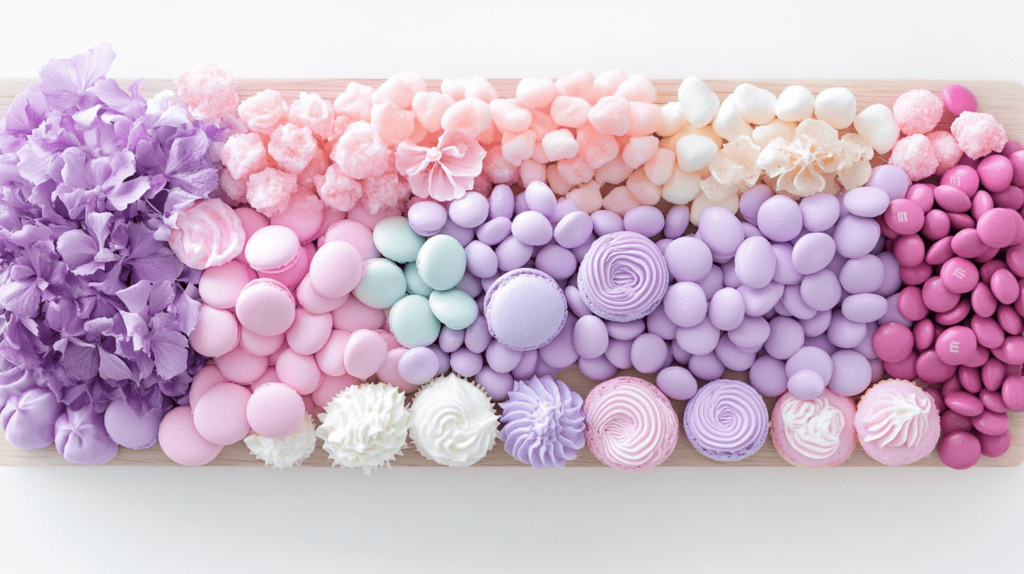
Creating an Easter Dessert Charcuterie Board
I love this version because it leans all the way into the fun part of Easter. An Easter dessert charcuterie board gives you color, texture, and a table moment without much stress. It also works for brunch, parties, or that weird middle space when people want sweets before dinner.
- Start with the obvious treats first. I’d use pastel chocolate eggs, mini cupcakes, macarons, jelly beans, and decorated sugar cookies. Those pieces set the tone fast, and they make the board look festive right away.
- Then I’d add fresh fruit so the whole thing does not turn heavy. Strawberries, raspberries, blueberries, melon, and pineapple work really well here. That fresh bite breaks up all the sugar and keeps the board from looking flat.
- Next comes the dip section, because people love a little extra. Small bowls of whipped cream, chocolate sauce, or caramel make everything more interesting. They also help the board look fuller without adding ten more desserts.
- After that, I’d work in the chewy and crunchy pieces. Mini marshmallows, white chocolate dipped pretzels, dried apricots, banana chips, and dried pineapple all fit nicely. This is the part that makes an Easter charcuterie board more fun to eat, not just pretty to look at.
- When I arrange it, I place the biggest items first. Cupcakes and bowls go down before the smaller candy and fruit. That order makes the board easier to balance, and it saves me from chasing awkward little gaps later.
- Last, I add the small Easter touches without overdoing them. A few extra jelly beans, pastel candies, or a couple of edible flowers are enough. Too much decoration can make the whole thing look busy, and that is not the goal.
I’ve found that this board looks best when it feels full, bright, and easy to grab from. Not stiff. Not fussy. Just sweet enough to get people circling back for one more bite.
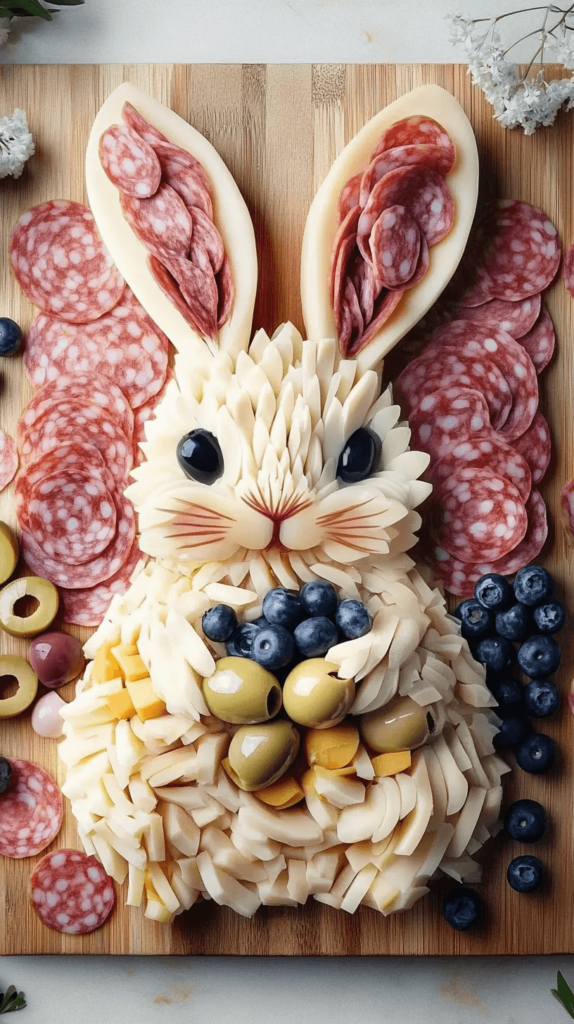
Easter Bunny Charcuterie Board Design
I think this is one of the cutest ways to style an Easter charcuterie board. A bunny design brings instant personality without needing fancy ingredients. It looks playful, but it can still stay practical. That matters, because people need to eat from it without wrecking the whole thing.
I start with a standard board, either rectangular or round, and picture the bunny first. The body should be the biggest shape. Then I leave room for a smaller head and two long ears. Brie, Camembert, or spreadable cheese work well for the body because they create soft, clear shapes fast.
After that, I build out the details with foods that hold their place. Cheddar slices make great ears, especially when they overlap a little. Olives or grapes work for the eyes, and a cherry tomato makes an easy nose. Thin cucumber strips can become whiskers, while salami or ham helps define the edges.
Then I fill the rest of the board so it still looks generous. Prosciutto, salami, crackers, breadsticks, grapes, berries, baby carrots, nuts, and dried fruit all fit nicely. Small bowls of olives, pickles, honey, or fruit preserves keep the wetter items contained. I also like placing the dippable foods near the bowls, because it makes the board easier to use.
One thing I tend to notice is that people overdecorate this kind of board. They add too many little extras, and the bunny gets lost. I’d rather keep the outline clear and let the food do the work. A little parsley or dill around the edges can hint at spring without taking over.
When it comes together, this board lands somewhere between cute and actually useful. That is the sweet spot. It gives you a bunny theme, plenty of variety, and a centerpiece people will remember. And honestly, that is exactly what a holiday board should do.

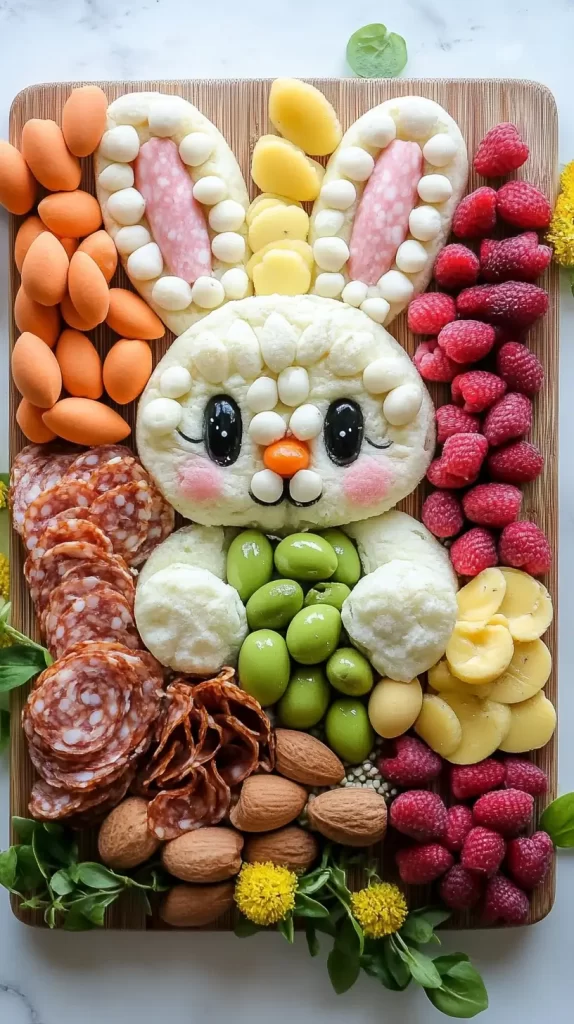
How to Achieve the Perfect Bunny Design
Start by picturing the bunny shape on the board before adding any food. Give it one large round body, one smaller round head, and two long ears so the layout stays clear from the beginning.
Build the body and head with soft cheese. Spreadable cheese works well because it is easy to shape, but Brie or Camembert also works if that is easier.
Make the ears with overlapping slices of firm cheese, such as Cheddar. Keep them long and slightly pointed, then add thin slices of prosciutto or salami inside the ears for extra color and texture.
Add the eyes and nose next. Use olives or grapes for the eyes, then place a cherry tomato or a small bit of colored spreadable cheese in the center for the nose.
Create the whiskers and mouth with small, narrow pieces. Thin cucumber strips work well for whiskers, and a small berry or piece of red pepper works for the mouth.
Fill the space around the bunny with the larger foods first. Arrange crackers, breadsticks, extra cheese, and folded meats around the shape so the board looks full and balanced.
Tuck the smaller foods into the open spaces. Grapes, berries, sliced apples, pears, nuts, and dried fruit work well because they fill gaps without covering the bunny design.
Place small bowls or ramekins near the outer edges of the board. Olives, pickles, honey, fruit preserves, or dips fit best there and keep the board easier to serve.
Finish with a light garnish and a quick final check. Add a little parsley or dill for a spring look, then step back and move anything that makes the bunny shape harder to see.
Creating an Easy Easter Charcuterie Board
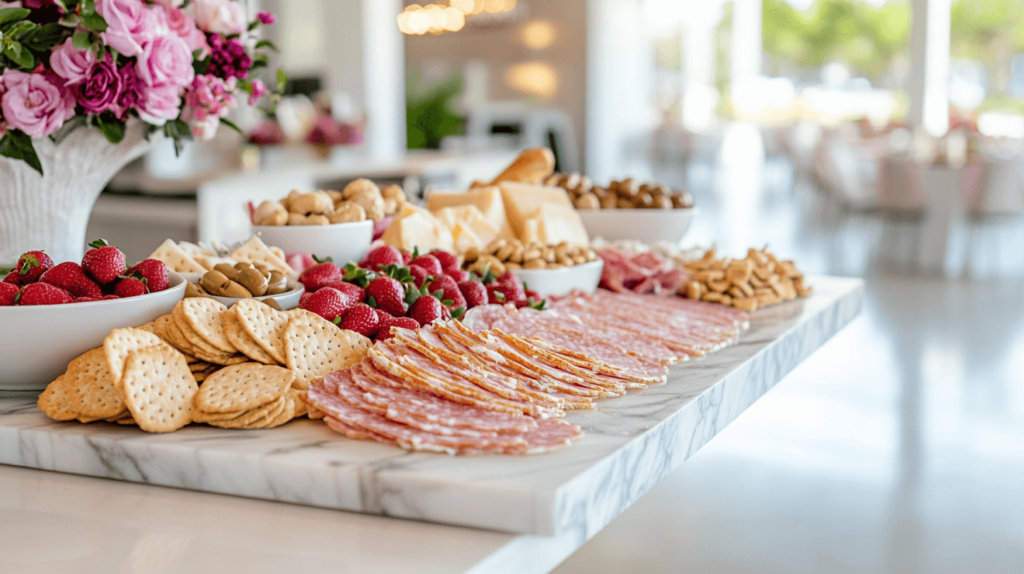
I’ve found that this kind of board works best when I stop trying to impress people. An easy Easter charcuterie board should look festive, full, and simple to build. That is the whole charm.
I start with cheeses that need almost nothing from me. Pre-sliced Cheddar or Swiss makes things faster right away. Brie, goat cheese, mozzarella balls, or even string cheese also keep the board easy.
Then I add meats that can go down straight from the package. Turkey, ham, salami, and prosciutto all work well here. I fold or roll a few slices, but I do not fuss over them.
After that, I bring in fruits and vegetables that already look good with barely any prep. Grapes, baby carrots, cherry tomatoes, cucumber slices, and sugar snap peas do a lot of work. They add color fast, which helps an Easter charcuterie board look more finished.
Next comes the part people actually build bites with. Water crackers, rice crackers, pita chips, baguette slices, or mini rolls all fit. I like using a mix because the board looks fuller without much extra effort.
Once the basics are down, I add a small Easter touch. Chocolate eggs or jelly beans are enough. Too many sweets can make the board look confused, and this section is supposed to stay easy.
When I arrange everything, I place the biggest foods first. Cheese and meat go down, then fruit and vegetables fill the open spaces. Crackers usually fix the last awkward gaps, which is very convenient.
At the end, I step back and check whether the board looks balanced. If one side feels plain, I move color instead of adding more food. That keeps the whole thing simple, which is exactly why an easy Easter charcuterie board works so well.
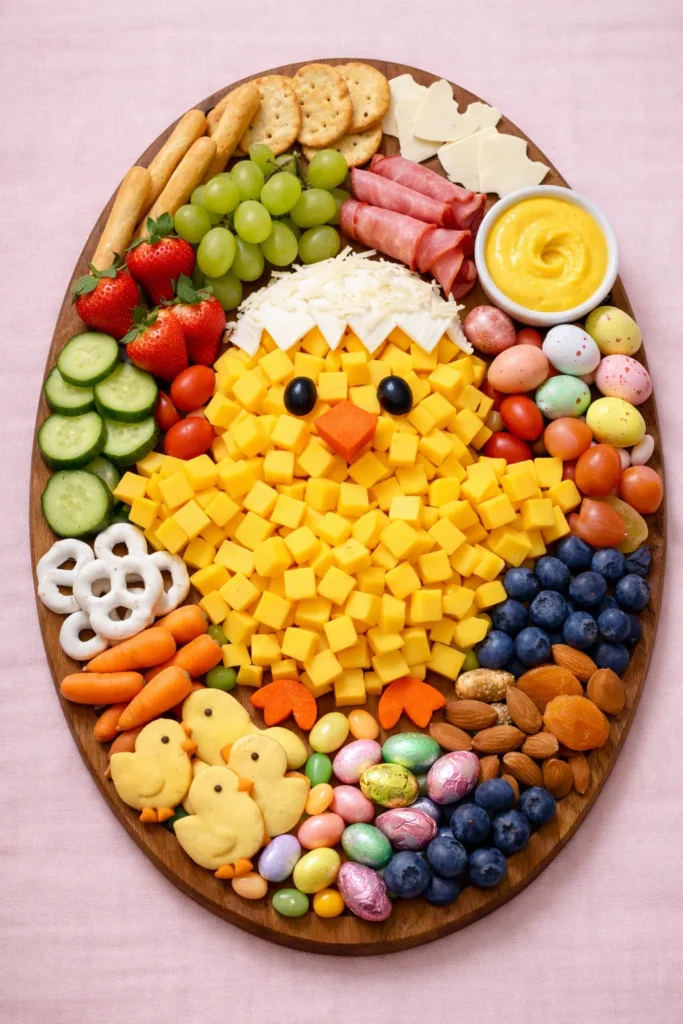
Creating a Kid Friendly Easter Charcuterie Board
This is the board I’d make when I want Easter to look fun without getting too precious. A kid friendly Easter charcuterie board should be colorful, easy to grab from, and full of foods kids already like. That is the whole point. Nobody wants to hand a child a fussy board and hope for the best.
- Start with the easiest grab and go foods first. I’d use mozzarella sticks, Cheddar cubes, string cheese, rolled turkey, rolled ham, and small crackers. Those foods make the board look full fast, and kids usually know exactly what they are getting.
- Next, add fruit and vegetables that bring color without adding drama. Grapes, strawberries, and blueberries work really well here. Baby carrots, cucumber slices, and cherry tomatoes also help, especially when the board needs more bright color.
- Then I’d bring in a few sweet foods, but not so many that the whole thing turns into dessert. Mini marshmallows, jelly beans, foil wrapped chocolate eggs, and bunny or egg shaped sugar cookies all fit. A little candy makes it festive. Too much makes it chaotic.
- After that, I’d add a couple of simple dips. Ranch works for the vegetables, hummus works for crackers or cucumbers, and chocolate or caramel sauce fits the sweeter side. Small bowls help keep the board cleaner, which matters more with kids.
- Now comes the part that makes the board extra fun to look at. I group similar foods together so little hands can spot favorites quickly. If I want one playful touch, I’ll do bunny shaped cheese or arrange fruit in an Easter egg pattern.
Once everything is down, I check whether it looks full, colorful, and easy to eat. That is my test every time. A good kid friendly Easter charcuterie board should look cheerful, but it should also work in real life, which is honestly the bigger win.

Questions People Actually Ask
What should go on an Easter charcuterie board?
I’ve found that the best boards mix savory, fresh, crunchy, and a little sweet. Cheese, meat, fruit, crackers, vegetables, and one small Easter candy touch usually cover it.
How far ahead can I make it?
I’d prep most of it a few hours early, then add crackers and the prettiest fruit last. That way, the Easter charcuterie board still looks fresh instead of tired.
Does it have to be expensive to look good?
Not at all, and I really think people overestimate that part. A budget board with smart color, full sections, and simple ingredients can still look very put together.
What cheese works best for Easter?
Brie, Cheddar, Gouda, mozzarella, and goat cheese all work really well. I like using one soft cheese, one firmer cheese, and one mild option.
How do I keep the board from looking messy?
I start with the biggest foods first, then fill the smaller gaps after that. Small bowls also help a lot because olives, honey, and dips can make things look sloppy fast.
Can I make one that works for kids too?
Yes, and that version can still look cute. I’d lean into string cheese, Cheddar cubes, crackers, grapes, strawberries, marshmallows, and a few chocolate eggs.
What makes an Easter charcuterie board look festive instead of random?
Color placement makes the biggest difference. Pastel candy, bright fruit, deviled eggs, bunny shapes, or an egg design can make an Easter charcuterie board read like spring right away.
Do I need garnish?
Only a little, if any. I use herbs sparingly because too much garnish can make the board look busy instead of fresh.
Styled to match your uploaded March 2026 blog rules, including bold FAQ questions and WordPress-safe paragraph formatting.

The Board Everyone Hovers Around
I always think the best holiday food does more than feed people. Good food sets the mood and buys a little time. Meanwhile, everyone has something to nibble while the kitchen is still doing kitchen things. That matters more than people admit.
That is why I like an Easter charcuterie board so much. It looks festive without needing a giant budget or a stressful plan. One good board can cover brunch, snacking, dessert, and that random pre-dinner circle around the counter. Suddenly, the whole gathering looks more thoughtful, even if the setup stayed pretty simple.
Living in Orlando, I’m used to spring looking bright and cheerful fast. Easter food should have that same energy. I want color, a little whimsy, and enough variety that nobody has to fake excitement over one lonely option on a plate.
What I like most is how flexible this whole idea is. Some boards can lean sweet. Others can stay savory. A few can go full bunny, full egg, or full pastel if that is the mood. Meanwhile, the best ones still feel easy to eat, easy to serve, and easy to remake later when Pinterest starts whispering new ideas at all of us.
I’ve found that people remember the boards that look generous, not perfect. They remember the cute details, sure, but they also remember reaching for one more bite. That is the sweet spot.
So if the board looks full, springy, and just a little irresistible, I’d call that done. Honestly, that is Easter in snack form.