As women, we know how important jewelry is to our overall look. Whether it’s a simple pair of earrings or a detailed necklace, jewelry can add flair to our ensembles and boost our self-esteem. I’ll walk you through the entire process of how to design your own jewelry in this post, from finding inspiration to realizing your ideas.
This site contains affiliate links; please view the disclosure for more information.
Step 1 – Motivation to Design Jewelry
Getting inspired is the first step in designing jewelry. Look for pieces that grab your attention in periodicals, stores, and online. Keep images of jewelry that you like and make note of what appeals to you about it. Is it the shade? The form? The substances? Pay close attention to the particulars and consider how you may use them in your own creations.
Inspiration is all around you! From things like nature, art, and even your own everyday life. Perhaps you want to incorporate your favorite flower into a necklace or have a special quote engraved on a bracelet. Whatever it is, let your creativity soar and glean all the inspiration you can!
Step 2 – Choose Your Materials
It’s time to choose your resources once you have some inspiration. The type of jewelry you wish to design will determine the type of materials you choose.
Glass, crystal, wood, and metal beads are going to be an obvious, and popular choice. To achieve a distinctive aesthetic, use beads that are varied in sizes, shapes, and colors.
Whether it’s a small ring or a complicated necklace, the structure of the jewelry is made of wire. To suit your design, select wire in a variety of gauges and metals.
Charms are tiny decorative components that can be incorporated into jewelry to lend a unique touch. Find charms that go with the theme or source of your inspiration.
Findings: Findings, which include clasps, jump rings, and ear wires, are the hardware used to join various pieces of jewelry together. Select findings that go with the metal and design of your piece.
Step 3 – Sketch Your Design
It’s time to draw your design now that you have your sources of inspiration and supplies. A rough drawing will help you visualize your jewelry. Consider the piece’s shape, size, and materials.
If you’re making a necklace or bracelet, make multiple pieces to try out different combinations and patterns. Never be reluctant to experiment with several concepts until you find the one that feels right.
Step 4 – Create a Prototype
It’s time to make a prototype after you have your sketch. This is a prototype of your design that lets you see how it will appear in use. To build a basic version of your design, use affordable materials like craft wire and plastic beads. Before working with more expensive materials, you will be able to make any necessary alterations thanks to this.
Make notes of any adjustments you desire to make while you develop your prototype. For instance, you might think the necklace is too lengthy or the color scheme is off. Before moving on to the final edition, all of these items can be changed.
Step 5 – Gather Your Materials
Before starting, gather all the supplies and organize them. You’ll save time and the process will go more smoothly as a result.
That’s why investing in a quality jewelry-making kit is important. A decent kit will give you all the tools and materials you need to make a range of jewelry designs, making it easier to start. Having everything you need in a kit saves time and makes the procedure easier. A well-equipped jewelry-making kit may help you produce stunning, distinctive items, whether you’re a novice or an expert jewelry maker.
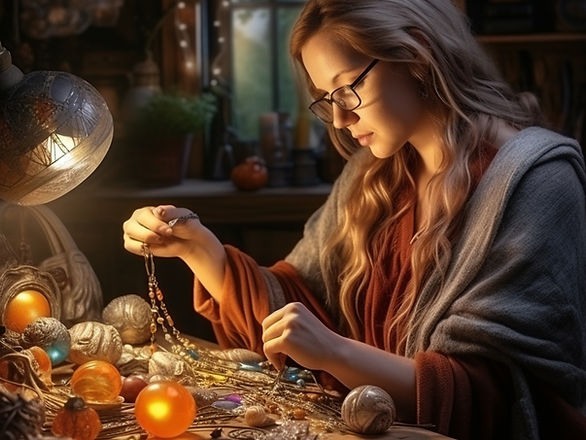
Step 6 – Create and Design Jewelry
It’s time to begin making your jewelry! You might need to manipulate the wire and beads using pliers, wire cutters, and other tools, depending on your design. It’s vital to be cautious with your materials when making jewelry because it can be a delicate procedure. Be patient and take your time.
Check your sketch and prototype as you go along to make sure you’re on the correct track. Never hesitate to make changes as you go since occasionally a design that seems excellent on paper doesn’t work out in practice.
Step 7 – Add the Final Details
After you’re done with the main piece, you can add the finishing touches. This can entail polishing the metal, adding a clasp, or engraving or adding a charm. Your jewelry will look polished and professional with these finishing touches.
Step 8 – Wear and Share
The time has finally come to show off and showcase your new jewelry! Show off your new earrings, bracelet, or necklace to your loved ones by donning them. They’ll be amazed by your originality and the fascinating item you produced.
You can also think about selling or gifting your jewelry. There are numerous online markets where you can open a shop if you’re interested in selling your jewelry, like Etsy and Amazon Handmade.
Advice for Jewelry Design
If you’re just getting started crafting jewelry, use a straightforward design. Before going on to more intricate designs, this will give you the chance to hone your abilities and gain a feel for the materials.
Play with color: To create a distinctive look, don’t be afraid to experiment with various hues and materials. Beads of various hues and textures can be combined and matched to produce a magnificent result.
Prior to beginning your design, become familiar with several fundamental jewelry-making processes, including wire wrapping, beading, and knotting. These abilities will be useful as you produce increasingly intricate designs.
Invest in high-quality tools: Having pliers, wire cutters, and other instruments will make manufacturing jewelry a lot simpler and more pleasurable. Additionally, quality tools will last you for many years.
Final Thoughts on How to Design Jewelry
Making jewelry is a delicate process, so be patient and take your time. Rushing a design might result in errors and dissatisfaction. Also, don’t forget to make it fun, and if your kids are interested, you can include them in on the experience! This makes for a great DIY Mommy and Me project!