I love talking about Valentine candles because they create such an easy way to add charm at home. These candles always bring soft color, warm light, and a little touch of romance to any space. They also give me countless options for crafting, decorating, and gifting. I’ve found that homemade candles are an easy project for women who want something fun without buying pricey seasonal decor. They also let me play with colors and shapes in a relaxing way. That creative freedom always keeps me coming back for more.
I like projects that offer big visual payoff. Candle making gives that, even when you keep things simple. Each small detail shifts the entire mood of a room. One soft pink jar can brighten a shelf. One red pillar can anchor a table. One layered candle can spark conversation during dinner. Projects like this fit well into my life because I live in Orlando and enjoy adding seasonal touches that still work in warm weather. Valentine’s Day definitely hits different when you can make candles with the windows open.
As I walk through this post, I’ll show you how to make pretty candles without stress. You can pick the style you like. You can also learn how to color, scent, and shape them. Candle making looks complex at first glance. However, it becomes easy once you know the steps. The process stays simple, even if you want creative designs. I notice that many women want both pretty and practical projects, and this one sits right in that sweet spot.
Now let’s get into these candle ideas and have some fun while we work.

Some of the links on this page are affiliate links, which means that if you click on them and buy something, I might get a small commission. But don’t worry; it never costs you more. You can peek at my full disclosure if you’re curious about the fine print.
Crafting Classic Jar Candles With Valentine Candles Flair
Jar candles make a great starting project because they offer simple steps and quick results. I like starting with jars because they support many color and scent ideas. You only need a steady hand, a clean jar, and basic supplies. Candle making works best when you gather everything first. That helps you work without stopping. Valentine candles fit perfectly with this style because they let you mix soft colors with sweet scents.
I melt soy wax in a double boiler because it melts evenly. While the wax melts, I prep the jar. I place a wick in the center and attach it with a dot of hot glue. This step keeps the wick steady. I also rest a wooden skewer across the jar so the wick stays upright. Once the wax melts, I remove it from heat. Then I stir in fragrance oil. You can choose scents like rose, cherry, or vanilla. These scents always match the season. You can also add pink or red wax dye at this point.
Jar candles look amazing when you design them with small touches. Here are easy options:
• Add a pinch of fine glitter for shimmer
• Pour two layers of wax in different shades
• Drop dried rose petals along the edges
• Use heart-shaped labels for the outside
These ideas keep your candle charming without adding extra work. They also let you create many looks with the same supplies. I’ve found that layering colors creates the prettiest effect for most jars. Although it requires patience, it also creates a candle that stands out.
You can display these jars on nightstands, kitchen shelves, or dining tables. They blend into many spaces because the shape stays classic. They also make sweet gifts for friends who love handmade items. I always suggest making two jars at once because the process goes fast once you start.

How To Make Romantic Pillar Candles At Home
Pillar candles add height and drama to a Valentine setup. They look great on mantels, tables, and grouped with smaller candles. I like pillar candles because they offer strong shape and work in many sizes. They also last longer than small jars. Valentine candles work well in pillar form because you can control color placement and layering.
Start with a pillar mold. You can find plastic or metal molds online. Then prep the mold by threading a wick through the bottom hole. Tie the wick at the top so it stays centered. After that, melt your wax. Paraffin works well for pillars because it holds shape. Soy works too, although it creates a softer finish. Once the wax liquefies, add fragrance oil. You can choose rose, strawberry, or jasmine for a romantic scent.
Color plays a big part in pillar design. You can keep it simple with one shade. Although, you can also try a layered look. Pour a small amount of wax into the mold and let it set slightly. Then add a second layer in a new shade. Continue until the mold fills. This technique creates stripes or ombre designs.
You can also add surface texture. Here are easy ideas:
• Wrap string around the mold before pouring
• Add dried flowers along the inner edge
• Create swirls by stirring colored wax inside briefly
• Dust mica powder in the mold for shimmer
These options help you build unique candles without stress. Pillars look beautiful in clusters. You can place three candles of different heights together. That arrangement always catches attention. You can also position pillars near mirrors to double the glow. I enjoy making these for dining tables because they add calm light and soft shadows.

Creating Hidden-Message Valentine Candles for Surprise Moments
Hidden-message candles bring something new to the Valentine season. These Valentine candles reveal a short message as they melt. The idea works because the wax hides a thin layer of contrasting color under the surface. As the candle burns, the message appears slowly. I like this project because it feels simple and still creates a surprising moment for anyone who lights the candle.
Start by choosing a small heat-safe container with straight sides. That shape keeps the message visible once revealed. Melt your wax and tint the first portion in a darker shade. Pour a shallow layer into the container. Let it cool until firm. Then create your message. Use a thin paintbrush and melted white wax to write a word directly on the surface. You can write love, kisses, or any short phrase that fits the mood. Because the message sits between layers, it stays hidden until the candle melts down.
After the message cools, melt more wax in a lighter shade. Pour it gently over the top. Slow pouring protects the message. Smooth the top with a heat gun if needed. You can also add a tiny amount of shimmer to the final layer for extra charm. Although this method looks complex, the steps stay straightforward once you try them.
These candles shine when used during quiet moments. You can light one during dinner, a cozy movie night, or a simple self-care evening. The message appears slowly, which adds a bit of drama in the sweetest way. You can also make several with different messages and place them around your home. Each candle becomes a small surprise waiting to happen. Valentine candles with hidden messages offer originality and charm without demanding expert skills, which makes them perfect for creative women who want something delightfully unexpected.

Creating Heart-Shaped Valentine Candles With DIY Molds
Heart-shaped candles bring instant Valentine charm. They look adorable on trays and shelves. I like them because the shape carries the theme without needing extra decor. They also work as small gifts. Valentine candles in heart form deliver an easy way to add romance.
You can start with silicone heart molds. These molds pop wax out easily. They also come in many sizes. I melt soy wax because it gives smooth surfaces. After the wax melts, I mix in fragrance oil. Strawberry, raspberry, and cotton candy scents match the shape well. Then I add dye. You can use soft pastel pink for a sweet style. Bright red creates a bold look.
Pour the wax into the molds slowly to prevent bubbles. You can tap the mold gently to release air. If you want layered hearts, pour a thin amount of wax first. Let it cool slightly. Then add the next color. Repeat until you have the look you want. Because silicone molds flex, you can experiment without worry.
Try adding creative details:
• Place a few sprinkles of glitter at the bottom
• Add a thin swirl of white wax for contrast
• Press dried flower petals into the top
• Mix two pink tones for a marble look
Heart candles display well when grouped. You can arrange many small hearts in a tray. They also look cute on bathroom shelves. Although they are small, they create strong visual impact. You can also tie two hearts together with ribbon for a sweet gift idea.
I’ve found that heart-shaped candles melt evenly because the mold supports balanced thickness. They also cool quickly. That means you can make several batches in a short time. Because of the fast process, these candles work well for last-minute decor.
Layered Color Candles That Add Valentine Charm
Layered candles bring depth and drama to a room. They catch the eye because each stripe shows off a new shade. Valentine candles shine in layered designs because pink, red, and white work beautifully in stacks. You can use jars or clear molds. You just need steady layering.
Start by melting your base wax. Then add fragrance oil and color. Choose your first shade. Pour a thin layer into your container. Let it cool until the surface firms but stays slightly warm. Then melt more wax, color it differently, and pour again. Although you must wait between layers, the results look stunning. You can build soft gradients or bold contrasts.
Try design ideas like these:
• Pink to red ombre
• Alternating pink and white stripes
• Red base with pale pink top
• Soft cloud-like blends with half-tone shades
Layered candles take a little longer because cooling time matters. However, the final reveal always makes the effort worthwhile. I enjoy choosing color palettes based on where I plan to place the candle. One set might match a bathroom tray. Another set might brighten a kitchen counter.
You can add texture too. Sprinkle mica powder between layers for shimmer. You can also tilt the jar slightly while pouring to create diagonal stripes. Candle makers use diagonal layering to create dynamic shapes that stand out from classic straight lines.
Layered candles work well as centerpieces. You can place them near flowers or small trinkets. The stripes draw attention, even without extra decor. They also make great gifts because each candle looks custom. I’ve found that people love the surprise of seeing new colors appear as the candle melts. Because layered candles look detailed, many women assume they’re difficult to make. They’re actually simple once you understand timing.

Scent Combinations That Elevate Your Valentine Candles
Scent plays a major role in candle making because it sets the tone of any space. Valentine candles match well with sweet and romantic scents. You can mix oils to create unique blends. I enjoy experimenting with scent because each small change shifts the entire mood.
Start with single notes if you’re new to mixing. Rose offers classic romance. Vanilla brings warmth. Strawberry adds sweetness. After you know what you like, start combining. Blend rose and vanilla for a soft floral effect. Mix strawberry and cream for a dessert-like aroma. Add jasmine and sandalwood for a deeper, elegant scent.
Try combinations like these:
• Rose + raspberry
• Cherry + vanilla
• Strawberry + jasmine
• Cotton candy + rose water
• Vanilla + pomegranate
Although scent mixing looks intimidating, it becomes easy once you find balance. Always add fragrance oil after melting your wax but before pouring. That timing helps the scent stay strong.
You can also match scent to color. A deep red candle works beautifully with cherry notes. A pastel pink candle pairs well with vanilla. Although this step isn’t required, it adds harmony to the design.
I adjust scent strength depending on the candle size. Large jars need more fragrance oil. Small heart molds need less. You can also create sets with multiple scents. That brings variety to your display. I enjoy keeping a few scent families on hand because they let me shift the vibe quickly.
Scented candles work well in entryways because they greet guests gently. They also brighten bedrooms with calm fragrance. You can also use them in bathrooms for a spa-like touch. When scents match the season, the space instantly gains charm. Valentine candles often get noticed because they mix beautiful colors with inviting fragrance. That combination always creates a lovely atmosphere.

Decorative Touches That Take Your Candles to the Next Level
Decorative accents add personality to homemade candles. Small details help each candle stand out. Valentine candles especially benefit from these touches because the theme supports playful decoration. You can use glitter, petals, labels, or textured wax.
Glitter adds sparkle. Use fine glitter because it blends smoothly. Sprinkle a small amount on top after pouring. You can also mix it into the wax. Although bold glitter works too, it may clump. I choose soft shimmer for most projects.
Dried petals create natural beauty. Rose petals look stunning in pink candles. You can press them near the candle’s edge. They show through when the wax cools. Lavender buds also work well for a soft, romantic style.
Try these decoration ideas:
• Add a narrow ribbon around jar rims
• Use heart-shaped labels for gifting
• Carve simple designs into pillar candles
• Press petals into the top layer
• Dust mica powder along inner walls for glow
You can also create textured surfaces. Wrap string around pillar molds before pouring. Once you unmold the candle, remove the string. It leaves a raised pattern. That pattern pairs well with soft Valentine tones.
Color accents also help. Add white wax swirls to deepen contrast. Mix two shades of pink to create marbled patterns. Although marbling takes practice, it becomes easier with time. I like marbling because no two candles look the same.
Decorated candles display beautifully on shelves, trays, and countertops. You can match accents to your home’s palette. You can also build coordinated sets using similar materials. Small touches often elevate simple candles into gifts that look thoughtful and polished. I enjoy adding details to match the mood I want at home. A small accent can shift the entire style of a space.
Using Molds and Tools To Shape Professional-Looking Valentine Candles
Candle molds allow endless creativity. Shapes range from hearts to waves to geometric forms. Valentine candles work well with molds because the season encourages playful shapes. Tools help you refine edges, form layers, and create textured surfaces.
Start with silicone molds. They release candles easily. They also support detailed shapes. You can pour wax directly into them. Plastic and metal molds also work, although they require more prep. Coat them lightly with mold spray so candles slide out cleanly.
Try these mold styles:
• Heart molds
• Cube molds
• Bubble molds
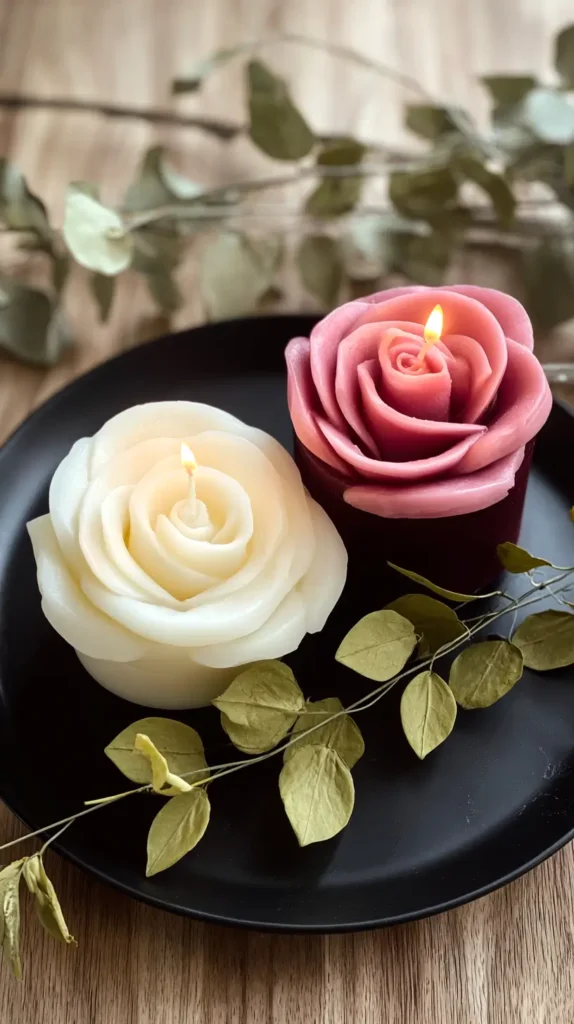
• Rose-shaped molds
• Tall geometric molds
Each style creates a different vibe. Cube molds look modern. Rose-shaped molds look romantic. Bubble molds add fun, youthful charm. You can match shape to your home decor.
Pour technique matters. Always pour slowly to reduce air bubbles. Tap the mold lightly to help release trapped air. You can also tilt molds to create angled layers. That adds dimension to the design. I’ve found that slow pouring creates smoother surfaces.
Tools also help. Heat guns smooth rough tops. Wick centering tools hold wicks steady. Carving tools help you add lines or patterns. Although these tools seem advanced, they work easily once you try them.
You can also create effects inside the mold. Add dried petals along the inner walls. Dust mica inside before pouring. Mix two wax colors lightly for marbling. Because molds catch many details, your candles will look professional even with small effort.
Molded candles shine when displayed together. Shapes create visual interest. Colors and textures add depth. You can build a small set for a shelf or tray. I like using shapes to match the season because they make the display charming and playful without much work.
Display Ideas That Make Valentine Candles Pop
Display choices matter because they shape the mood of your home. Valentine candles deserve spots that show off their design. You can place them on trays, mantels, entry tables, or nightstands. These candles bring warm light wherever you set them.
Start with simple displays. Place jar candles on wooden trays. Add small accents like beads or petals. Although these touches are optional, they help anchor the candle visually. You can also pair candles with small vases. The combination always looks balanced.
Try these display concepts:
• Group three candles of different heights
• Use mirrored trays for extra glow
• Arrange heart candles around a larger pillar
• Set candles beside framed photos
• Place candles near plants for contrast
You can also build color stories. Pair pink candles with soft neutrals. Pair red candles with gold accents. Although mixing many shades works too, choosing a theme keeps the space cohesive.
Consider scent placement as well. A rose-scented candle works well in bedrooms. A strawberry candle fits nicely in kitchens. Vanilla candles blend into any room. I enjoy shifting candles around during the season because it keeps things interesting.
You can also create themed zones. Build a cozy nook with a few layered candles. Create a centerpiece with pillars on a dining table. Although centerpieces can get busy, candles simplify the look. Their height and glow draw attention.
Display ideas matter because they unlock the full impact of your hard work. Valentine candles bring charm on their own. However, thoughtful placement enhances every detail. You can redesign spaces easily by swapping candles in and out. That flexibility makes candle projects even more rewarding.

Easy Cleanup and Storage Tips for Reusing Supplies
Candle making works best when you manage cleanup carefully. Wax cools quickly. Once it hardens, it sticks to tools. Valentine candles don’t require special cleanup steps. You just need a simple routine.
Start by wiping tools while the wax stays warm. Use paper towels to remove melted wax from pots and spoons. Although it’s tempting to wait, cleaning later takes more effort. Warm wax wipes away quickly. After wiping, wash everything with hot water and dish soap.
You can clean jars by freezing them. Place the jar in the freezer for an hour. The wax shrinks and pops out. That trick saves time. I use this method for jars I plan to reuse.
Try these storage ideas:
• Keep leftover wax in labeled bags
• Store wicks in small containers
• Keep fragrance oils upright
• Save silicone molds in a drawer
• Wrap metal molds to prevent scratches
You can reuse most items many times. That saves money. It also helps you stay organized. I like keeping candle supplies together so projects start faster. Although candle making uses several items, storing them well makes everything easier.
You can also recycle mistakes. If a candle looks uneven, melt it again. If a wick shifts, repour the wax. That flexibility reduces waste. You can also blend leftover wax to create new colors. Because candle making allows so much creativity, nothing goes unused.
Cleanup and storage become second nature. You wipe, wash, organize, and repeat. Supplies stay ready for new projects. Valentine candles become more fun when you have a smooth setup. A tidy workspace supports creativity. You spend less time hunting for tools and more time choosing colors and scents.

Final Thoughts
I love making candle projects during the Valentine season because they offer instant charm and simple beauty. Valentine candles let me choose colors, shapes, scents, and textures that match my home. I’ve found that projects like this create a sense of ease. Candle making also gives me something creative to do when I want a quick break from daily tasks. Although the steps stay simple, the results always look thoughtful.
I enjoy teaching these projects because women want crafts that feel manageable. This hobby checks all the boxes. You can customize everything without stress. You can also reuse supplies many times. The process becomes easier every time you make a batch. I like that each candle turns out slightly different. That small uniqueness makes every project exciting. Living in Orlando gives me warm weather during the Valentine season, so I make many of these candles with my windows open. The breeze always helps set the tone.
I also love how candles support mood changes. Soft light brightens corners. Gentle scents shift the space. Creative displays make rooms more welcoming. Candle making helps me create small moments of calm. Pinterest also helps me gather new design ideas when I want fresh inspiration.
Working with wax teaches you patience too. You pour, wait, and then enjoy the finished product. Each project brings new ideas. Each design leads to another experiment. That cycle keeps things fun and creative.
I appreciate how candles fit into many homes. They work in bedrooms, kitchens, living rooms, and entryways. Valentine candles especially shine during the season because they blend warmth with color. I hope these ideas inspire you to create candles that brighten your home.