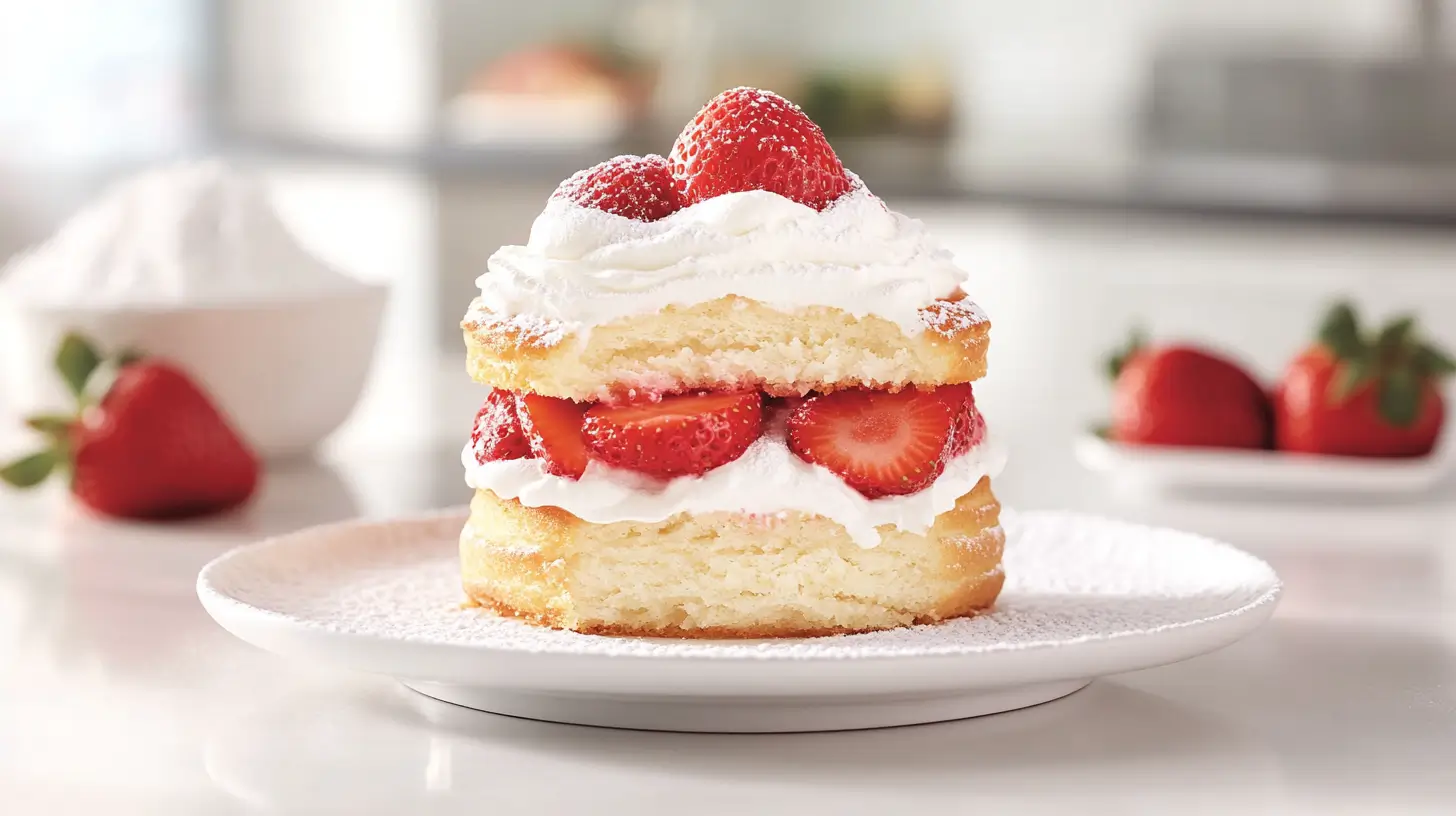
Some desserts sound easy until you picture the sink afterward. A lot of people put strawberry cheesecake in that spot. It sounds dreamy, yet slightly annoying. I’ve found that most of the stress comes from the reputation, not the recipe itself.
That reputation is loud. People hear cheesecake and think cracks, water baths, and one long afternoon of second-guessing. Then strawberries enter the picture, and suddenly it sounds even fussier. Meanwhile, the actual payoff is huge. You get a creamy center, a buttery crust, and a fresh berry topping that cuts the richness beautifully.
I tend to notice that people like this dessert because it has contrast. The filling tastes rich, but not heavy. Meanwhile, the topping tastes bright, but not sharp. Even the crust matters more than people expect. That little bit of crunch changes everything.
As a mom in Orlando, I love recipes that look polished without demanding a dramatic kitchen marathon. Heat and patience already have a tense relationship here. So when a dessert can chill in the fridge and still look impressive later, I’m listening.
This post gives you the whole recipe, not the vague version. I’m including the crust, the filling, the strawberry topping, the exact U.S. measurements, the baking steps, the cooling tips, the common mistakes, the FAQs, and the serving ideas. I’m also getting into one small move that makes the texture much smoother. It seems boring at first. Then it quietly changes the whole result.
Some of the links on this page are affiliate links. That means if you click and make a purchase, I may earn a small commission at no extra cost to you. If you’re curious about the fine print, you can check out my full disclosure.
Why This Recipe Works So Well
Cheesecake only looks mysterious from the outside. Once you know the rhythm, it becomes much more manageable. That matters, because nobody wants a recipe that feels like a personality test. I want dessert, not emotional damage.
This version works because the ratios stay balanced. There’s enough cream cheese for richness, but not so much that the filling turns dense. Sour cream lightens the texture and adds tang. A little flour helps the center hold its shape without tasting stiff. That balance keeps each bite smooth instead of heavy.
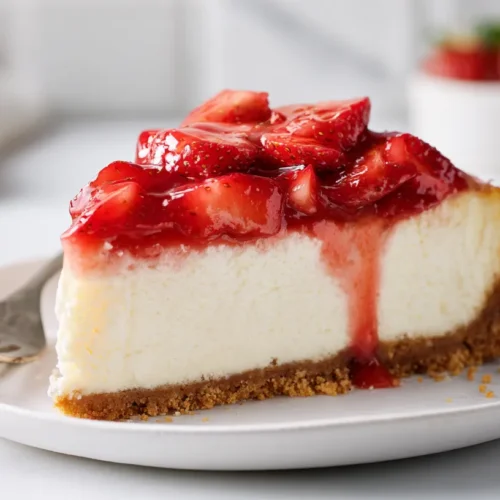
The strawberry layer matters just as much. A lot of toppings taste too sweet, too thick, or too much like jam. I prefer a topping that still tastes fresh. Cook part of the fruit for body. Then fold in more berries later for color and texture. You get shine, softness, and real strawberry flavor in the same spoonful.
Here’s the reframe that changed this recipe for me. The goal is not a bakery copycat. I want a creamy, sliceable dessert with bright fruit and clean texture. Those goals matter more than some polished fantasy. Once you stop chasing that image, the whole process gets easier.
And yes, the crust matters. A strong crust adds structure and contrast. Without it, the whole dessert tastes too soft. That’s the difference between a recipe people politely try and a recipe they genuinely remember. Big difference. Strawberry cheesecake needs that texture change, or the filling can taste one-note.
One more thing helps this recipe stay reliable. The sweetness stays controlled. Meanwhile, the berries bring brightness, and the sour cream adds tang. That combination keeps the flavor clear instead of flat. Rich desserts need that kind of contrast.

Strawberry Cheesecake Ingredients That Matter
I like ingredient lists that read like real groceries, not a scavenger hunt. This strawberry cheesecake keeps things classic. Nothing here feels overcomplicated. Each ingredient has a clear job, which makes the recipe easier to trust from the start.
For the crust, you need:
- 2 cups graham cracker crumbs.
- 2 tablespoons granulated sugar.
- 6 tablespoons unsalted butter, melted.
- 1 pinch salt.
For the filling, gather:
- 32 ounces full-fat cream cheese, softened.
- 1 cup granulated sugar.
- 1 cup full-fat sour cream.
- 1 tablespoon vanilla extract.
- 3 tablespoons all-purpose flour.
- 1 pinch salt.
- 4 large eggs, room temperature.
And for the topping, use:
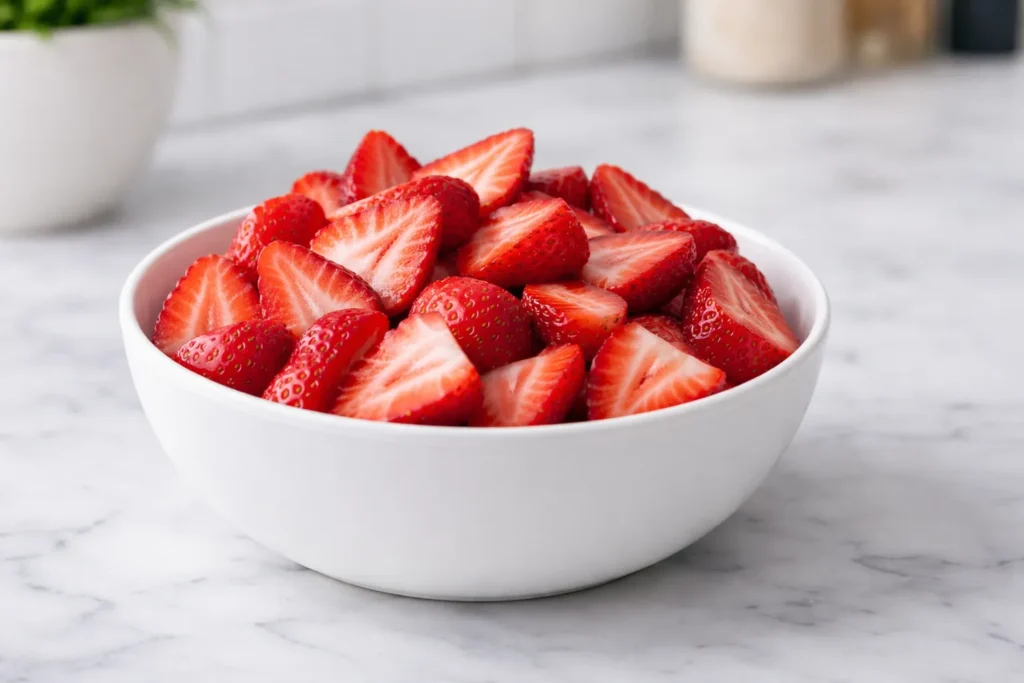
- 1 pound fresh strawberries, hulled and sliced.
- 1/3 cup granulated sugar.
- 1 tablespoon lemon juice.
- 1 tablespoon cornstarch.
- 2 tablespoons cold water.
- 6 to 8 extra strawberries for garnish, optional.
Now the opinionated part. Use full-fat cream cheese. Reduced-fat versions change the texture, and not in a charming way. Also, room temperature ingredients matter more than people think. Soft cream cheese blends smoothly. Warmed eggs mix in faster. Both things help the batter stay creamy.
Fresh strawberries work best here because the topping tastes brighter. Frozen berries can work for the cooked portion, though they release more liquid. If that’s your plan, cook the sauce a little longer. The topping should look glossy and spoonable, not runny. That small detail saves the final look. Vanilla and lemon may seem basic, though they sharpen the whole flavor nicely.
Salt matters too, even in dessert. It keeps the crust from tasting bland and helps the filling taste fuller. You won’t notice a salty flavor. You’ll just notice better balance, which is exactly what strawberry cheesecake needs.


Before You Bake, Set Yourself Up Properly
A lot of cheesecake frustration starts before the mixer even turns on. That’s the annoying truth. Good prep makes the whole recipe smoother, cleaner, and less stressful. Better still, it lowers the odds of panic halfway through.
Use a 9-inch springform pan. That size gives the filling enough depth without making the center bake forever. I also like to line the bottom with parchment. Slices come out more neatly, and cleanup goes much faster. Small win, big mood improvement.
Set the cream cheese, sour cream, and eggs out ahead of time. Cold ingredients create lumps, and those lumps do not magically disappear later. I’ve found that giving the dairy one to two hours on the counter helps a lot. Eggs usually need about 30 minutes.
Now for the less glamorous part. Wrap the outside base of the pan with foil if you plan to place hot water nearby. I’m not doing a full water bath here. I just like extra insurance. Put a separate pan of hot water on the rack below. That adds moisture to the oven and helps the surface bake more gently.
Grease the sides of the springform pan lightly too. That gives the cheesecake room to rise and settle without sticking hard to the edge. Tiny detail. Big help.
One more thing before the fun part starts. Read the whole recipe once before mixing anything. I know that sounds deeply obvious. Still, this dessert often starts confidently, then stalls when the cream cheese is still cold. Respect the sequence, and strawberry cheesecake gets much easier. Good prep also makes cleanup less annoying later. That counts too. It saves time later.
How To Make Strawberry Cheesecake Step By Step
This is where the recipe starts looking more dramatic than it really is. The steps are simple. Still, the order matters. Once you keep that order steady, the whole thing moves along without much fuss.
Start with the crust:
- Heat the oven to 325°F.
- Mix graham cracker crumbs, sugar, melted butter, and salt in a bowl.
- Stir until the crumbs look evenly damp.
- Press the mixture into the bottom and slightly up the sides of a 9-inch springform pan.
- Bake for 10 minutes.
- Cool the crust while you make the filling.
Make the filling next:
- Beat the softened cream cheese until smooth.
- Add sugar, sour cream, vanilla, flour, and salt.
- Mix until creamy and fully combined.
- Scrape the bowl and beaters well.
- Add the eggs one at a time.
- Mix on low after each egg, just until blended.
Finish and bake:
- Pour the filling over the cooled crust.
- Smooth the top with a spatula.
- Tap the pan gently on the counter a few times.
- Bake for 60 to 70 minutes.
- Look for set edges and a center with a slight jiggle.
- Turn off the oven and crack the door open.
- Let the cheesecake rest inside for 30 minutes.
- Cool fully on the counter.
- Chill for at least 6 hours, though overnight works best.
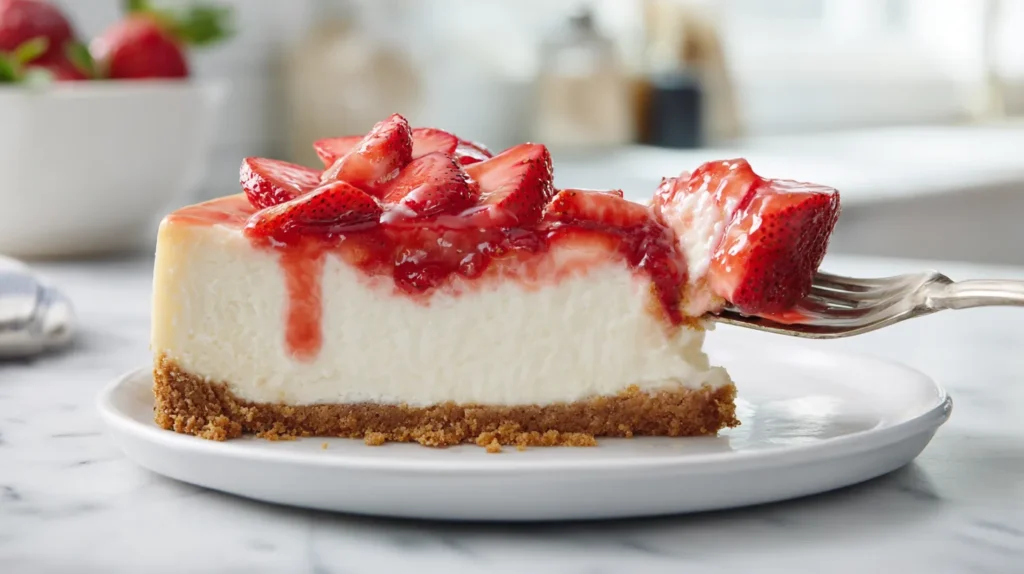
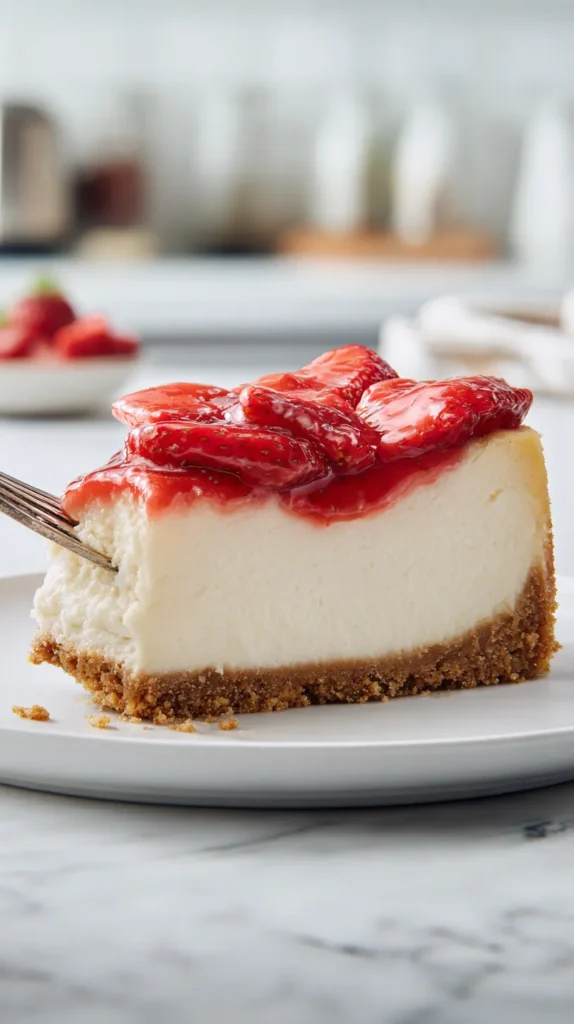
That slight jiggle matters. A fully firm center usually means overbaking. Strange, but true. The cheesecake keeps setting as it cools, which is exactly why patience pays off here. I’ve found that strawberry cheesecake looks deceptively soft at first. Give it time, and the texture becomes much cleaner. That waiting period is not filler. It’s part of the recipe. Don’t skip it.

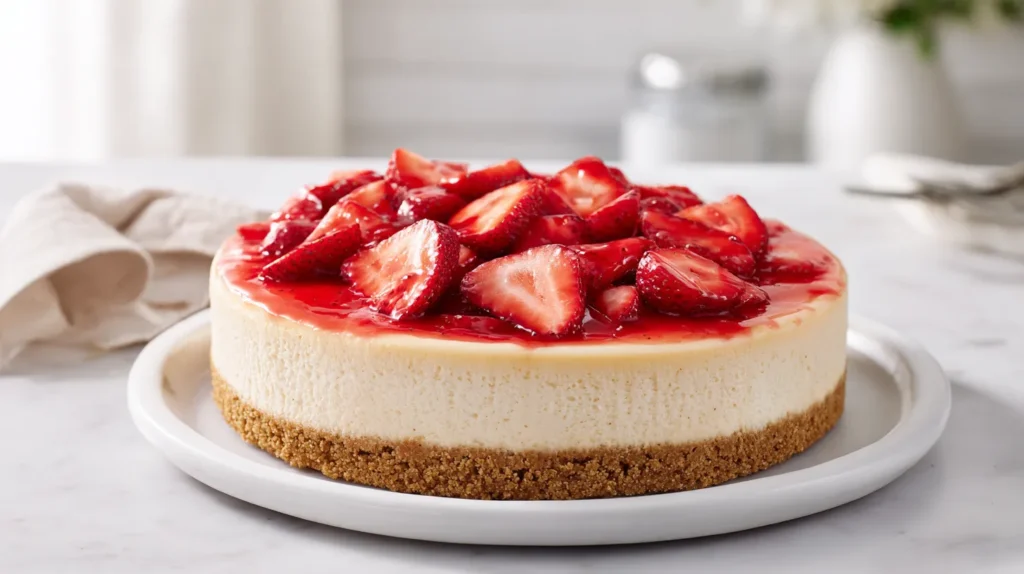
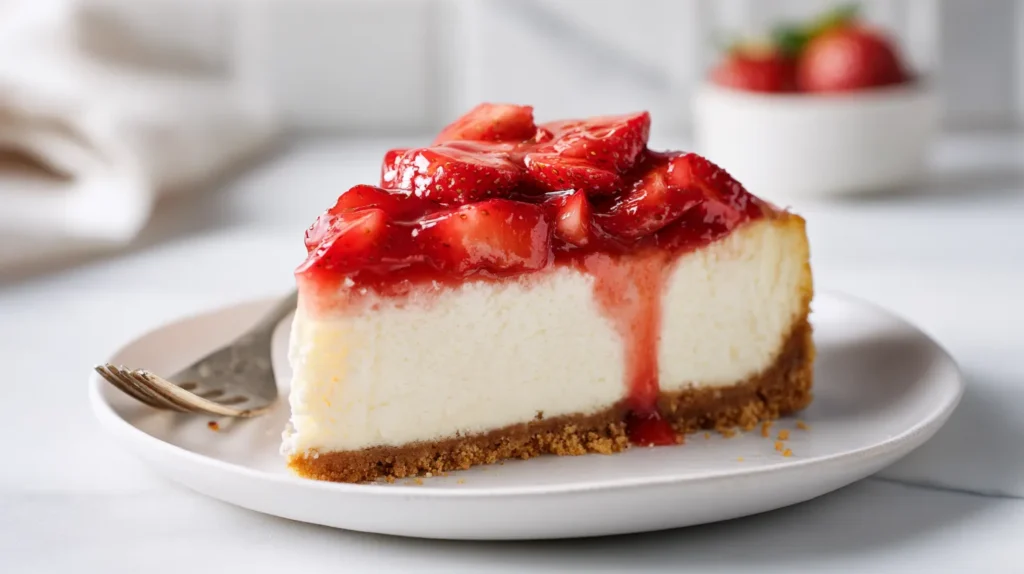
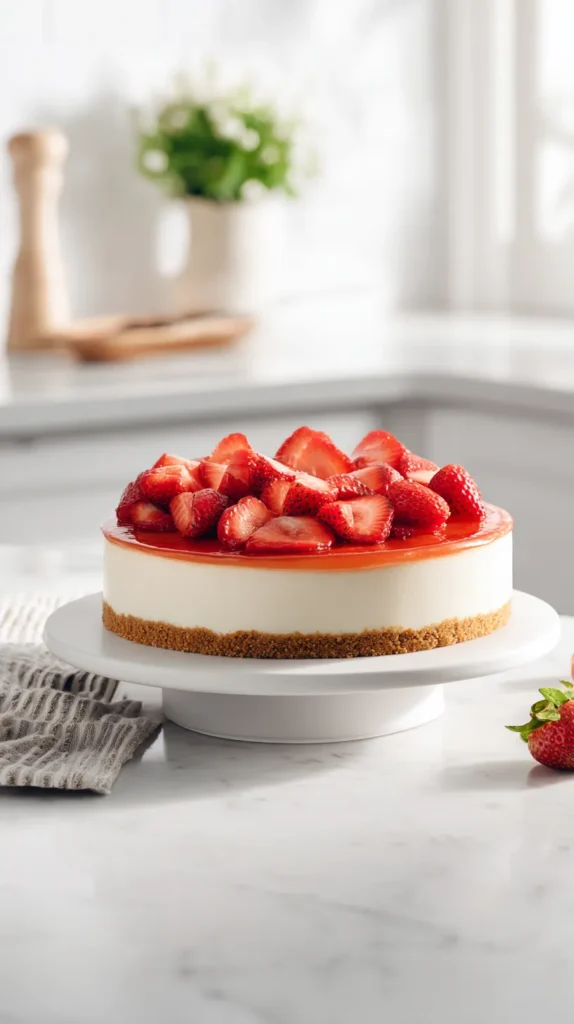
The Strawberry Topping Changes Everything
Plain cheesecake can be lovely. Still, the strawberry topping is what gives this version its bright, fresh edge. Without it, the dessert tastes richer and heavier. With it, the whole slice lands better. That contrast is the reason this recipe keeps its balance.
I prefer a topping with two textures. Cooked berries add body and shine. Fresh berries add shape, color, and a cleaner strawberry taste. When you use only cooked fruit, the topping can turn flat. By contrast, only fresh fruit can slide around too much. The mix solves both problems.
Start by placing half the sliced strawberries in a saucepan. Add the sugar and lemon juice. Cook over medium heat until the fruit softens and releases juice. Meanwhile, stir the cornstarch with cold water in a small cup. Pour that slurry into the pan and stir until the sauce thickens.
Once the mixture looks glossy, take it off the heat. Let it cool for about 10 minutes. Then fold in the remaining sliced strawberries. That’s the move that keeps the topping from tasting dull. You still get the soft, syrupy base, but the berry texture stays fresher and more distinct.
Cool the topping completely before using it. Warm topping can loosen the chilled cheesecake surface and make slicing messier. Nobody needs that surprise. Spoon the cooled topping over the whole cheesecake or add it to each slice individually. Both options work. I usually choose the second one when I want cleaner leftovers. That little choice makes day-two slices look much better. Strawberry cheesecake benefits from that extra control. Clean slices matter more than people admit. The topping looks prettier too. Small detail, big payoff.

Strawberry Cheesecake Tips That Save You Trouble
Good cheesecake depends on a few smart habits. It does not reward rushing. I’ve found that most problems come from impatience, not lack of skill. That should be comforting, because patience is easier to fix than talent.
Here are the tips I trust most:
- Soften the cream cheese for 1 to 2 hours before mixing.
- Bring the eggs to room temperature for 30 minutes.
- Mix on low once the eggs go in.
- Scrape the bowl often.
- Bake until the center still jiggles slightly.
- Cool the cheesecake slowly.
- Chill overnight for the cleanest texture.
- Add topping after chilling.
- Wipe the knife between slices.
- Cover leftovers well before refrigerating.
Now for a common assumption that needs a reset. Tiny cracks do not ruin cheesecake. They change the look, yes. Still, they do not ruin the taste. Once the strawberry topping goes on, most people won’t notice anyway. I’d rather have a creamy cheesecake with a small crack than a dry one with a perfect top.
Another tip matters more than it sounds. Don’t whip the batter hard after adding the eggs. Too much air can make the cheesecake puff in the oven, then sink later. Low speed keeps the texture smoother and the surface calmer.
Also, don’t rush the chill time because dinner ran late or guests arrived early. A half-set strawberry cheesecake cuts poorly and leans on the plate. That’s never the energy I want after all that waiting. Give it the full chill, and the texture becomes richer, cleaner, and much easier to serve confidently.
If the cheesecake sticks to the pan edge, run a thin knife around it before releasing the ring. Do that after chilling, not before. That small move protects the sides and keeps the surface looking neater.
Strawberry Cheesecake Serving Ideas And Storage Help
Once the cheesecake is chilled, the serving part gets fun. This is also where a few small choices make the whole dessert look more polished. Not fussy. Just put together. I like that kind of effort.
For clean slices, use a thin sharp knife. Dip it in hot water, wipe it dry, then slice. Repeat between cuts. That sounds extra, yet it works. The layers stay neater, and the topping doesn’t drag across the surface as much.
A few serving ideas work especially well:
- Add whipped cream beside each slice, not on top.
- Scatter extra sliced strawberries on the plate.
- Serve with hot coffee or iced coffee.
- Pair it with unsweetened tea or sparkling lemonade.
- Cut 12 regular slices for a standard dessert table.
- Make 14 smaller slices for parties with other desserts.
Here’s my opinionated take. Smaller slices often work better with cheesecake. It’s rich. A huge wedge can look exciting, then suddenly become a lot. Slightly thinner slices let people enjoy it without hitting dessert fatigue halfway through.
For storage, keep the cheesecake covered in the fridge for up to 4 days. I like storing the topping separately when possible. The crust stays a little firmer that way, and the slices keep their shape better. If you want to freeze it, freeze the plain cheesecake first. Wrap it tightly, then thaw it in the fridge overnight. Add the topping after thawing. That order protects both texture and appearance, which is exactly what you want from a make-ahead strawberry cheesecake.
Serve it slightly cold, not ice-cold straight from the back of the fridge. Ten minutes on the counter helps the filling soften just enough. The flavor comes through better, and the texture tastes creamier.
Cheesecake FAQs People Actually Ask
Questions usually show up as soon as cheesecake gets mentioned. I get it. This dessert sounds high-maintenance. The good news is simple. Most answers are easier than people expect, and far less dramatic.
Can I make this a day ahead?
Yes, and I recommend it. Overnight chilling gives the filling a better texture and makes slicing much easier.
Can I use frozen strawberries?
Yes, for the cooked portion of the topping. Fresh berries still work better for the final fold-in and garnish.
Do I need a water bath?
No. A pan of hot water on the rack below helps enough for this recipe.
Why did my cheesecake crack?
Overbaking, overmixing, or cooling too fast usually causes cracks. The topping covers most small ones easily.
How do I know the center is done?
Look for set edges first. Then check for a slight jiggle in the center. It should not look liquid.
Can I freeze strawberry cheesecake?
Yes. Freeze the plain cheesecake for up to 1 month, wrapped tightly, then thaw in the fridge.
What crust swaps work well?
Vanilla wafers or shortbread crumbs both work. Graham crackers still give the most classic result.
Why did my batter look lumpy?
Cold cream cheese usually causes that problem. Room temperature dairy gives you a much smoother filling.
See? This is not one of those recipes with twenty hidden traps. It just needs a steady hand, decent timing, and a little patience. Once you make it once, the whole process starts looking much less intimidating. After one round, the steps make much more sense. That first try clears up a lot. It really does. That confidence helps next time.
Strawberry Cheesecake
Ingredients
Crust
- 2 cups graham cracker crumbs
- 2 tablespoons granulated sugar
- 6 tablespoons unsalted butter melted
- 1 pinch salt
Filling
- 32 ounces full-fat cream cheese softened
- 1 cup granulated sugar
- 1 cup full-fat sour cream
- 1 tablespoon vanilla extract
- 3 tablespoons all-purpose flour
- 1 pinch salt
- 4 large eggs room temperature
Topping
- 1 pound fresh strawberries hulled and sliced
- 1/3 cup granulated sugar
- 1 tablespoon lemon juice
- 1 tablespoon cornstarch
- 2 tablespoons cold water
- 6 to 8 extra strawberries for garnish optional
Instructions
- Preheat the oven to 325°F.
- Mix the graham cracker crumbs, sugar, melted butter, and salt in a bowl until evenly combined.
- Press the mixture into the bottom and slightly up the sides of a 9-inch springform pan.
- Bake the crust for 10 minutes.
- Remove the crust from the oven and let it cool while preparing the filling.
- Beat the softened cream cheese until smooth.
- Add the sugar, sour cream, vanilla extract, flour, and salt.
- Mix until creamy and fully combined, scraping the bowl as needed.
- Add the eggs one at a time.
- Mix on low speed after each egg until just blended.
- Pour the filling over the cooled crust.
- Smooth the top with a spatula.
- Tap the pan gently on the counter a few times to release air bubbles.
- Bake for 60 to 70 minutes until the edges are set and the center slightly jiggles.
- Turn off the oven and crack the door open.
- Let the cheesecake sit in the oven for 30 minutes.
- Remove the cheesecake from the oven and let it cool completely at room temperature.
- Chill the cheesecake in the refrigerator for at least 6 hours or overnight.
- Place half of the sliced strawberries in a saucepan.
- Add the sugar and lemon juice.
- Cook over medium heat until the strawberries soften and release their juices.
- Stir the cornstarch with the cold water in a small bowl.
- Pour the cornstarch mixture into the saucepan.
- Cook and stir until the mixture thickens and becomes glossy.
- Remove the saucepan from the heat and let it cool slightly.
- Fold in the remaining sliced strawberries.
- Let the topping cool completely.
- Spoon the cooled topping over the chilled cheesecake before serving or add to individual slices.
Why This Recipe Stays In My Rotation
I always like a recipe more when the result matches the effort. That sounds obvious, yet plenty of desserts miss that mark. This one does. You get a creamy filling, a crisp crust, and a bright topping. That topping keeps the whole slice from tasting too rich.
For me, that balance makes it worth repeating. The texture stays smooth, but still substantial. Meanwhile, the topping adds freshness without turning watery. Even the crust matters all the way through. Every part has a purpose, which I appreciate more the older I get.
As a mom in Orlando, I’m especially loyal to desserts that chill well and still look good later. That kind of flexibility matters. Schedules shift. Kitchens get crowded. Someone always opens the fridge five times for no reason. Desserts that hold up well matter in my house.
I also think this recipe has strong Pinterest energy, and I mean that warmly. It looks classic, colorful, and just polished enough to make people save it for later. Then later actually comes, which is the whole goal.
So if strawberry cheesecake has felt like too much, this is your sign to stop circling. Start with softened cream cheese and steady mixing. Trust the slight jiggle. Let the chill time do its work. Then serve a slice that looks clean, tastes fresh, and makes the whole effort look very smart. That’s the kind of dessert math I’ll take every time. No drama needed. And yes, that matters.