St. Patrick’s Day is on the horizon, and it’s the perfect time to jump into some creative fun with your kids! This post is packed with 52 easy St. Patrick’s Day crafts, all designed to be simple, enjoyable, and mess-free. Over 40 of them require just three materials or less, making them ideal for busy moms who want to craft without the hassle of long supply lists.
Here’s what you’ll find:
- Quick and Easy Crafts – Perfect for little hands with minimal setup.
- Creative and Festive Ideas – From shamrocks to leprechaun traps, there’s something for every age.
- Minimal Supplies Needed – Most projects use things you already have at home.
- Pinterest-Worthy Fun – Cute crafts that make great keepsakes and shareable moments.
If you’re looking for stress-free ways to celebrate, these crafts are exactly what you need. Whether you want a last-minute activity or a full afternoon of crafting, there’s something here for every family.
So grab the glue, scissors, and a little creativity—it’s time to make St. Patrick’s Day extra fun with crafts your kids will love!
This site includes affiliate links; you can check the disclosure for more details.
52 Easy and Fun St. Patrick’s Day Crafts
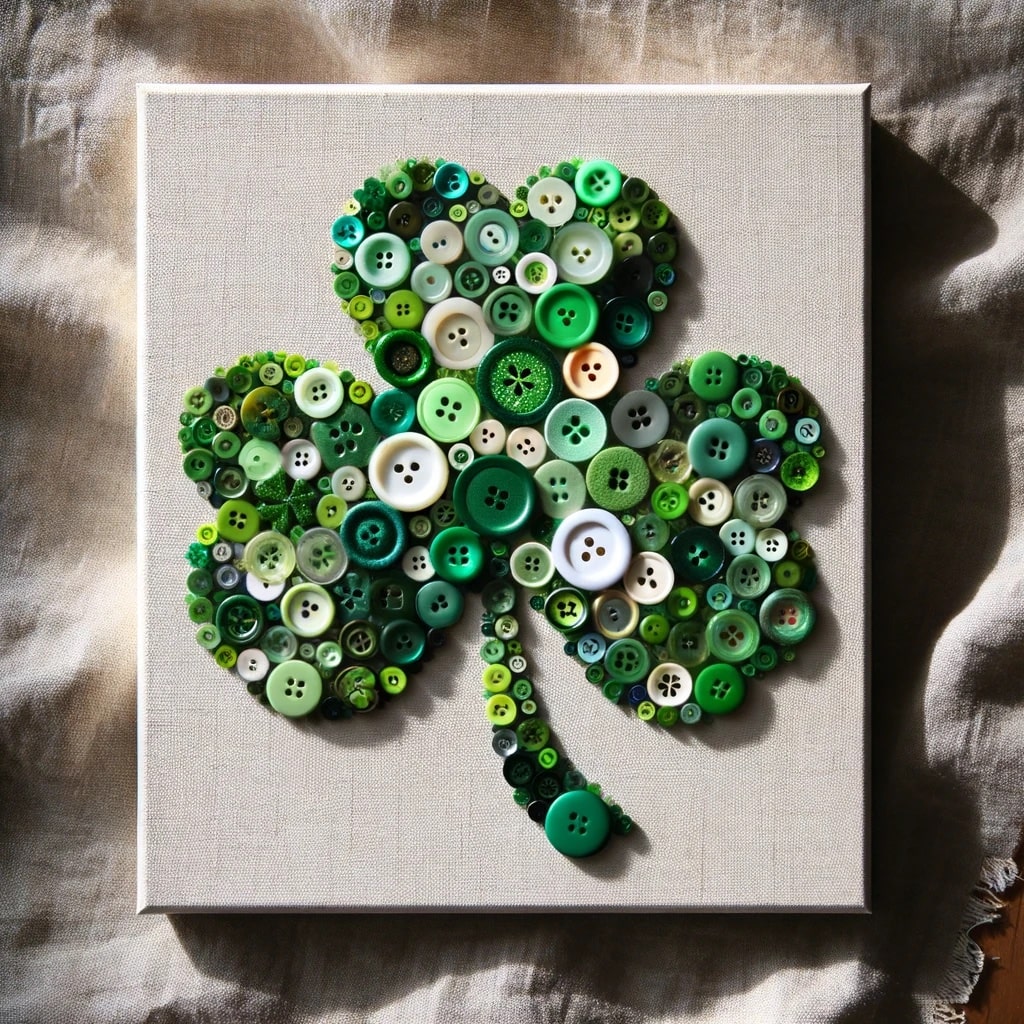
1. Shamrock Button Art
- Materials: Canvas, green buttons, glue, pencil
- Instructions: Draw a shamrock shape on the canvas. Fill the shape with green buttons, using glue to secure them.
- Description: This craft creates a beautiful piece of art that adds a touch of St. Patrick’s Day to your home décor.
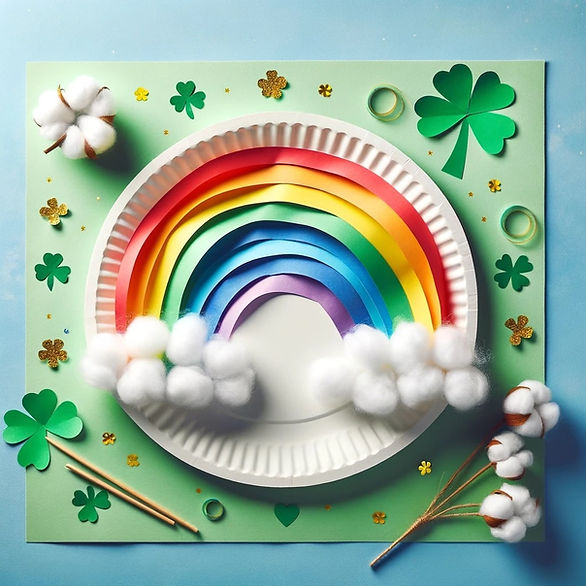
2. Rainbow Paper Plate
- Materials: Paper plate, cotton balls, glue, rainbow-colored paper
- Instructions: Cut the paper into small pieces for the rainbow. Glue colored paper to form each color band of the rainbow on the plate and add cotton balls for clouds.
- Description: Kids love this colorful craft, and it’s a cheerful decoration for the holiday.
3. Leprechaun Handprint
- Materials: Construction paper, paint, markers
- Instructions: Paint your child’s hand and press it on paper. Add features to make it look like a leprechaun.
- Description: A cute and personal craft that festively captures your child’s handprint.
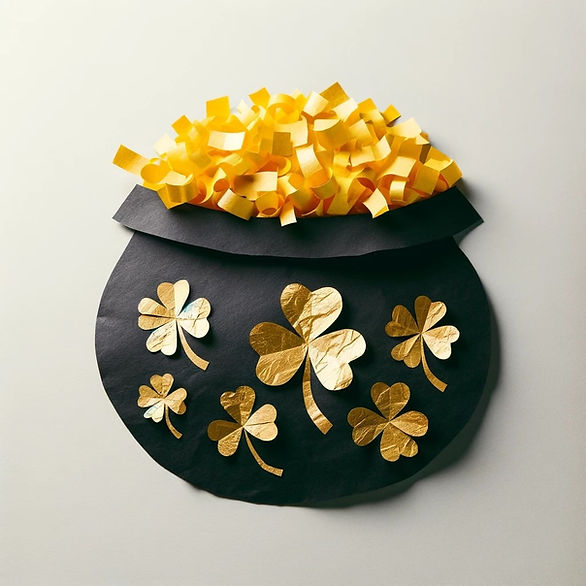
4. Pot of Gold Collage
- Materials: Black paper, yellow tissue paper (or yellow regular paper), glue, scissors
- Instructions: Cut a pot shape from black paper. Tear yellow tissue paper and glue it on as gold.
- Description: Simple and fun, this craft is great for younger kids and makes a lovely decoration.
5. Shamrock Salt Painting
- Materials: Glue, salt, watercolors, paper
- Instructions: Draw a shamrock with glue, sprinkle salt over it, and paint with watercolors.
- Description: A magical craft where the salt and paint interact to create a unique texture.
6. St. Patrick’s Day Crown
- Materials: Green construction paper, stickers, glue, tape
- Instructions: Cut a band and shamrock shapes from paper, decorate with stickers, and tape ends together.
- Description: Kids will love making and wearing this festive crown.
7. Rainbow Necklace
- Materials: Colored ziti pasta, string, paint
- Instructions: Paint the ziti pasta in rainbow colors, let dry, and string it.
- Description: A fun way to practice fine motor skills and make a colorful accessory.
8. Leprechaun Trap
- Materials: Box, paint, pipe cleaners, stickers
- Instructions: Decorate the box as a trap, and use pipe cleaners for a ladder. (I have detailed instructions here for you: How to Build an Irresistible Leprechaun Trap)
- Description: Get creative and see if you can catch a leprechaun with this imaginative craft.
St. Patrick’s Day Crafts: More Creative Ideas to Explore
9. Shamrock Suncatcher
This Shamrock Suncatcher craft is a fun and easy way to add some festive flair to your St. Patrick’s Day décor. It’s also a great project for kids of all ages and can brighten up any window with its colorful, light-catching design.
Materials:
- Clear contact paper
- Green tissue paper (various shades)
- Scissors
- Shamrock template (optional)
- Green construction paper (for border)
- Hole punch
- String or ribbon for hanging
Instructions:
- Prepare the Shamrock Template: If you’re using a template, place it beneath a piece of clear contact paper for guidance. Alternatively, you can freehand the shamrock shape later.
- Cut the Contact Paper: Cut two pieces of contact paper, making them large enough for your shamrock shape. Peel the backing off one piece and place it sticky side up on your work surface.
- Tear or Cut Tissue Paper: Tear or cut the green tissue paper into small pieces. This doesn’t have to be precise – irregular shapes add character to the suncatcher.
- Create the Tissue Paper Layer: Arrange the tissue paper pieces on the sticky side of the contact paper. Overlap them slightly to create a stained glass effect. Ensure the entire area of the shamrock will be covered.
- Outline the Shamrock Shape: If you didn’t use a template earlier, now is the time to place your shamrock template on top of the tissue paper arrangement to trace the shape. If you use a template underneath, you can simply follow the lines.
- Seal the Suncatcher: Take the second piece of contact paper, remove the backing, and carefully place it sticky side down over your tissue paper arrangement. Smooth it out to remove any air bubbles and ensure a good seal.
- Cut Out the Shamrock: Using scissors, cut out the Shamrock shape. If you’re doing this freehand, you can draw the shamrock shape on the contact paper before cutting.
- Add a Border (Optional): For a more finished look, cut a thin border from green construction paper and glue it around the edge of your shamrock.
- Punch a Hole and Add String: Use a hole punch to make a hole at the top of the shamrock. Thread a piece of string or ribbon through the hole for hanging.
- Display Your Suncatcher: Hang your shamrock suncatcher on a window where it can catch the light. The sunlight shining through will bring the colors to life!
10. Rainbow Windsock
- Materials: Blue paper, ribbon, cotton balls, glue
- Instructions: Create a cylinder with paper, attach ribbons at the bottom, and cotton on top.
- Description: Hang this outside and watch the colors dance in the wind.
11. Gold Coin Painting
- Materials: Plastic gold coins, green paint, paper
- Instructions: Dip the coins in paint and stamp them onto the paper.
- Description: This craft is a fun way to create festive art, and kids love the stamping process.
12. St. Patrick’s Day Clover Bookmark
This St. Patrick’s Day Clover Bookmark is not only a fun and easy craft to make but also a practical item that can be used in everyday life. It’s perfect for encouraging kids to read, and they can use their handmade bookmarks in their favorite books. Plus, these bookmarks make great gifts for friends and family members who love to read.
Materials:
- Green craft foam or heavy cardstock
- Scissors
- Hole punch
- Green ribbon or yarn
- Glue
- Green glitter or stickers for decoration (optional)
Instructions:
- Cut Out Shamrock Shapes: Start by cutting shamrock shapes out of green craft foam or cardstock. You can make these as big or as small as you like, but a size of about 2-3 inches is ideal for a bookmark.
- Decorate the Shamrocks: This is where you can get creative. Decorate the shamrocks with green glitter, stickers, or other embellishments. If you’re using glitter, apply a thin layer of glue to the shamrock and sprinkle the glitter over it.
- Punch a Hole: Once the shamrocks are decorated and dry, use the hole punch to make a hole at the top of each shamrock.
- Attach the Ribbon: Cut a length of ribbon or yarn, around 6-8 inches long. Thread the ribbon through the hole in the shamrock, and tie a knot at the end to secure it.
- Final Touches: Trim any excess ribbon and make sure all decorations are securely attached.
13. Leprechaun Beard
- Materials: Orange construction paper, elastic band, glue
- Instructions: Cut beard shape from paper, and add an elastic band to wear.
- Description: A hilarious and simple craft, perfect for silly dress-up play.
14. Rainbow Chain
- Materials: Colored paper strips, stapler, or tape
- Instructions: Link the strips into a paper chain in rainbow order.
- Description: This vibrant decoration brightens any room and is a great counting activity.
15. Clover Leaf Lei
- Materials: Green paper, string, hole punch
- Instructions: Cut shamrock shapes, punch holes, and string them together.
- Description: A festive necklace that’s perfect for any St. Patrick’s Day celebration.
16. Leprechaun Hat
- Materials: Green paper, black paper, yellow paper, glue
- Instructions: Create a hat shape from green paper, add a black strip and yellow buckle.
- Description: This cute hat is a fun accessory for any St. Patrick’s Day outfit.
17. Pot of Gold Mobile
- Materials: Black and yellow paper, string, hanger
- Instructions: Cut pots and gold coins from paper, and hang them from the hanger.
- Description: A charming mobile that spins and twirls, adding magic to the room.
18. St. Patrick’s Day Wreath
- Materials: Paper plate, green tissue paper, glue, ribbon
- Instructions: Cover a plate with scrunched-up pieces of tissue paper, and add ribbon to hang.
- Description: A simple and elegant wreath that brings a touch of Irish charm to your door.
19. Lucky Clover Patch
- Materials: Green felt, soil, small pot
- Instructions: Cut clovers from felt, and place in pot with soil.
- Description: A cute, no-maintenance clover patch that’s perfect for indoor decoration.
20. Rainbow Cloud Art
- Materials: Blue paper, cotton balls, colored ribbons
- Instructions: Glue cotton balls on paper for clouds, and attach ribbons as rainbows.
- Description: This adorable artwork brings a touch of whimsy and color to your walls.
Continuing the Craft Fun
21. Shamrock Stamps
- Materials: Potato, knife, green paint, paper
- Instructions: Cut a shamrock shape into a potato half, and use it as a stamp.
- Description: A classic craft that’s always a hit.
22. Leprechaun Puppet
- Materials: Paper bag, colored paper, markers
- Instructions: Decorate the bag to look like a leprechaun using paper and markers.
- Description: An interactive craft, these puppets are perfect for imaginative play.

23. Green Glitter Slime
This craft is not only fun for St. Patrick’s Day but also offers a wonderful sensory experience for kids.
Materials:
- 1/2 cup of clear glue
- 1/2 teaspoon of baking soda
- Green glitter (as much as desired for sparkle)
- 1 to 2 tablespoons of contact lens solution (must contain boric acid and sodium borate)
- A mixing bowl
- A mixing spoon
Instructions:
- Prepare Your Workspace: Lay out a newspaper or a plastic sheet to protect your surface. Have all your materials ready.
- Mix Glue and Glitter: In the mixing bowl, pour in 1/2 cup of clear glue. Add a generous amount of green glitter. Stir them together until the glitter is evenly distributed in the glue.
- Add Baking Soda: Sprinkle 1/2 teaspoon of baking soda into the glue mixture. Mix it thoroughly. The baking soda helps the slime to firm up and not be too sticky.
- Contact Lens Solution: Add 1 tablespoon of contact lens solution to the mixture. Mix it in completely. The slime will begin to form and pull away from the sides of the bowl. If it’s still too sticky, add a bit more contact lens solution, but be careful not to add too much or your slime will become stiff.
- Knead the Slime: Once the slime starts to form, take it out of the bowl and knead it with your hands. If it’s too sticky, add a tiny bit more contact lens solution and knead again. The warmth of your hands will help the slime reach the perfect consistency.
- Adjust Consistency: If your slime feels too sticky, add a little more contact lens solution and knead. If it’s too stiff, add a bit more glue to soften it.
- Play Time: Now your green glitter slime is ready! Stretch it, squish it, and have fun. Remember, slime is a great sensory tool but it should be used with supervision.
Tips:
- Slime should be stored in an airtight container when not in use to keep it from drying out.
- If the slime sticks to hands or surfaces, a little bit of soap and warm water will clean it up.
- Customize your slime by adding more glitter, or even a few drops of green food coloring for a deeper green color.
24. Irish Flag Mosaic
- Materials: Orange, white, green paper, glue, cardboard
- Instructions: Cut paper into small pieces and glue onto cardboard in the flag’s pattern.
- Description: A creative way to learn about the Irish flag and practice fine motor skills.

25. Leprechaun Hat Cup
These Leprechaun Hat Treat Cups are not only a craft but also a fun way to serve treats or favors at a St. Patrick’s Day gathering. They are super easy to make and can be a fun activity for kids. Plus, they add a festive touch to your St. Patrick’s Day celebration, doubling as adorable table decorations!
Materials:
- Green paper cups
- Black and yellow construction paper
- Scissors
- Glue or double-sided tape
- Green candies or treats
Instructions:
- Prepare the Cups: Begin with green paper cups. These will form the base of your leprechaun hats.
- Create the Hat Bands: Cut strips of black construction paper to wrap around the cups. These strips will act as the leprechaun hat bands. The width of the strips can be about an inch or so, but you can adjust according to the size of your cups.
- Add the Buckles: Cut small squares out of yellow construction paper to make the buckles for the hats. Then, cut out smaller squares inside these to create a buckle shape.
- Assemble the Hat: Glue or use double-sided tape to attach the black strips around the middle of each cup. Then, glue the yellow buckle onto the center of the black strip.
- Fill with Treats: Once your hats are ready, fill them with green candies or any St. Patrick’s Day-themed treats. You can also use them to hold small party favors.
26. Clover Leaf Prints
- Materials: Bell peppers, green paint, paper
- Instructions: Cut peppers in half, dip in paint, and stamp onto paper.
- Description: The natural shape of bell peppers makes perfect clover prints.
27. Rainbow Bracelets
- Materials: Elastic, colored beads
- Instructions: String beads onto elastic in a rainbow pattern.
- Description: A simple jewelry craft that’s fun to make and wear.
28. Shamrock Shake Up
- Materials: Empty water bottle, green beads, water, glitter
- Instructions: Fill a bottle with water, beads, and glitter, then seal.
- Description: A mesmerizing sensory bottle that’s fun to shake and watch.
29. Leprechaun Lookers
- Materials: Toilet paper rolls, green paint, decorations
- Instructions: Paint rolls green and decorate them to look festive.
- Description: Kids can use these to look for leprechauns or just play pretend.
30. Leprechaun Garden
- Materials: Small pot, soil, grass seeds, small decorations (like miniature mushrooms, gold coins, etc.)
- Instructions: Fill the pot with soil, plant grass seeds, and decorate with small items to create a magical leprechaun garden.
- Description: A charming craft that’s also a mini-gardening project, perfect for teaching kids about plant growth.
31. Shamrock Garland
- Materials: Green paper, string, tape or stapler
- Instructions: Cut shamrocks, and attach to string to create a garland.
- Description: Hang this across a room or window for an instant festive touch.
32. Rainbow Cloud Mobile
- Materials: Cotton balls, colored paper, string, hanger
- Instructions: Create clouds with cotton balls, and hang strips of paper as rainbows.
- Description: This charming mobile adds a splash of color and whimsy to any space.
33. St. Patrick’s Day Canvas Art
- Materials: Canvas, green and gold paint, painter’s tape
- Instructions: Use tape to create designs or words on the canvas. Paint over with green and gold. Remove tape when dry.
- Description: This craft is great for older kids or adults, resulting in a stylish piece of art for home decor.
34. Shamrock String Art
- Materials: Green string, nails, wooden board, hammer
- Instructions: Hammer nails in a shamrock shape, and weave string around the nails.
- Description: A beautiful piece of art that older kids and adults will enjoy making.
35. Shamrock Friendship Bracelets
- Materials: Embroidery thread in different shades of green, shamrock charm (optional)
- Instructions: Braid or knot the thread to create a bracelet, adding a shamrock charm if desired.
- Description: A lovely craft that kids can make and share with their friends as a symbol of friendship and luck.
36. Leprechaun Footprints
- Materials: Green construction paper, scissors, tape
- Instructions: Cut out small footprints and tape them to the floor leading to a surprise.
- Description: A magical touch that delights children, making them wonder if a leprechaun visited.
37. Rainbow Button Frame
- Materials: Old picture frame, colorful buttons, glue
- Instructions: Glue buttons in a rainbow pattern on the frame.
- Description: A creative way to repurpose an old frame and make a colorful decoration.
38. Clover Leaf Crown
- Materials: Green construction paper, tape or stapler
- Instructions: Cut paper into strips and shamrock shapes, and create a crown.
- Description: A regal and festive headpiece, perfect for St. Patrick’s Day.
39. St. Patrick’s Day Puzzle
- Materials: Green paper, markers, scissors
- Instructions: Draw a picture or pattern, and cut it into pieces for a puzzle.
- Description: A simple homemade puzzle that’s great for cognitive development.

40. Rainbow Pasta Art
- Materials: Pasta, food coloring, glue, paper
- Instructions: Color pasta with food coloring, and glue it onto paper in rainbow shapes.
- Description: A colorful and tactile craft, perfect for developing fine motor skills.
41. Leprechaun Paper Plate Mask
- Materials: Paper plate, green paint, colored paper, elastic string
- Instructions: Paint the plate green. Cut out eyes and a mouth. Add a paper hat and beard. Attach elastic string to wear as a mask.
- Description: This craft lets kids become a leprechaun for a day and is great for imaginative play.
42. St. Patrick’s Day Themed Dream Catcher
This St. Patrick’s Day-themed dream catcher is a fun craft to make and a beautiful piece of decor. The green hues and shamrock details bring a festive touch, while the dream catcher itself adds a whimsical and bohemian feel to any room. It’s a great craft for older kids and adults alike, offering a chance to get creative with patterns and designs.
Materials:
- A round hoop (can be a metal or wooden embroidery hoop)
- Green yarn or ribbon
- Various shades of green felt or construction paper
- Beads in green and gold
- Feathers in green, white, or natural colors
- Scissors
- Glue or a hot glue gun
Instructions:
- Wrap the Hoop: Start by wrapping the hoop with green yarn or ribbon. Cover it completely, securing the ends with a knot or a dab of glue.
- Cut Shamrock Shapes: From the green felt or construction paper, cut out several shamrock shapes. You can make them in different sizes for variety.
- Weave the Web: Cut a long piece of yarn or string. Tie one end to the hoop and weave a web inside the hoop. As you weave, you can add beads to the yarn for a little sparkle. Tie off the yarn once you’re satisfied with your web.
- Decorate with Shamrocks and Beads: Using glue, attach the shamrock shapes around the hoop or onto the yarn web. Intersperse with beads as desired.
- Add Feathers: Tie feathers at the bottom of the dream catcher with yarn. You can also string more beads onto these pieces for added decoration.
- Create a Hanging Loop: Cut a piece of yarn, form a loop at the top of the dreamcatcher, and secure it with a knot for easy hanging.
43. Leprechaun Hat Pinata
- Materials: Balloon, newspaper, green paint, glue, candy
- Instructions: Create a paper mache hat, paint it green, and fill it with candy.
- Description: A festive and fun addition to any St. Patrick’s Day party.
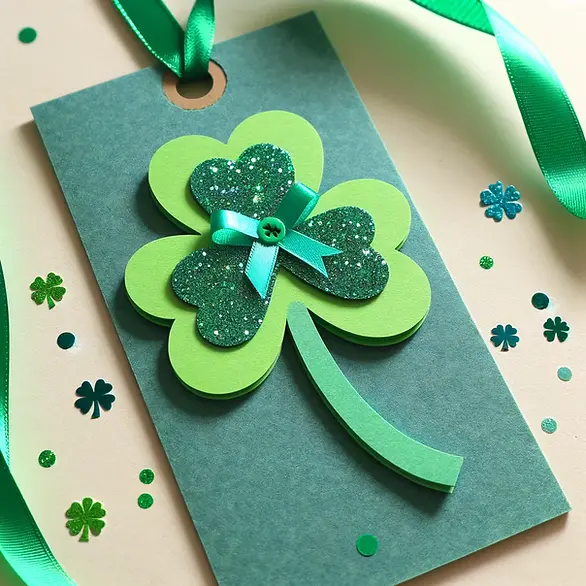
44. St. Patrick’s Day Card
- Materials: Cardstock, markers, stickers
- Instructions: Decorate the cardstock with festive designs and write a message.
- Description: A personal and heartfelt way to spread St. Patrick’s Day cheer.
45. Clover Leaf Wind Chimes
These Clover Leaf Wind Chimes are a unique and delightful craft, perfect for adding a touch of whimsy to your garden or balcony for St. Patrick’s Day. As the wind blows, the cans will clink together, creating a gentle and soothing sound. This project is not only a fun way to upcycle but also a great activity to do with kids, teaching them about recycling and crafting.
Materials:
- Tin cans of various sizes (like those from soup or beans)
- Green spray paint or acrylic paint
- Green ribbon or sturdy yarn
- A hammer and a nail (for making holes)
- Green beads, shamrock charms, or other decorative items
- Metal or wooden rods for hanging (optional)
Instructions:
- Prepare the Cans: Begin by thoroughly washing and drying the tin cans. Remove any labels and smooth out any sharp edges for safety.
- Paint the Cans: Spray paint or hand-paint the cans in different shades of green. You might need a couple of coats for an even finish. Let them dry completely.
- Make Holes for Hanging: Using the hammer and nail, carefully make two holes opposite each other near the open end of each can. These holes are for threading the ribbon or yarn to hang the cans.
- Decorate with Beads and Charms: Before attaching the cans to the ribbon or yarn, you can string beads, shamrock charms, or other decorative items for added embellishment.
- Assemble the Wind Chimes: Cut lengths of ribbon or yarn, and thread them through the holes in the cans. Tie knots inside the cans to secure them in place. Ensure that the cans are spaced out so they will clink together in the wind.
- Create the Top Hanger: If you’re using a rod for hanging, thread and tie the ribbons or yarns with cans onto the rod. Alternatively, you can hang each can individually from hooks or a tree branch.
- Final Touches: Adjust the lengths and positions of the cans as needed. You may also add additional decorative elements like bows at the top of each string.
46. Rainbow Jar
- Materials: Mason jar, colored sand or rice
- Instructions: Layer different colors of sand or rice to create a rainbow effect.
- Description: A visually stunning craft that’s soothing to make and beautiful to display.
47. Shamrock Wands
- Materials: Green paper, straws, glitter
- Instructions: Cut shamrocks, decorate with glitter, and attach to straws.
- Description: Perfect for pretend play or as cute decorations.
48. Leprechaun Hat Cookies
- Materials: Sugar cookies, green icing, small candies
- Instructions: Decorate cookies to look like leprechaun hats using icing and candies.
- Description: A tasty craft that doubles as a delightful snack.
49. St. Patrick’s Day Tic Tac Toe
- Materials: Cardboard, green and gold markers, small rocks
- Instructions: Draw a grid, paint rocks as shamrocks, and gold coins for pieces.
- Description: A classic game with a festive twist, ideal for family game night.
50. Irish Flag Tissue Paper Art
- Materials: White paper, green, white, orange tissue paper, glue
- Instructions: Tear tissue paper and glue it onto paper in the flag’s pattern.
- Description: An easy craft that teaches about the Irish flag and looks great on display.
51. Pot of Gold Magnet
- Materials: Black and yellow foam, magnet strips, glue
- Instructions: Cut a pot and gold coins from foam, glue them together, and add a magnet.
- Description: A charming and practical craft that adds a touch of whimsy to your fridge.

52. Rainbow Layered Soap
This Rainbow Layered Soap is not only a fun craft project but also a great homemade gift idea. Each layer of vibrant color makes for an eye-catching and delightful soap, perfect for St. Patrick’s Day or as a cheerful addition to any bathroom.
Materials:
- Clear glycerin soap base (available at craft stores)
- Soap dyes in rainbow colors (red, orange, yellow, green, blue, indigo, violet)
- Essential oils for fragrance (optional)
- Soap mold or a silicone loaf pan
- Microwave-safe bowl or double boiler
- Spoon or stirring stick
- Alcohol in a spray bottle (to remove bubbles)
- Thermometer (optional)
Instructions:
- Prepare the Soap Base: Cut the glycerin soap base into small chunks. This helps it melt evenly and quickly.
- Melt the Soap Base: Place a portion of the soap base in a microwave-safe bowl. Microwave in short bursts of 20-30 seconds, stirring in between, until completely melted. Alternatively, use a double boiler.
- Add Color and Fragrance: Once melted, add a few drops of soap dye to achieve the desired color (start with the first color of the rainbow, red). Stir well. If using, add a few drops of essential oil for fragrance.
- Pour the First Layer: Pour the melted soap into the mold to create your first layer. Spray the top with alcohol to remove any bubbles. Let it cool and harden, which can take around an hour.
- Repeat for Each Color: Melt more soap base for the next color layer (orange). Let the soap cool to about 120-125°F before pouring over the first layer. This prevents the layers from mixing. Spray with alcohol and allow it to set. Continue this process for each color of the rainbow.
- Monitor the Temperature: If you have a thermometer, use it to check the temperature of the melted soap before adding a new layer. This ensures the layers don’t melt into each other.
- Finish with the Last Layer: After completing all the rainbow layers, let the final layer cool and solidify completely.
- Unmold the Soap: Once all the layers have set and cooled (this can take several hours or overnight), gently remove the soap from the mold. If you use a loaf pan, slice the soap into bars.
- Curing: Allow the soap to cure for a day or two before using or packaging it. This ensures it’s fully hardened and gentle on the skin.
Final Thoughts
St. Patrick’s Day crafts are a great way to get kids excited about the holiday while keeping them busy with hands-on fun. Whether you’re making a simple shamrock suncatcher or a colorful pasta rainbow, these activities bring creativity to the celebration.
Here’s a quick recap of the craft ideas covered:
- Shamrock Suncatchers – A fun and colorful way to brighten up windows.
- Pot of Gold Craft – A simple paper project that kids love.
- Colored Pasta Rainbow – A bright and textured craft perfect for little hands.
- Leprechaun Trap – A creative way to spark imagination and St. Patrick’s Day excitement.
Crafting for the holiday doesn’t have to be complicated. With a few supplies and a little creativity, you can make fun keepsakes with your kids. Plus, these projects are perfect for sharing on Pinterest, whether for inspiration or to save for next year.
No matter which craft you choose, the goal is to have fun, make memories, and bring a little St. Patrick’s Day magic into your home.