Halloween treats for kids are basically an excuse to make snacks look ridiculous—in the best way possible. I’m talking cookies with candy eyeballs, cupcakes wearing little witch hats, and popcorn that looks like it crawled out of a haunted house. This is the one time of year when you can make food look “gross” and somehow it makes people want to eat it more. Go figure.
I’ve found that the most fun Halloween treats don’t require a culinary degree. You don’t need a blowtorch or twelve hours of prep. You just need a few basic ingredients, some clever assembly, and a willingness to lean into the weird. The goal isn’t perfection. It’s smiles. And maybe a few “ewws” that actually mean “this is amazing.”
What I love about themed treats is how much they add to the atmosphere. You could serve plain brownies at a Halloween party, sure. But wrap them in gummy worms, give them spooky names, and suddenly they’re the most talked-about thing on the table. Kids especially love food they can recognize from their favorite creepy-cute characters or Halloween icons. Pumpkins, ghosts, bats—you name it, they’ll eat it.
I’ve got enough years of snack duty under my belt to know that cute always wins over complicated.
The best part? You can make a lot of these treats ahead of time. That means less scrambling on party day and more time to actually enjoy watching the kids run around in costumes. I’ll walk you through eight ideas here, each one different enough that you won’t feel like you’re stuck in a cookie-cutter Pinterest board. Some are simple enough for a weeknight surprise, others are perfect for a big Halloween bash.
So grab your mixing bowls, your candy melts, and maybe a few paper towels because—fair warning—some of these get messy. Let’s make this Halloween table one the kids won’t forget.
Some of the links on this site are affiliate links, which just means I may earn a small commission (at no extra cost to you) if you make a purchase. You can check out my full disclosure for all the details.
Creepy Crawly Brownie Bites
These are the easiest “spooky” dessert I know. You start with brownies—homemade or boxed mix, totally your call. Cut them into bite-sized squares once they’ve cooled. Now here’s where the fun starts.
• Pipe a small swirl of chocolate frosting on each square.
• Add two candy eyes right in front.
• Use black or chocolate licorice strings for spider legs, tucking them into the frosting.
It’s basically arts and crafts but with sugar. The legs can go four on each side, or you can skip them if you’re going for “spider face” instead of full spider. I’ve noticed that kids love to “pull off” the legs first, so make them sturdy.
Want to go even creepier? Dust them with crushed chocolate cookies for a dirt effect. You can also swap licorice for pretzel sticks dipped in chocolate for a crunchier “leg.”
The nice thing about these is you can make them the night before and store them in an airtight container. They travel well too, so they’re perfect for sending to school parties.
If you’ve got a brownie pan that bakes them into individual squares, even better. No messy cutting and they hold their shape nicely. Plus, less cleanup. And cleanup is always the real win.
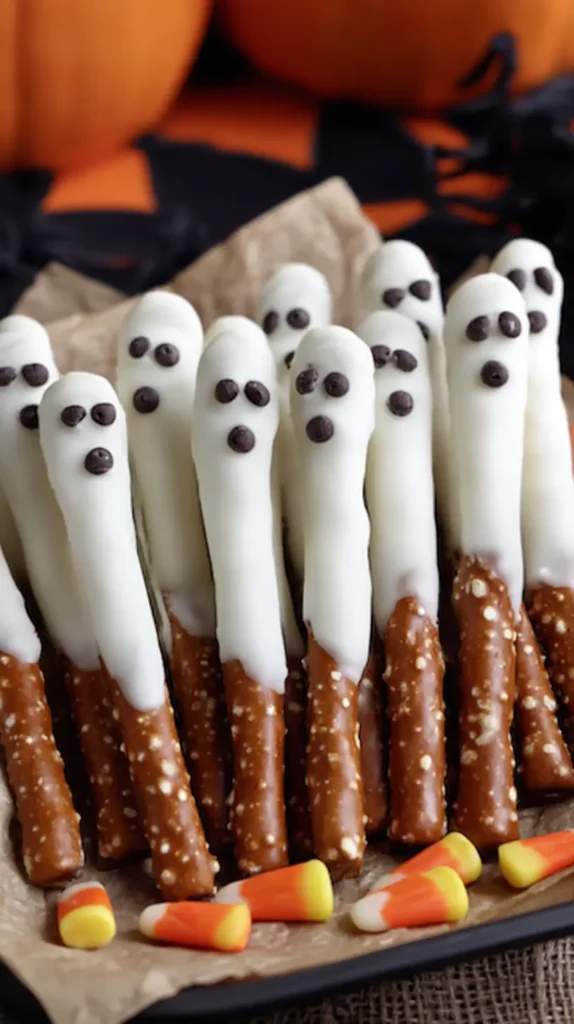
Halloween Treats for Kids: Ghostly Pretzel Rods
Pretzel rods are the unsung heroes of holiday snacks. They’re cheap, they hold up under all kinds of coatings, and they’re basically edible sticks for decorating. For these ghost pretzels, you’ll need white candy melts or almond bark.
Melt your coating in the microwave, stirring every 30 seconds until smooth. Dip each pretzel rod about three-quarters of the way, letting excess drip off. Place them on parchment paper. Before they harden, add mini chocolate chips for eyes and a mouth.
For a little texture, you can drizzle extra white coating back and forth over the top to give your ghosts a “flowy” look. Once they set, they peel right off the parchment.
These make a great grab-and-go treat at parties. Kids can hold them without a plate, which cuts down on dishes. If you want variety, you can also make “mummy” pretzels—just use candy eyes and drizzle thin lines of white coating across like bandages.
One tip: work in small batches so the coating doesn’t harden before you add the faces. And if you want the ghosts to stand up in a display, stick the uncoated ends into a foam block for drying. Instant centerpiece.
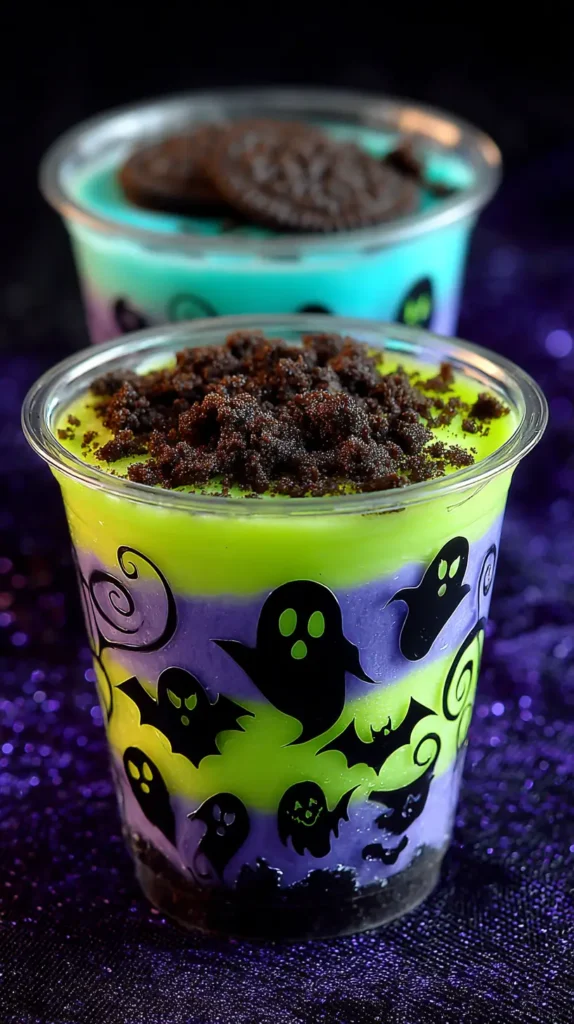
Haunted Lantern Jars With Edible Glow
Imagine little glowing jars on your treat table… and the glow is edible. Yep, that’s the twist. Start with small, clear plastic cups or mini mason jars. Paint the outside with simple spooky silhouettes—bats, ghosts, or crooked trees—using black food-safe paint or edible ink pens.
Inside, layer vanilla pudding that’s been tinted with neon food coloring—think green, orange, or purple. The glow effect comes from adding a small amount of tonic water to the pudding (just enough to make it safe and still taste sweet). Under a blacklight, it glows like something from a haunted science lab.
Top with crushed cookies for “dirt,” add a gummy spider, and stick in a mini spoon. Kids lose their minds when they see them light up under UV. They’re part decoration, part dessert, and a guaranteed photo moment for parents.
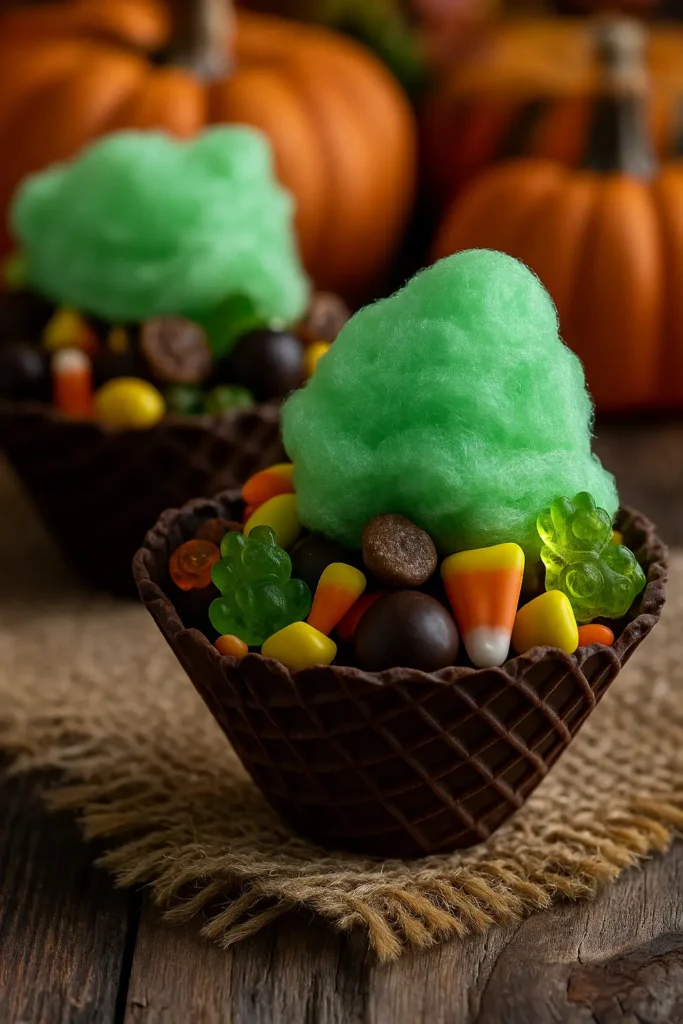
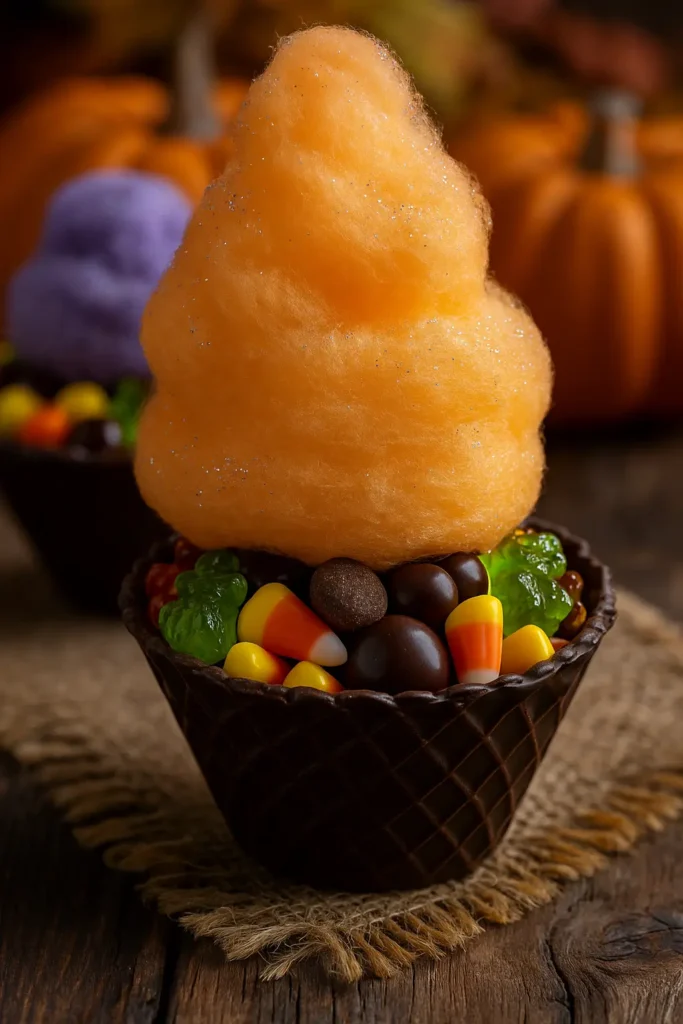
Cauldron Cotton Candy Bowls
These little cauldrons look like they belong on a Halloween party table—and they’re completely edible. Start with small waffle bowls, the kind usually used for ice cream sundaes. Dip the outside into melted black candy melts, letting the excess drip off, and set them on parchment paper to harden. The coating gives them a dark, cauldron look and a smooth finish.
Once the coating is set, flip the bowls right-side up and fill them halfway with “potion ingredients.” You can use chocolate candies, mini marshmallows, gummy frogs, or pretzels for a little crunch.
Right before serving, top each bowl with a big puff of cotton candy in green, purple, or orange. The cotton candy looks like billowing smoke coming out of the cauldron, and you can even mix colors for a more whimsical effect.
Finish with a dusting of edible glitter or colored sugar for extra sparkle. The best part? The waffle bowls are completely edible, so once the treats inside are gone, the “cauldron” itself becomes dessert too. They’re festive, easy to make, and guaranteed to disappear fast.

Pumpkin Patch Cupcakes
This one’s colorful, easy, and looks like you went way overboard (in a good way). Bake a batch of chocolate cupcakes. Once cooled, frost them with green-tinted buttercream.
Now comes the fun part—making the “pumpkins.” Use orange candy melts to coat round donut holes or cake pops. Let them set, then use a toothpick to create pumpkin ridges by pressing gently from top to bottom. Add a green M&M or a small leaf candy for the stem.
Place one pumpkin on each cupcake. You can even pipe little green vines curling out from the pumpkin. The result? A mini pumpkin patch right on the dessert table.
If you’re short on time, skip the ridges and just use orange frosting swirled high with a green candy stem. It still looks festive and takes a fraction of the effort.
These are especially fun if you set them out on a platter with crushed cookies sprinkled around for “dirt.” Kids love the little garden vibe, and it makes them more photogenic if you’re snapping party pics.
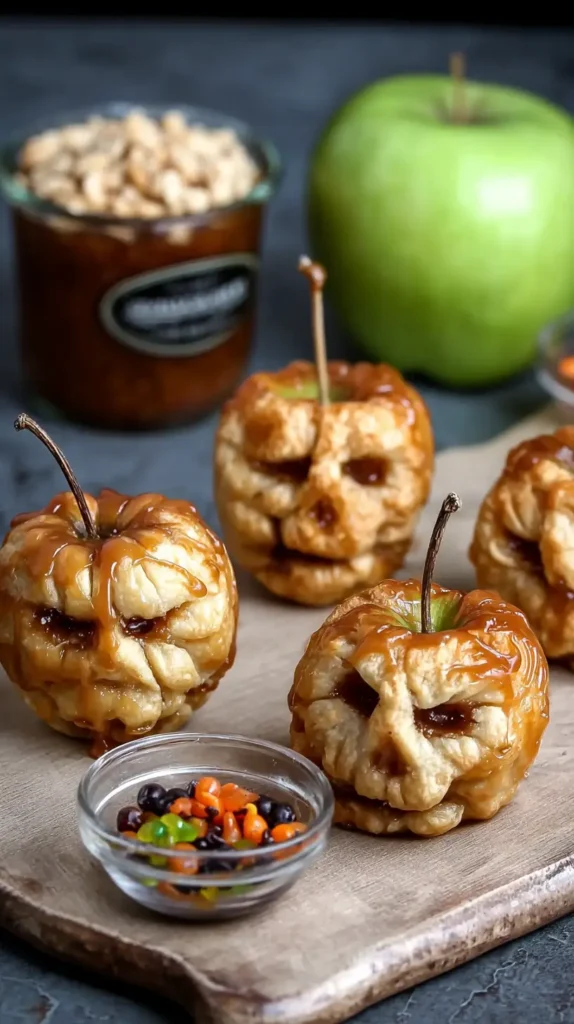
Shrunken Apple Head Caramel Dippers
This one’s equal parts creepy and adorable—and it’s almost guaranteed no one else will have it at their Halloween party. Think of those old-fashioned shrunken apple heads, but instead of hanging them on a string, you turn them into the cutest caramel apple dippers ever.
Here’s how you do it:
• Peel small apples (like Gala or Honeycrisp minis work best).
• Use a paring knife to carve simple faces—two eyes, maybe a crooked smile, even a little nose. Nothing fancy, just a few cuts so they “wrinkle” into shape.
• Soak them in lemon juice for a few minutes so they don’t brown too fast.
• Pop them in a 200°F oven for about four hours until they shrivel and get those amazing natural folds. They’ll look like tiny spooky grandmas, in the most charming way.
Once they’re cool, spear each one on a short skewer or lollipop stick. Serve them alongside a little cup of warm caramel dipping sauce and maybe some crushed nuts, mini chocolate chips, or Halloween sprinkles. Kids get to dunk their own “shrunken heads” into the caramel, which makes them giggle before they take a bite.
The best part? They’re way smaller than a full caramel apple, so they’re easier for kids to actually eat. Plus, the wrinkled faces make them an instant conversation starter.
And yes, the apple heads will keep their shape for a day or two if you store them covered in the fridge, so you can make them ahead.
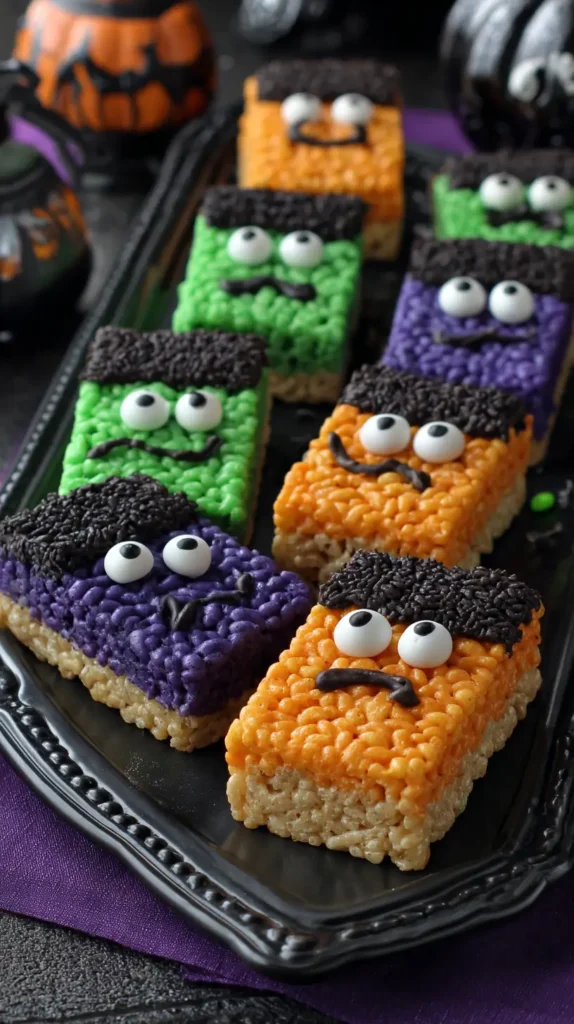
Halloween Monster Rice Krispie Treats for Kids
Rice Krispie treats are basically edible canvases. Make a pan of them, cut into rectangles, and get ready to decorate. Melt different colors of candy melts—green, purple, orange—and dip the tops of each treat.
Before the coating sets, add candy eyes—one big one, three little ones, whatever makes them look goofy. Use black icing to draw mouths, stitches, or even fangs. If you want wild hair, dip one end in chocolate sprinkles or crushed cookies.
You can stick them on lollipop sticks for a cleaner presentation. They look great lined up in a jar or standing upright in foam.
For variety, you can shape them into circles before dipping, then make them look like pumpkins, eyeballs, or little monster heads. This is a good one to let kids help with—they can go wild with designs and still end up with something cute.
And bonus: these hold up well, so you can make them a couple of days ahead if needed.
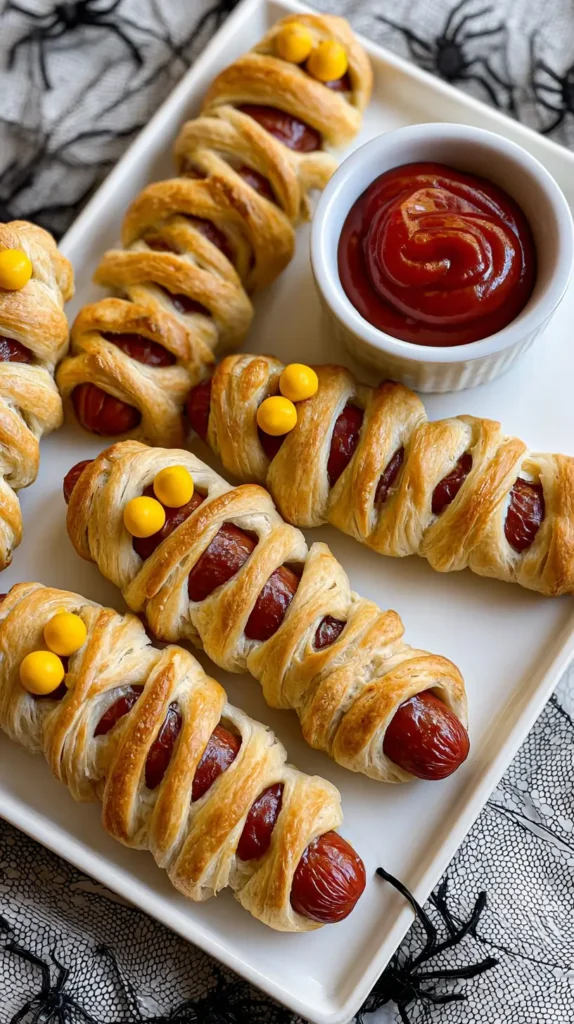
Mummy Hot Dogs
Savory treats deserve a place at the table too. For these mummies, you’ll need hot dogs and refrigerated crescent roll dough. Cut the dough into thin strips and wrap them around each hot dog, leaving a little gap for the “face.”
Bake according to dough package directions until golden. Once slightly cooled, dot on mustard or ketchup eyes, or use tiny pieces of black olive.
These are perfect for balancing out all the sugar at a party. They’re kid-friendly, handheld, and make the whole house smell amazing while they bake. You can serve them plain or with a side of “bloody” ketchup for dipping.
If you want mini versions, use cocktail sausages and bake for less time. They disappear fast, so make extra. Trust me on that.

Witch Hat Cookies
These are almost too easy. Use fudge-striped cookies as the base, chocolate-side up. Unwrap chocolate kisses and attach them to the center with a dab of frosting.
To decorate, pipe a frosting “band” around the base of the kiss, then add a sprinkle or tiny candy for a buckle. That’s it. Instant witch hats.
You can get creative with colors—purple, green, and orange bands all look great. If you’re making these for a crowd, they’re easy to stack and transport.
They’re also a no-bake option, which is always a plus when you’re juggling a dozen party tasks at once.
Candy Corn Popcorn Mix
This is more of a snack mix than a single treat, but it’s addictive and festive. Pop a big batch of popcorn (air-popped or microwave, your choice). Drizzle with melted white chocolate, then toss in candy corn, pretzels, and candy-coated chocolates in Halloween colors.
Spread it out on parchment to set. Once hardened, break into chunks and pile into a big bowl. Kids love grabbing handfuls, and it looks great in clear treat bags if you want to send it home as favors.
For extra crunch, you can add cereal or mini marshmallows. And if candy corn isn’t your thing, swap it for gummy pumpkins or seasonal jelly beans.
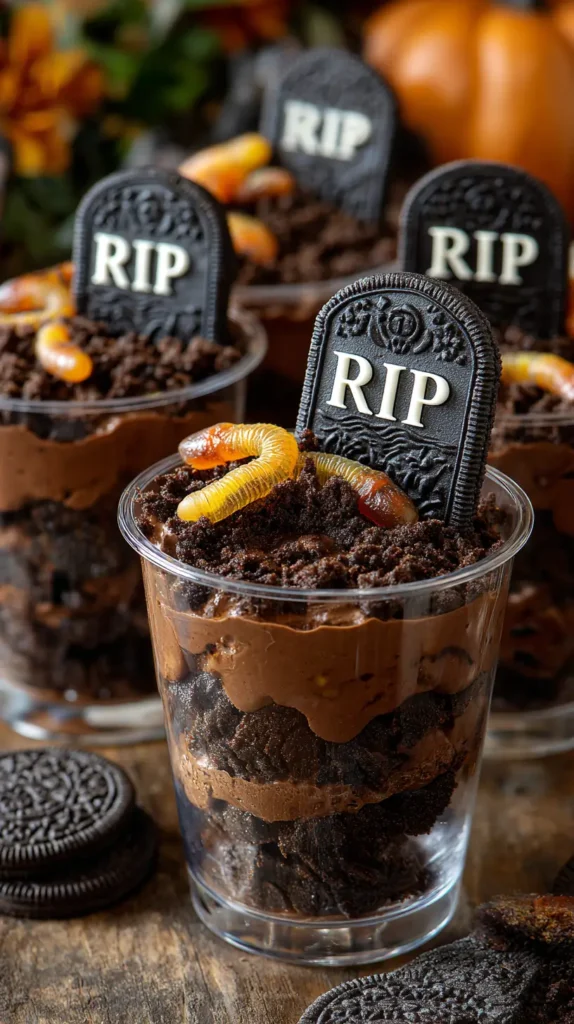
Halloween Graveyard Pudding Treat Cups for Kids
This one’s pure fun to assemble. Start with clear plastic cups. Fill halfway with chocolate pudding. Top with crushed chocolate cookies for “dirt.”
Stick in a cookie “tombstone”—you can write “RIP” on them with black icing if you want. Add a gummy worm or two peeking out from the dirt.
If you’re feeling extra, tint some coconut green and sprinkle it on as grass. You can also add candy bones for more detail.
These are great for portion control and can be made hours ahead. Just keep them chilled until serving. Kids love digging through the layers to find the “buried” gummies.
My Final Thoughts
I always feel like Halloween snacks are the perfect excuse to let your creativity go a little wild. It’s not about making everything flawless—it’s about making it fun. Kids remember the silly ghost pretzels and the lopsided monster cookies more than the perfectly piped cupcakes. And honestly, so do the adults.
By the time October rolls around in my house, I’m just looking for treats that bring more giggles than dishes.
When I’m planning out a table of Halloween treats for kids, I like to mix textures and colors. Some things crunchy, some soft, some chocolate, some fruity. That way every kid can find something they’re excited about. It’s the same trick I use when I’m pinning party ideas on Pinterest—you want variety, but you also want a clear theme tying everything together.
The other big tip? Don’t wait until the day of the party to try a recipe for the first time. Even the easy stuff can take longer than you think, especially if you’re decorating. A quick trial run can save you from last-minute stress (and frosting meltdowns—both literal and emotional).
I’ve noticed that the most popular treats are the ones kids can interact with a little. Pulling legs off a spider brownie, biting into a “pumpkin” cupcake, digging through pudding “dirt.” The sillier it feels to eat, the faster it disappears.
So make it colorful. Make it a little messy. Let the kids laugh at their food before they devour it. That’s the whole point of a Halloween treat table—they’re not just snacks, they’re part of the celebration.