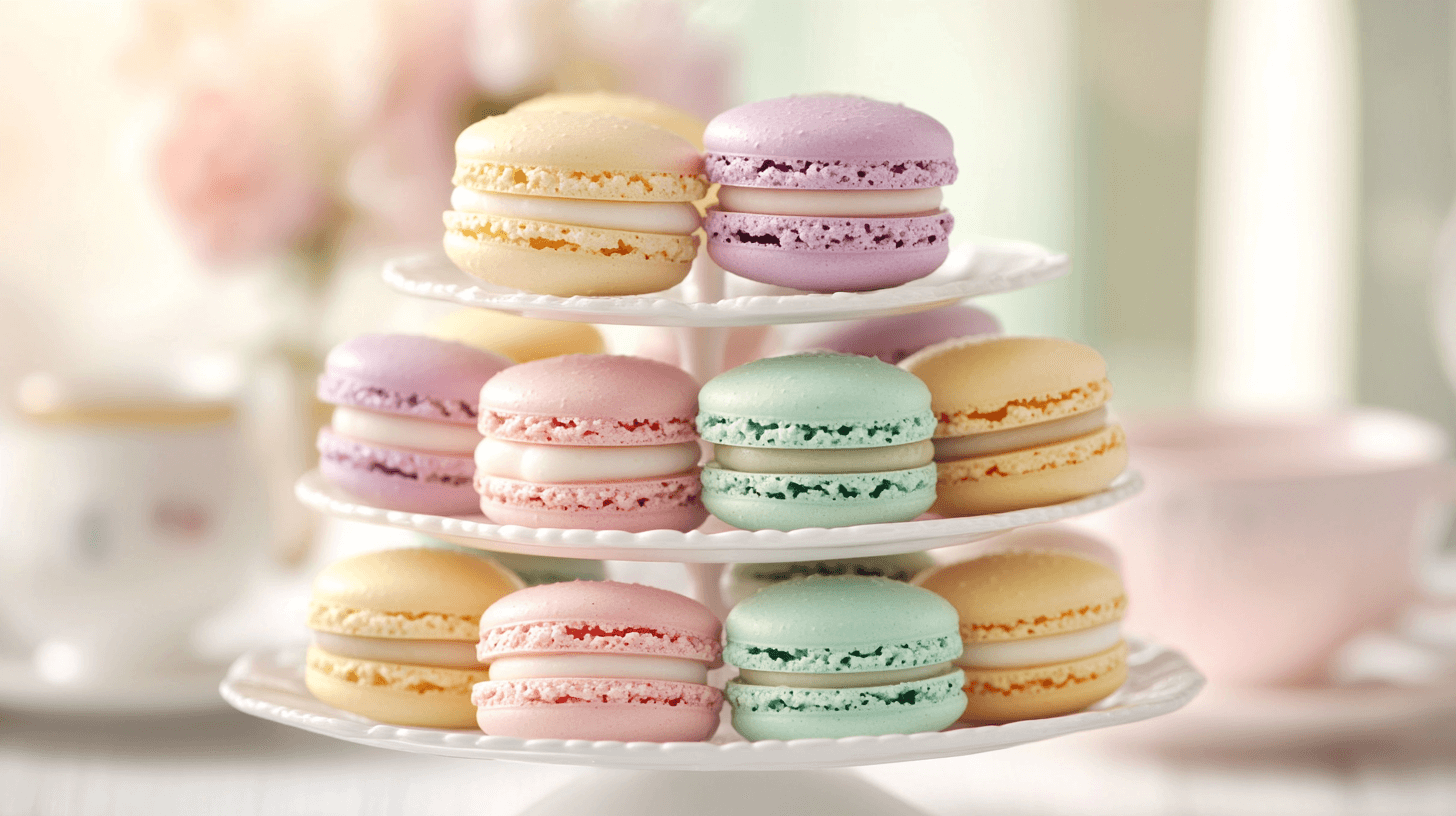
I have a soft spot for snacks. I always have. But not just any snacks—I’m talking about grazing tables. Big, beautiful, slightly chaotic spreads that feel like a party all by themselves. There’s something wildly satisfying about tossing down a roll of butcher paper and watching it slowly turn into an edible centerpiece.
If you’ve never built one before, don’t worry. You don’t need to be a fancy food stylist or have a cheese degree from France. All you need is a flat surface, some good grocery store finds, and a little know-how. That’s what this post is for.
I’m going to walk you through exactly how to build a grazing table. Step by step. No fluff, no filler. Just real-deal instructions you can follow without losing your mind or your money. We’ll start with the base, then move into the cheeses, the crackers, and everything else that makes people hover around the table like it’s a work of art.
I’ll share my go-to list of foods that never fail. I’ll also explain what types of cheese actually work well together and which ones melt into a mess if you leave them out too long. There’s a rhythm to building these tables, and once you get it, you’ll never want to host a party any other way.
As a mom of five who’s hosted more birthday parties, showers, and holiday get-togethers than I can count, I’ve learned that grazing tables are hands-down the easiest way to feed a crowd without losing my mind.
Whether you’re setting one up for a bridal shower, a birthday bash, or just a random Friday, this guide will help you pull it off without a single Pinterest fail. Let’s build a grazing table that makes people gasp when they walk in.
Let’s start with paper.
Some of the links on this site are affiliate links, which just means I may earn a small commission (at no extra cost to you) if you make a purchase. You can check out my full disclosure for all the details.
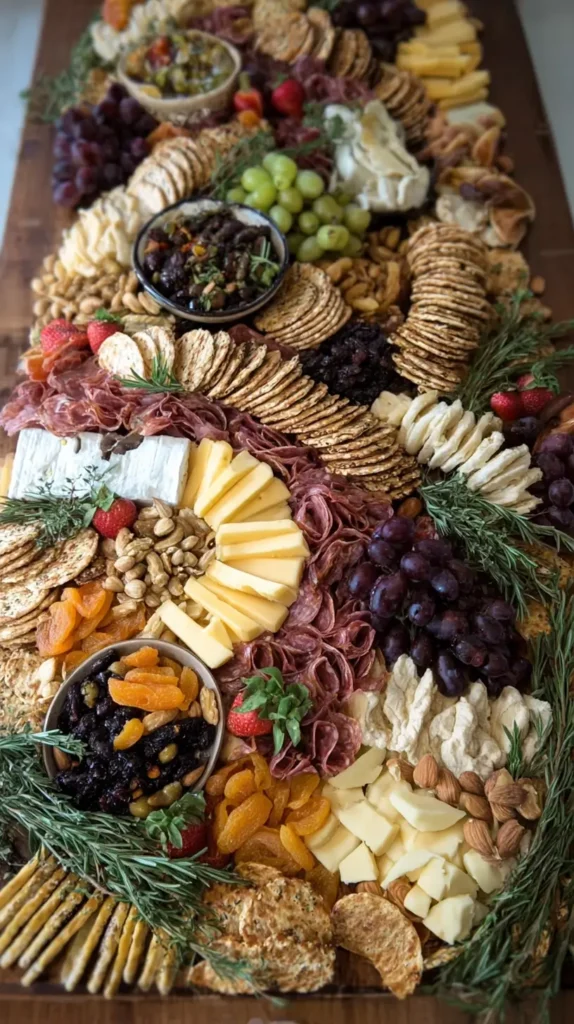
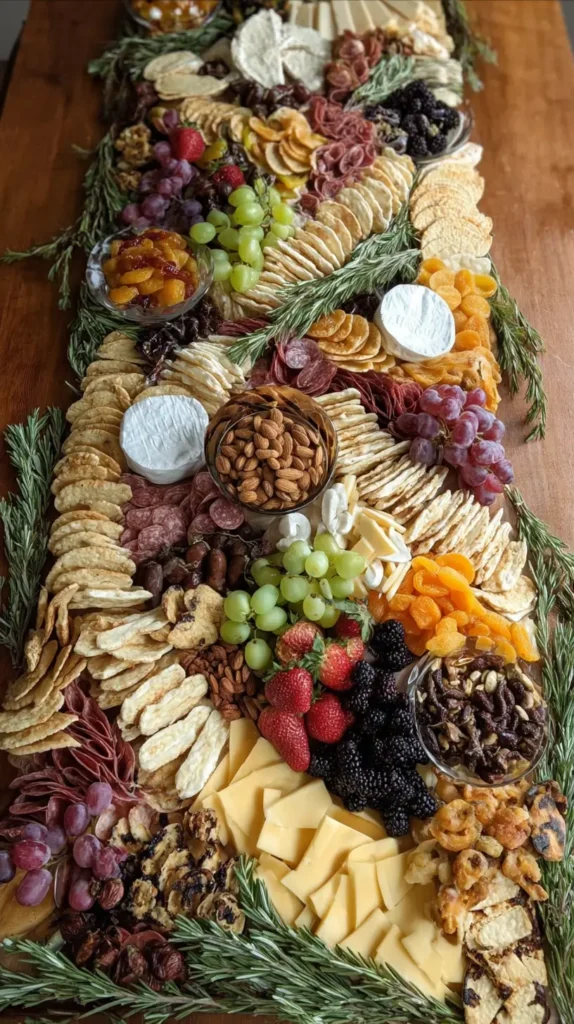
Roll Out the Grazing Tables Base Like a Red Carpet
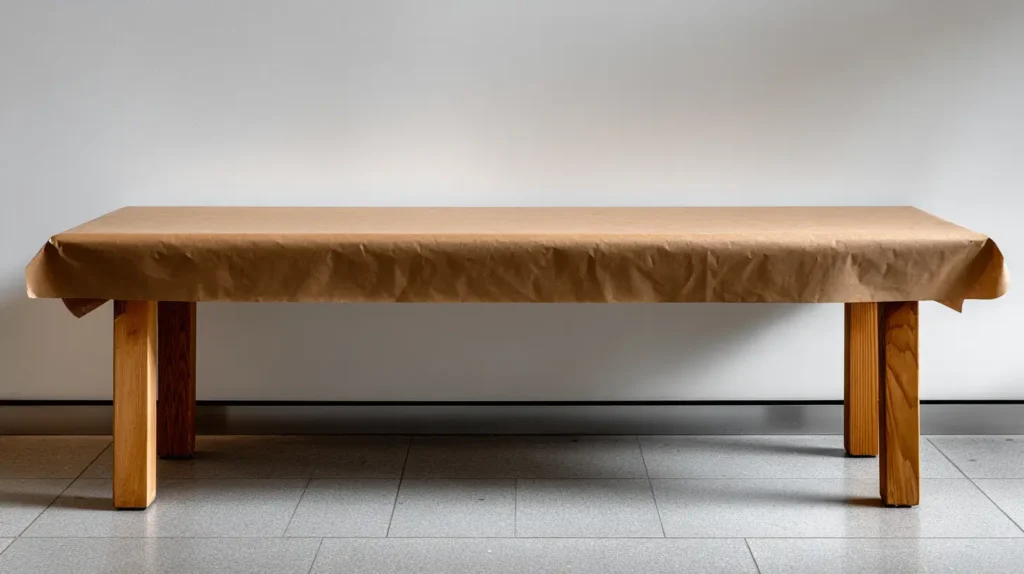
Before you stack one cracker, roll out your foundation. Butcher paper is your best friend here. It’s cheap, disposable, and makes everything you put on top of it pop. You can use a wood board if you like, but butcher paper adds a casual vibe that feels intentional. I roll mine out across the table like I’m setting up for a masterpiece.
Once that’s down, tape the edges underneath so it doesn’t curl up mid-party. If you’re outside, weigh it down with a couple small platters or heavy bowls until the food does the job. Now you’ve got a blank canvas, which is both exciting and slightly terrifying. But don’t panic. The next part is the fun stuff.
Start with your anchors. That means the biggest items—cheese blocks, fruit bowls, dips in small ramekins. These give structure and balance. I always place them off-center or diagonally from each other. If everything’s lined up like a grid, it looks stiff. And grazing tables? They’re anything but stiff.
Next, think about height. Stack crackers in a loose pile instead of laying them flat. Use small cake stands or upside-down bowls to lift a few items up. This adds visual interest and keeps things from looking like a buffet line at a sad conference.
Use greenery if you want. A few sprigs of rosemary or eucalyptus tucked around the edges go a long way. Just don’t overdo it. You’re not building a forest. You’re building a feast.
From here, it’s time to dive into cheese. Arguably the most important part.
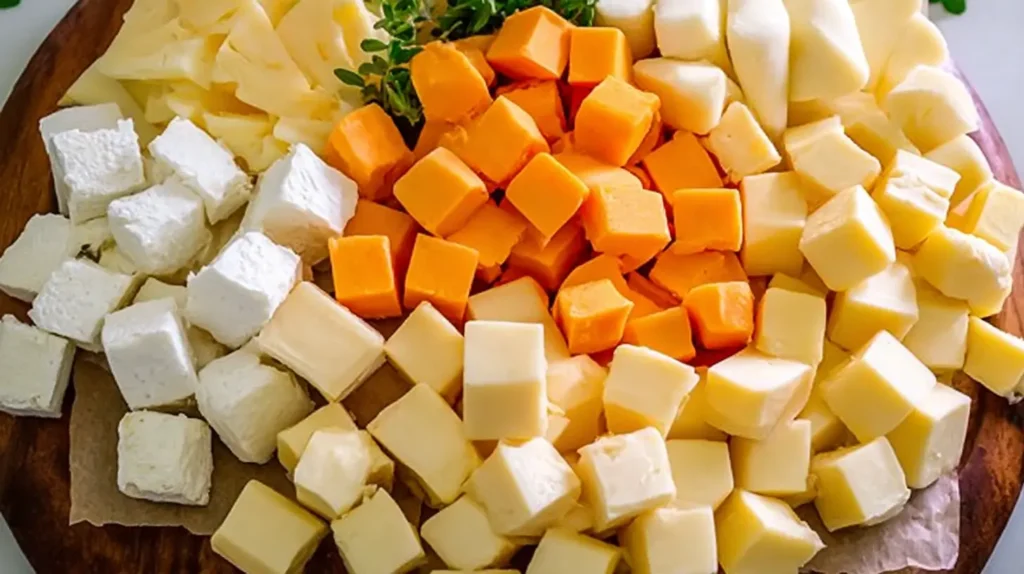
Choose Cheeses That Don’t Overwhelm
Cheese is where your grazing table earns its stripes. But don’t grab random wedges and hope for the best. You want a mix of textures and flavors. That means something soft, something firm, and something a little bold.
Here’s my cheat sheet:
- Soft: Brie, goat cheese, or camembert. These are creamy and mild.
- Semi-firm: Manchego, Havarti, or gouda. These slice cleanly and pair well with fruit.
- Sharp or aged: Aged cheddar or parmesan wedges bring the salty, nutty punch.
- Blue cheese (optional): If your crowd likes it, include a small piece of blue or gorgonzola.
You don’t need ten cheeses. Three or four is perfect. Aim for variety, not volume. And always let cheese come to room temp before guests arrive. It softens the flavors and makes slicing way easier.
Place cheese first. Not only because it’s the star, but because it takes up the most space. Cut a few slices or wedges into each block so people aren’t intimidated to be the first one in. Nobody wants to attack a solid cube of gouda with a plastic knife.
Add cheese knives or spreaders. Label them if you’re feeling fancy, but honestly, people will figure it out. If you have a round brie, top it with a drizzle of honey or a spoonful of fig jam. It looks fancy. It tastes better. And it takes ten seconds.
Next comes the crunch.
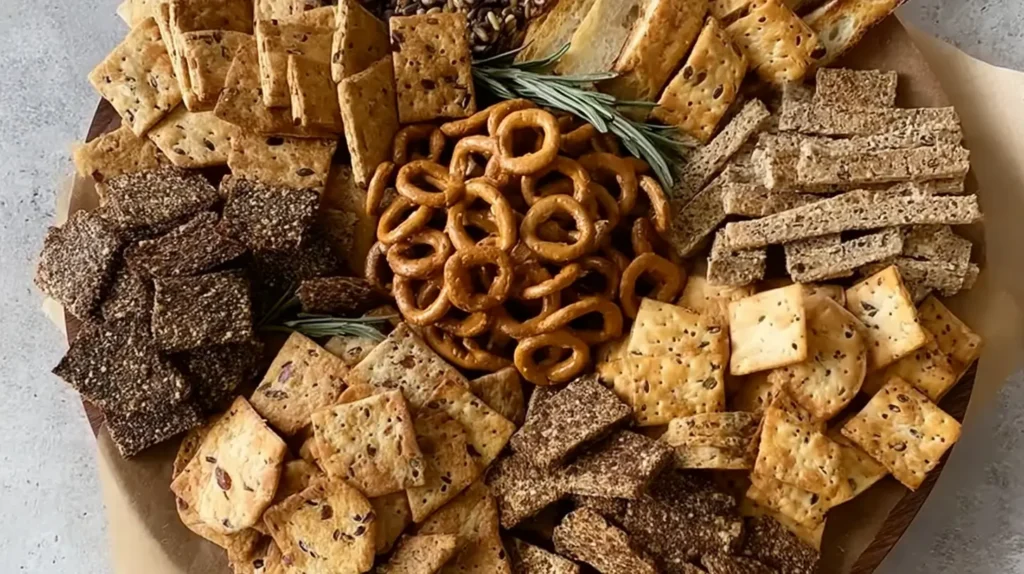
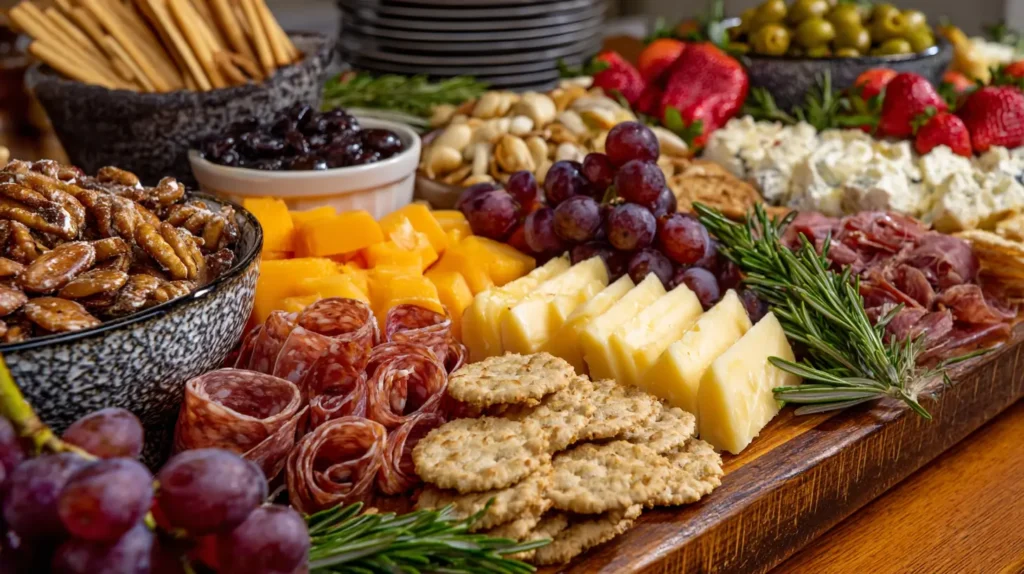
Crackers, Bread, and a Bit of Crunch
Crackers are the unsung heroes of grazing tables. They don’t get the spotlight, but they make the cheese worth eating. You want a mix of shapes and textures here, too. Long, square, seeded, plain. A little of everything.
Here’s what I usually grab:
- Water crackers (light, crisp, go with anything)
- Multigrain or seeded crackers (a little extra texture)
- Thin baguette slices (toasted is best)
- Pita chips or crostini (sturdy enough for dips)
Avoid anything overly flavored. Garlic-onion crackers can overpower every bite. Keep it simple. Let the toppings shine.
I place crackers in little piles, leaning against the cheese or tucked beside dips. Don’t worry if they’re not perfect. Grazing tables are about being a little messy, in a good way.
Want a wow factor? Add parmesan crisps or pretzel sticks in a small glass jar. It adds height and a different texture. Breadsticks work too, especially if you have dips that need scooping.
Once the crunch is covered, it’s time for some color.

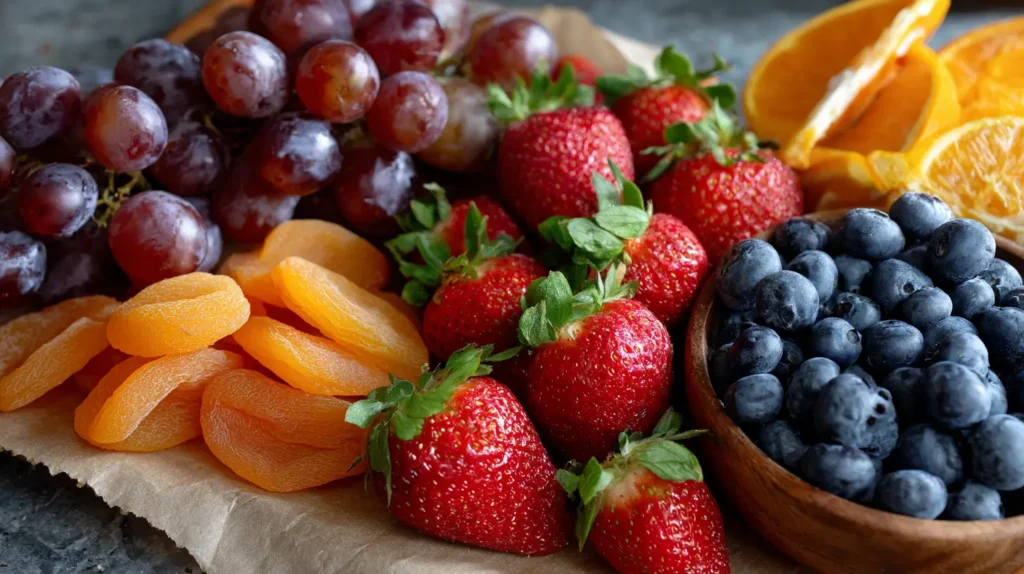
Fruit and Veggies for a Pop of Life on Grazing Tables
This is where the table comes alive. Bright strawberries, glossy grapes, fresh-cut cucumbers—these little bursts of color are what make people ooh and ahh. They also give people a break from all the rich stuff.
Go for variety, but don’t go overboard. Here’s what I keep on repeat:
- Grapes (keep them on the vine—it’s prettier)
- Strawberries (leave the green tops on)
- Blueberries or blackberries (tossed into little piles)
- Apple or pear slices (dip in lemon water so they don’t brown)
- Dried apricots or figs (they add chewiness)
- Cucumber rounds and baby carrots (crunchy and fresh)
Place fruit near the cheese it pairs with. Grapes love brie. Apples belong near cheddar. Little things like that make the bites taste better.
Veggies should go next to the dips. Don’t make people search. Put hummus and carrots close together like old friends. Cucumber rounds are also great with soft cheeses. They’re like little edible plates.
Throw in some fresh herbs or edible flowers if you want bonus points. But honestly? You don’t need them. Just stick with real, colorful produce and arrange it with a loose hand.
After that, we’re adding protein.
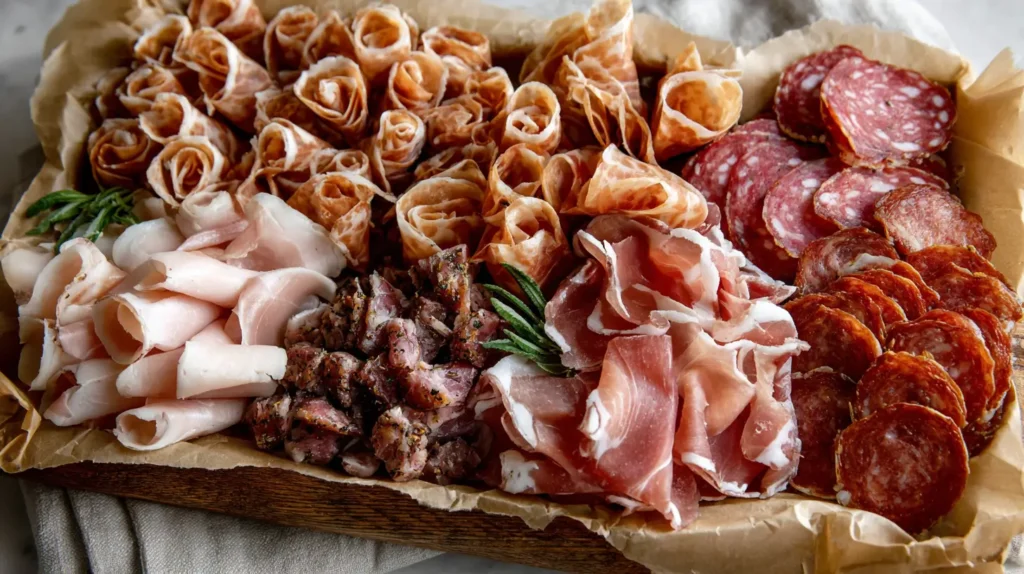
Charcuterie and Extras That Make It Feel Fancy
If cheese is the star, charcuterie is the moody co-star. It adds richness, salt, and a little something extra. Think cured meats, nuts, olives—anything that feels indulgent but easy to grab.
Here’s my short list:
- Prosciutto (fold it like ribbons)
- Salami (rolled or fanned out)
- Soppressata or peppered turkey slices
- Mixed nuts (almonds, cashews, or marcona almonds if you’re feeling bougie)
- Olives (in a little bowl so the oil doesn’t run)
Meats can go straight onto the paper, but I like to bunch them up a little. Don’t lay them flat like lunch meat. Give them movement. Let them curve and curl.
Tuck the olives into a ramekin. You can use a second one for pits if you’re serving whole olives. Same goes for nuts—small bowls or piles work equally well. Just make sure they’re not rolling all over the cheese.
Want to elevate it even more? Add a few pickles or peppadew peppers. Something with a little bite helps cut through the richness. Don’t forget a couple of spoons, toothpicks, or mini forks for messier items.
Now it’s time for the sweet stuff.
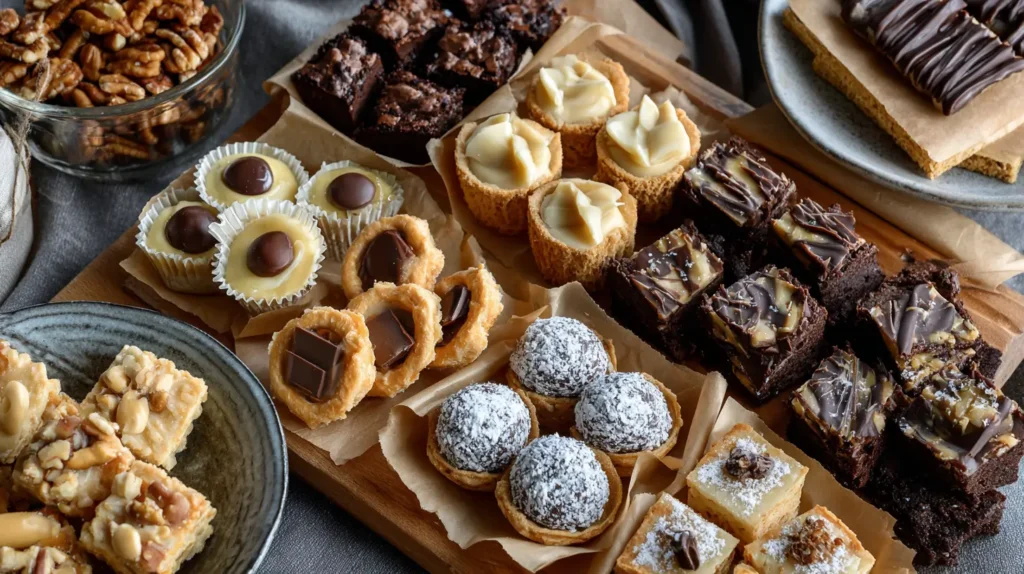
Sweet Bites That Tie It All Together
Dessert on a grazing table? Always. You don’t need a full cake or even a tray of cookies. Just a few bites that feel like a treat. It rounds out the whole experience.
Here’s what works great:
- Dark chocolate squares or chocolate-covered almonds
- Yogurt-covered pretzels
- Mini shortbread cookies
- Small handfuls of caramel popcorn
- Honeycomb or drizzled honey on brie
I usually keep sweets toward the edges of the table. That way, they don’t get mixed with meats and olives. You want salty and sweet, but not on the same cracker.
If you’re building a breakfast or brunch table, swap in mini muffins, sliced banana bread, or cinnamon rolls. For evening parties, chocolate bark or even candy works just fine.
You don’t need a dozen desserts. Just a handful of small, sweet bites to balance everything else. Think of it like the exclamation point at the end of the meal. Just enough to make people linger a little longer.
And now? You’ve got a full grazing table ready to serve.

Warm Surprises and Grazing Table Storytelling
You know what I’ve never seen on grazing tables but honestly think should be a thing? Warm elements. Hear me out. Everyone assumes a grazing table has to be cold meats, room-temp cheese, and fresh fruit. But there’s something oddly satisfying about sneaking in one warm, cozy item. It adds contrast, depth, and surprise—like when someone puts on socks straight from the dryer. So unexpectedly good.
The trick is to pick something that holds heat without turning weird. Think mini baked brie bites wrapped in puff pastry, set on a little ceramic dish to keep the warmth. Or tiny cast-iron skillets filled with roasted garlic you can smear on crusty bread. Even a pile of warm, salty pretzel bites nestled in parchment paper can totally shift the vibe. It turns a casual snack board into something that feels layered and intentional—like, “oh wow, someone really thought this through.”
Another idea I love (and have never once seen in real life) is building a theme around the grazing table. Not just color themes, either. I mean actual seasonal or emotional moods. A rainy-day grazing table with soft gray napkins, mushroom pâté, dark chocolate, and moody blue cheeses. Or a beach-day version with fresh mango, grilled shrimp skewers, coconut chips, and lime-dusted cashews. You’re not just laying out snacks—you’re telling a story with food. That’s the kind of grazing table that becomes the party’s whole personality.
And honestly? That’s where the magic lives. In the unexpected, warm little touches. In those moments when someone takes a bite and pauses because they didn’t see it coming. That’s when you know your grazing table isn’t just pretty—it’s personal. And that’s the best kind.
Final Thoughts
Every time I build one of these, I remember how much joy simple food can bring. There’s something about grazing tables that feels generous. You’re not just feeding people. You’re inviting them to connect, to hover, to talk between bites.
What I love most is that they don’t need to be perfect. In fact, they’re better when they’re a little messy. A half-eaten wedge of cheese, crumbs around the olives, a berry roll that went rogue—that’s all part of the charm.
You don’t need to spend a fortune either. Most of what I use comes straight from the grocery store. It’s the way you arrange it that makes it feel special. A little butcher paper, a few good cheeses, and a splash of color? That’s it. That’s the whole formula.
Living in a house where five kids can clear a table in sixty seconds flat, I’ve learned that grazing tables aren’t just pretty—they’re practical.
I’ve found that people remember the feeling of a grazing table long after the food is gone. It’s the kind of thing that shows you cared enough to do something extra, but not so much that it feels stiff or overly planned. It’s casual hosting, with a sprinkle of wow.
And if you want to share your masterpiece on Pinterest, I say go for it. Snap a photo before the swarm hits, because I promise it won’t last long. People will graze and graze until the whole thing is picked clean.
That’s when you know you nailed it.
And honestly? You totally will.