I love when something looks fancy but feels easy, and Christmas fudge works perfectly for that exact vibe. I’ve found that women appreciate treats that feel polished without requiring a full day in the kitchen. This idea hits that sweet spot, and it still feels fun. It also photographs beautifully, which helps when I’m pinning things later. Living in warm Orlando gives me even more reason to lean into holiday treats that don’t melt into chaos.
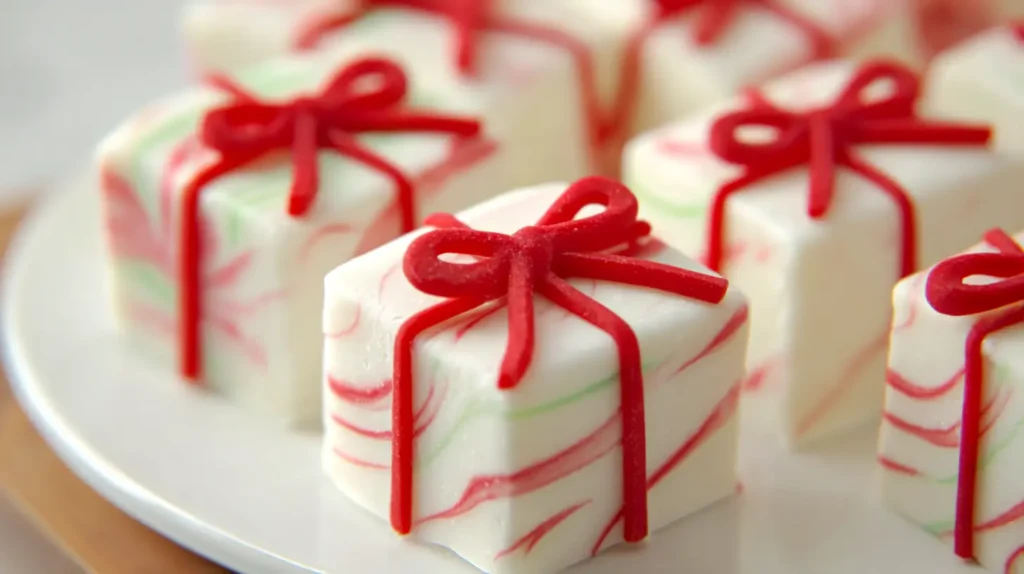
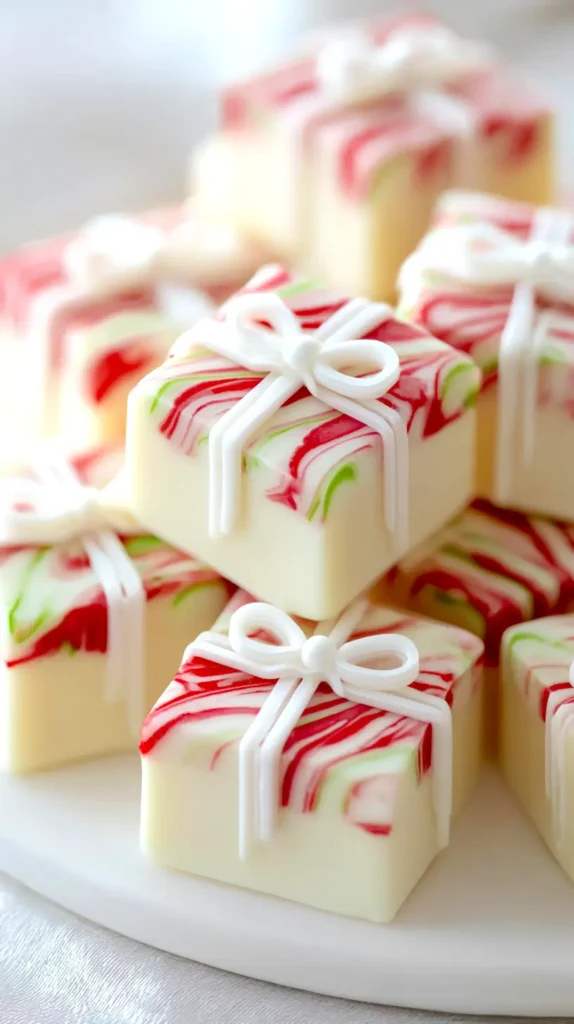
Sometimes I just want a dessert that makes people smile without forcing me to hunt down specialty supplies. Tiny fudge gift boxes do exactly that because they use simple ingredients. They also create a playful holiday look that still feels elevated. Each cube becomes a little present, and that simple twist turns your dessert plate into a scene.
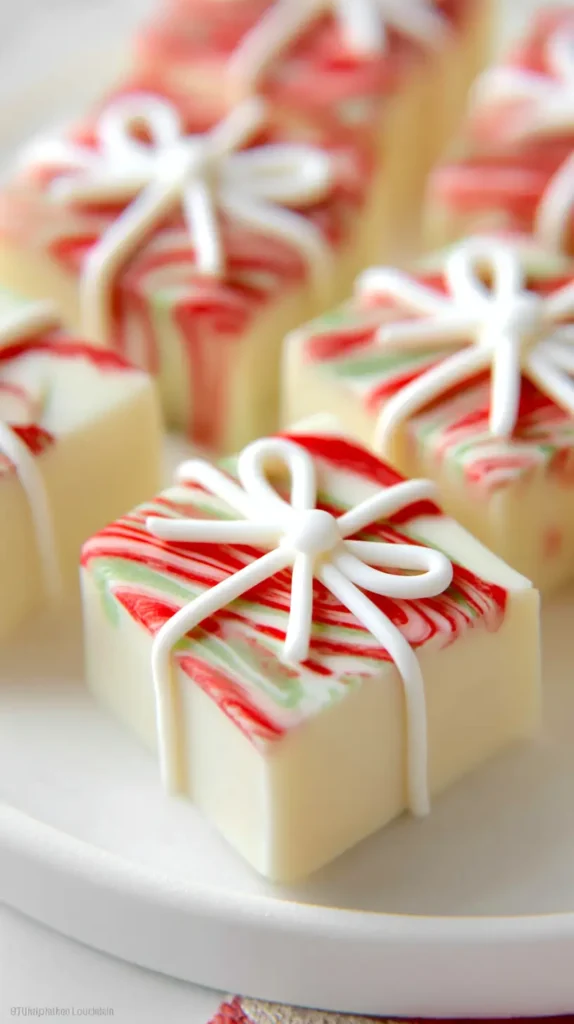
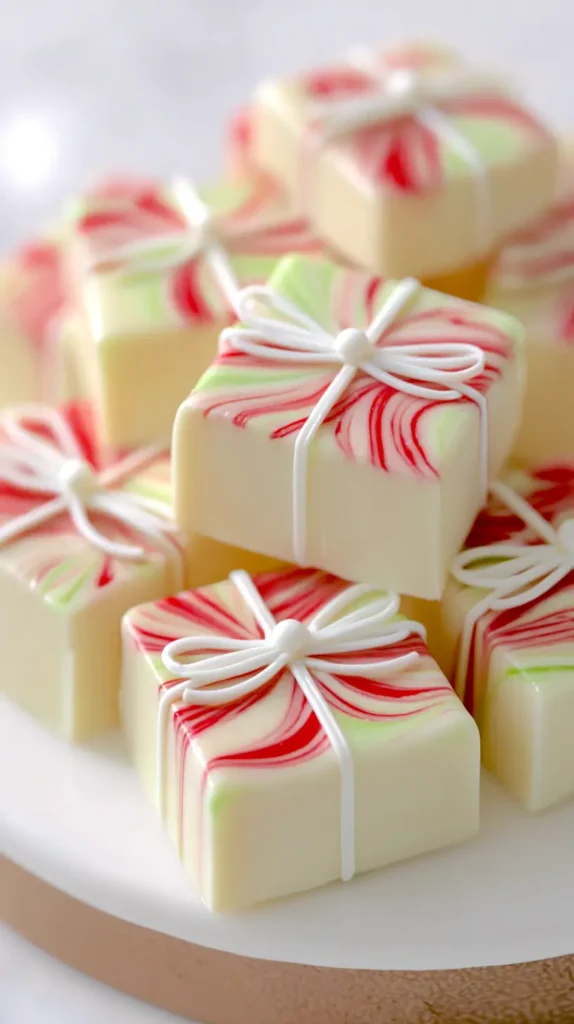
Even better, the steps are straightforward. Cut the fudge into neat squares. Drizzle thin ribbons of melted white chocolate. Add tiny bows. You’re done. Yet the finished tray looks like something you’d see at a boutique bakery. That’s the part that makes this idea so satisfying.
People love desserts that tell a visual story. These tiny gift boxes do that without being complicated. They invite people in, and they spark conversations. They’re also easy to share, which helps when you’re prepping holiday trays for friends or neighbors. I love when an idea does double duty like that.
Now let’s walk through how to make these sweet little boxes so they shine on your holiday table.
Some of the links on this site are affiliate links. This means that if you buy something, I might get a small commission at no extra cost to you. You can check out my full disclosure for all the details.
Fudge Gift Boxes Made Simple
This idea takes classic fudge and turns it into a tray of tiny presents. The steps stay simple, yet the look feels special. Christmas fudge doesn’t have to be complicated to earn compliments. With a little focus on clean cuts and cute details, these tiny gift boxes come together fast.
I start by making a firm batch of fudge that slices cleanly. Any flavor works, though chocolate, peppermint, or vanilla swirl look especially nice. Even store-bought fudge works if you need to save time. The key is neat cubes. Clean edges make the “gift box” shape feel intentional.
Then I set up a small decorating station because it keeps things tidy. I melt white chocolate in a microwave-safe bowl. I spoon the warm chocolate into a small piping bag. A freezer bag with the corner snipped also works. The goal is control.
Next, I place the fudge cubes on a sheet of parchment. I pipe one thin line across the top. Then I pipe another thin line to create that ribbon look. Keeping the drizzle narrow helps everything look crisp. Thick lines can overwhelm the small cubes.
After that, I create tiny bows. You can pipe simple loops from melted chocolate, or use small candy melts. Miniature white chocolate chips also look adorable. Each bow transforms the cube into a little present.
Here are details that help the boxes look polished:
• Use a warm knife for smooth cuts
• Keep the piping lines thin
• Add sprinkles sparingly
• Let the chocolate set fully
When you arrange the finished cubes in even rows, the tray looks like a field of tiny wrapped gifts. Kids love them, and adults appreciate the cute twist. Everything feels festive without extra stress.
White Chocolate Christmas Swirl Fudge
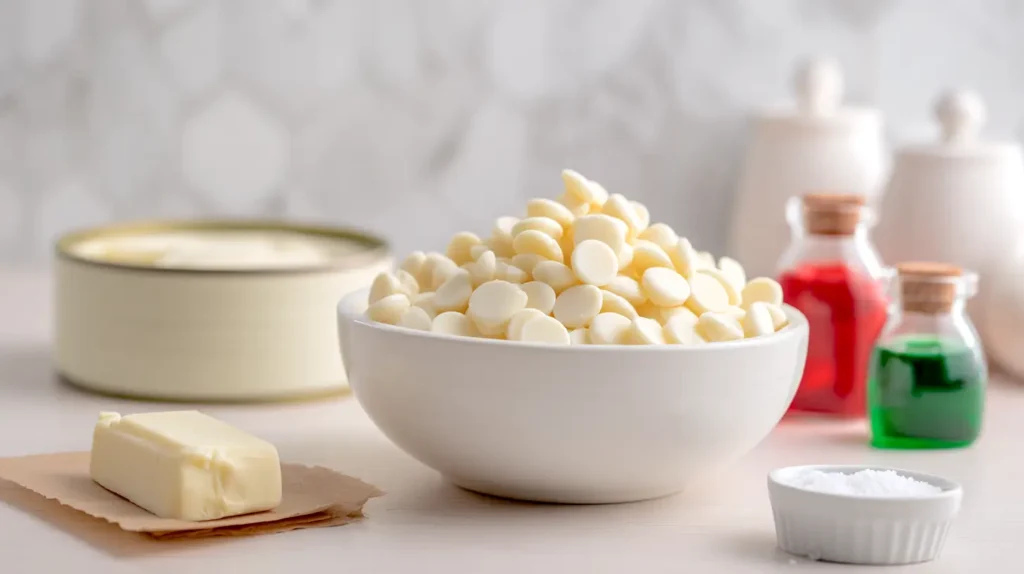
Ingredients
• 3 cups high-quality white chocolate chips
• 1 can (14 ounces) sweetened condensed milk
• 2 tablespoons unsalted butter
• 1 teaspoon vanilla extract
• 1–2 drops red gel food coloring
• 1–2 drops green gel food coloring
• Optional: pinch of salt for flavor balance
Instructions
- Line an 8×8 pan with parchment paper, leaving overhang on the sides.
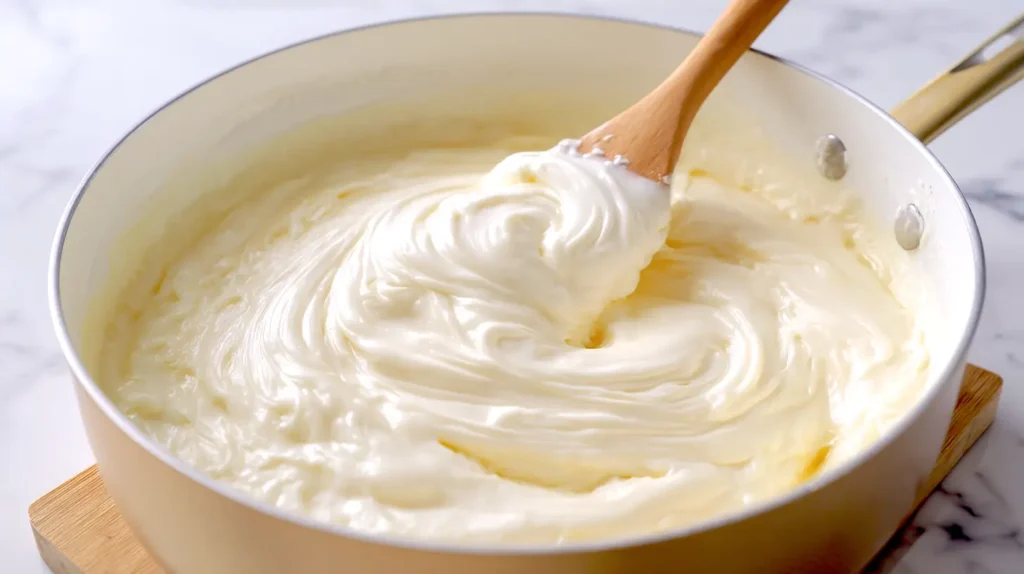
- Add white chocolate chips, sweetened condensed milk, and butter to a medium saucepan.
- Warm over low heat, stirring until smooth and fully melted.
- Remove from heat and stir in the vanilla extract and salt.
- Pour the mixture into the prepared pan and spread evenly.
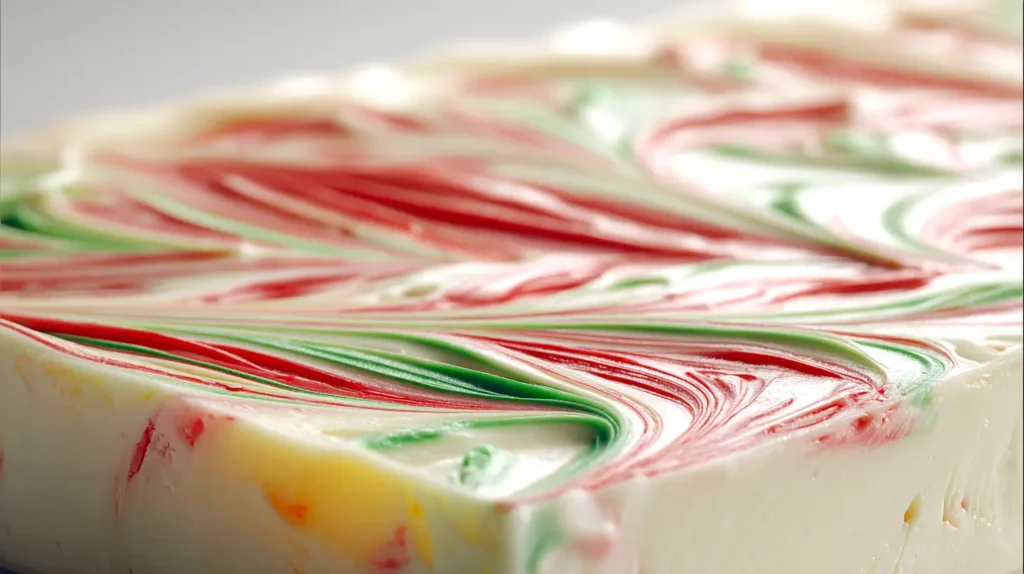
- Add one small dot of red gel food coloring and one small dot of green gel food coloring onto the surface.
- Drag a toothpick or skewer through the colors to create soft swirls.
- Tap the pan gently to settle the fudge and smooth the top.
- Chill for at least 3 hours, or until firm enough to slice cleanly.
- Lift the fudge from the pan using the parchment overhang.
- Slice into small, even cubes using a warm knife.
- Decorate each cube like a tiny present using thin white-chocolate drizzles and tiny chocolate bows.
Decorating Your Chocolate Gift Boxes
Decoration turns these simple cubes into charming holiday treats. Clean lines and tiny details bring them to life. Using small touches helps keep everything approachable. Even beginners can create a stunning tray by following a few easy steps. Christmas fudge works well here because it already has a sturdy base.
First, think about your color palette. I stick mostly with white chocolate because it keeps things bright. The contrast between dark fudge and white lines creates that classic ribbon look. Yet you can also add soft touches like pastel sprinkles or crushed peppermint. Light colors keep the boxes visually consistent.
Next, consider texture. Smooth drizzle always looks elegant, but tiny crunch elements create interest. Mini pearls work well because they sparkle without taking over. They also look great in photos. Because of that, I place them carefully so each cube feels balanced.
Then I add tiny bows. Here are easy bow ideas:
• Pipe a small loop and a second loop beside it
• Add a single chocolate chip as a simple bow center
• Use mini candy buttons for a clean look
• Shape melted chocolate into small teardrops
Each option keeps the process quick. Even so, little bows elevate the entire tray. People see the extra detail and assume the process was complex. That’s the fun part.
After decorating, let everything set. You want firm lines that don’t smudge when the cubes are arranged. Cooling on parchment helps. Once they’re set, I line them up in a neat grid because that layout creates the strongest presentation. Straight rows feel like a tiny candy village made of presents.
These decorated cubes look great on dessert tables and gift trays. They also give you an easy way to add charm to holiday gatherings without adding stress.
Display Ideas for Pinterest-Ready Fudge Boxes
Presentation matters because it can turn simple treats into a showpiece. I love finding ways to make desserts look fun without using complicated supplies. These tiny gift boxes shine when displayed with intention. Because they’re small, they look best when grouped tightly. The grid layout also performs well on Pinterest because it creates an eye-catching pattern.
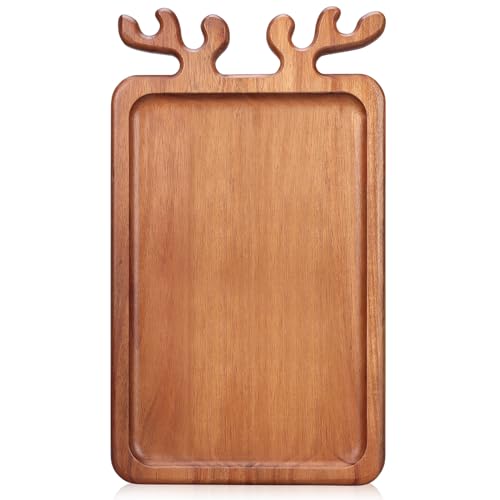
I’ve found that a white or cream background works especially well. It helps the cubes stand out and gives the scene a winter feel. Wooden boards also add warmth. Choosing a board with a pale tone keeps the colors balanced and bright.
For added charm, here are some display ideas:
• Arrange them in perfect rows
• Place them in a large shallow box lined with parchment
• Create color-blocked rows using different fudge flavors
• Add a small ribbon beside the tray for atmosphere
• Scatter a few tiny snowflake sprinkles nearby
Each idea enhances the look without taking away from the gift box theme. Less is more because the cubes already carry the visual weight.
Lighting makes a big difference too. Natural window light creates soft, even shadows. I avoid strong overhead lighting because it can make the chocolate look dull. Side light adds depth and keeps the fudge looking rich. If I want a warmer holiday feel, I place a small strand of fairy lights in the background. They stay blurred but add a cozy glow.
For serving, I love using low platters. The lower height keeps the gift box effect strong. Tall stands distract from the grid. Because these treats are bite-sized, guests enjoy picking them up easily.
This display approach turns simple cubes into a festive centerpiece. It also makes your dessert spread feel more intentional without adding work. Christmas fudge becomes the highlight of the table in the easiest possible way.

Layered Ribbon Blocks for Extra Charm
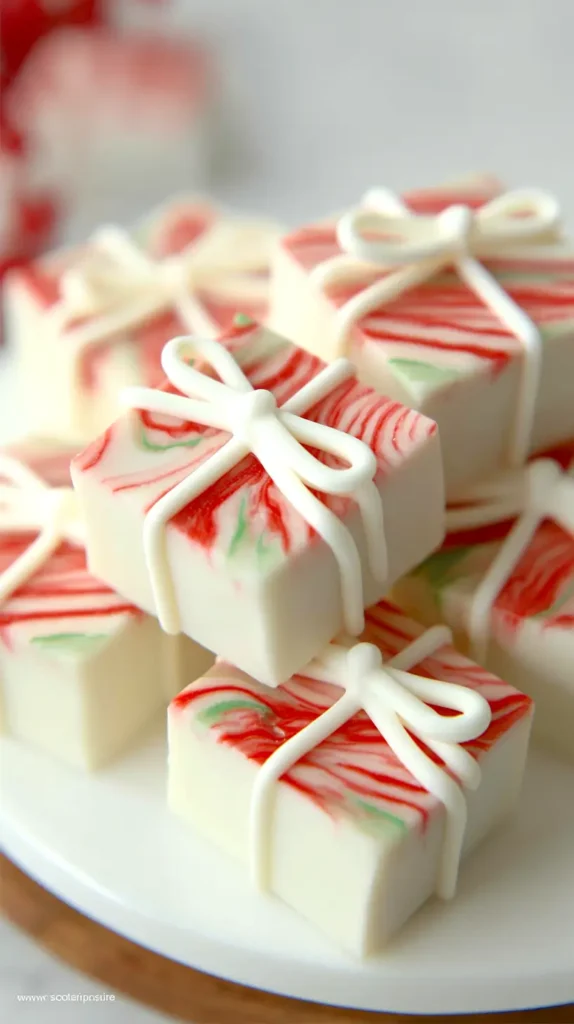
I love adding a twist that feels new, and layered ribbon blocks do exactly that. This idea takes your Christmas fudge cubes and gives them a tiny “wrapped package” effect on the inside, not just on the top. It looks impressive when someone takes a bite because the colors run through the cube like little stripes. The trick is creating thin layers that stack neatly without turning the fudge into a project that feels overwhelming.
I keep each layer simple because clean lines help the whole idea work. I pour a small amount of white chocolate fudge into the pan, let it set for a few minutes, then add a thin colored layer made from a tiny bit of tinted fudge. A second white layer goes on top, and the cube ends up with a soft ribbon stripe baked right into the center. The look stays subtle, but it still feels special.
This idea works well because the layers assist with slicing too. They help the cubes hold their shape, and the color lines guide your cuts. Even better, the stripes peek through on the sides and make each piece look like it has a wrapped band under the outer drizzle. I love how this adds depth without turning the prep into a multi-step science project. I’ve found that the best effect comes from keeping the colored stripe narrow so the treat still feels like a classic fudge bite. Wide stripes can overwhelm the small cubes.
The layered ribbon look gives every piece a polished finish and makes the entire tray more interesting without distraction. You end up with tiny gifts that reveal a hidden surprise inside, and that small detail adds value in a way that feels fresh, doable, and fun.
White Chocolate Christmas Fudge
Ingredients
- 3 cups white chocolate chips
- 1 can 14 ounces sweetened condensed milk
- 2 tablespoons unsalted butter
- 1 teaspoon vanilla extract
- 1 pinch salt
- 1 to 2 drops red gel food coloring
- 1 to 2 drops green gel food coloring
- ½ cup melted white chocolate for ribbon drizzle
- Small white candy pearls or a small dot of white chocolate for bow centers
Instructions
- Line an 8×8 pan with parchment paper and leave overhang on two sides.
- Add the white chocolate chips, sweetened condensed milk, and butter to a medium saucepan.
- Warm over low heat while stirring until the mixture is smooth and fully melted.
- Remove the saucepan from the heat.
- Stir in the vanilla extract and a pinch of salt.
- Pour the fudge mixture into the lined pan and spread it into an even layer.
- Place one small dot of red gel food coloring and one small dot of green gel food coloring on the surface of the fudge.
- Drag a toothpick or skewer through the color dots to create soft top-surface marbling.
- Tap the pan gently on the counter to settle the mixture.
- Refrigerate the fudge for at least 3 hours or until fully firm.
- Lift the fudge from the pan using the parchment overhang.
- Cut the chilled fudge into neat one-inch cubes using a warm knife.
- Drizzle thin lines of melted white chocolate across the tops of the cubes to resemble ribbon.
- Add a tiny dot of white chocolate or a small white pearl candy to the center to create a simple bow.
- Let the decorations set completely before serving or packaging.
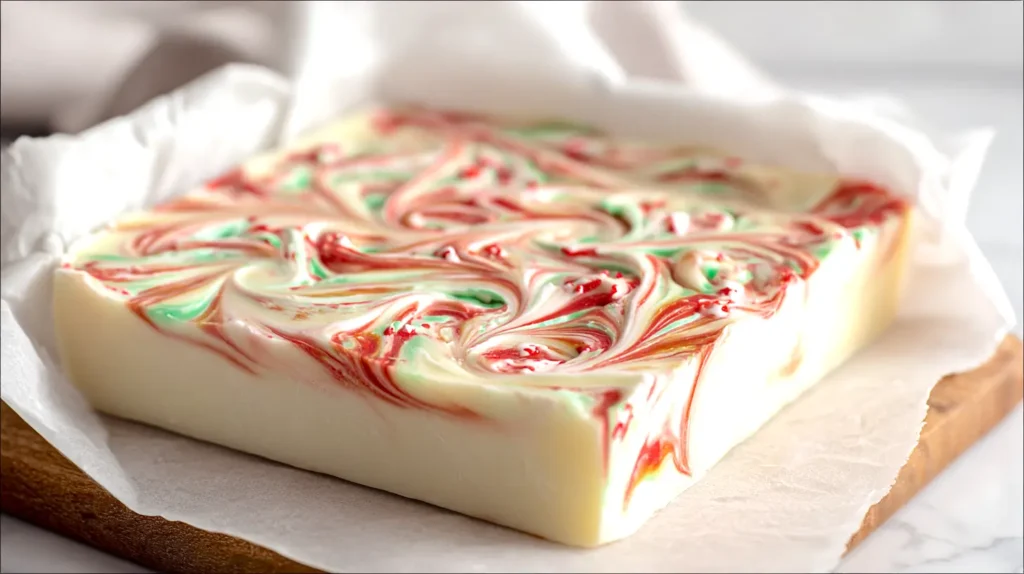
Swirled-Through Color Variation for a Different Look
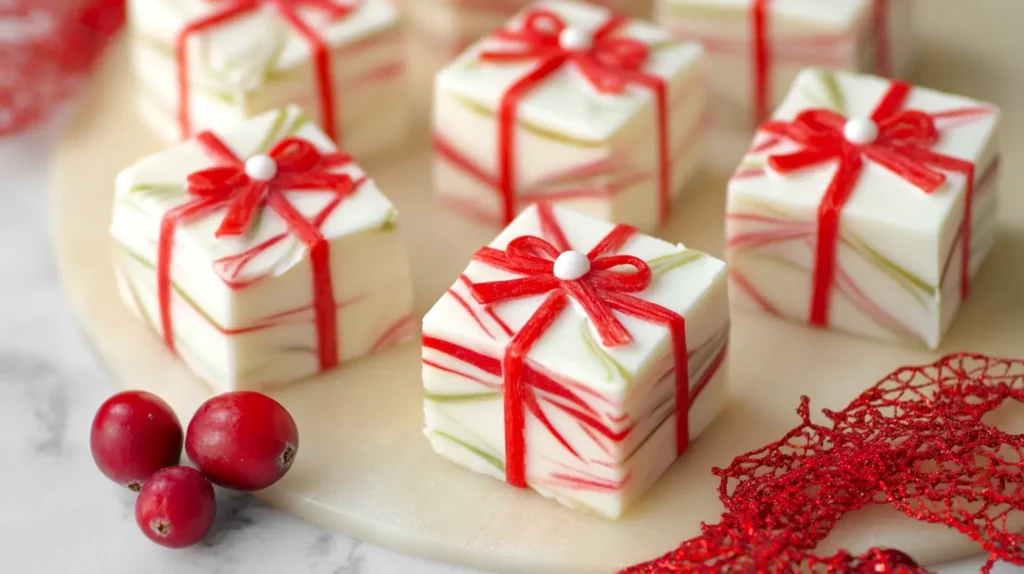
Sometimes the top-only swirl gives a clean, modern look, but there’s another option that adds even more movement. When a tiny amount of red and green color is folded gently through the warm fudge before pouring, the marbling spreads through the entire block. This creates streaks on the sides as well as the top, and every cube shows soft ribbons of color when you slice it. I use a slow dragging motion instead of stirring because stirring blends the colors too much and dulls the pattern. A light hand keeps the lines sharp and helps the colors stay bright after chilling. The finished cubes look more detailed, and the variation works well if you want every angle of the fudge to show some holiday pattern.
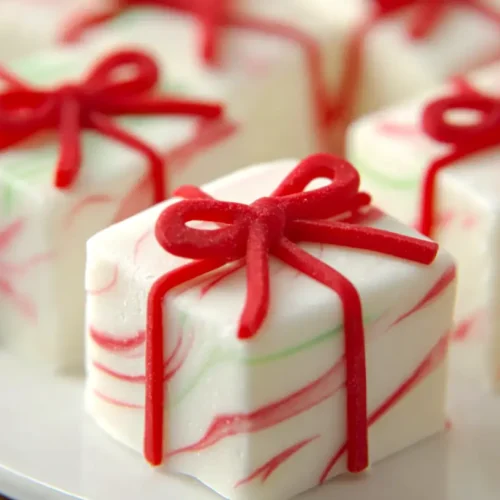
This full-swirl version also helps if you prefer a bolder look that holds up in photos taken from the side. Because the pattern carries through the center, each piece feels more decorative even before you add the ribbon drizzle. I usually keep the top design simple when I use this variation. The marbling already draws attention, so a single white chocolate cross on top keeps everything balanced. The cube still reads as a tiny present, but the extra detail underneath gives the candy a little personality.
You can also switch up the bow if you want a different finish or something easier to handle. Melted white chocolate works, but thin red licorice strings cut into tiny loops give you a soft candy bow that sits neatly on the surface. Fruit leather strips can be trimmed into small bow shapes too, and they stay flexible without losing definition. A small sugar pearl in the center adds a clean touch that feels polished without extra effort. I’ve found that using alternate bow ingredients lets you adjust the look for different tastes while keeping the decorating process fast and fun.
Tips to Make Your Fudge Boxes Foolproof
Small details help these gift boxes hold their shape and look clean. Because the idea relies on neat lines and smooth surfaces, a few simple tricks keep everything consistent. Christmas fudge behaves best when the mixture is firm. Soft fudge can sag, which makes the cubes look uneven. A good set makes all the difference.
I start by lining my pan with parchment so the fudge lifts out easily. This ensures straight edges. After chilling, I use a warm knife for every cut. A warm blade glides through and creates those crisp sides. I wipe the knife between cuts because stray crumbs make edges messy.
Once the cubes are cut, I set them on parchment so they don’t stick. Then I melt the white chocolate slowly. Overheating makes it thick and clumpy. Smooth chocolate creates cleaner lines. If I’m piping ribbons, I trim the piping bag opening as small as possible. Small openings give better control.
Here are practical tips that always help:
• Chill the cubes before adding decorations
• Keep your workspace cool
• Use parchment for clean lifting
• Pipe slowly to keep lines steady
• Let everything set before moving the cubes
These steps help the tiny gift boxes hold their shape. They also keep your tray neat. Because each cube is small, tiny flaws stand out. Using thoughtful prep avoids those mistakes.
Storage helps too. I store the finished cubes in a single layer. Stacking can crush bows. If I need to transport the tray, I place the cubes tightly together so they don’t slide.
Following these tips turns a simple idea into a polished holiday dessert. And the best part is that the process stays easy, even with these details. Everything comes together with calm, steady steps.
My Final Festive Thoughts on Christmas Fudge
This simple idea brings so much charm to a holiday table. I love when a project looks detailed yet takes very little effort. Christmas fudge becomes something special just by adding tiny ribbons and bows. The process feels approachable, and the finished tray looks joyful. I enjoy ideas that work for busy women because holiday seasons already come with plenty of tasks.
I also appreciate how these tiny boxes offer flexibility. You can make them with any flavor, which keeps things fun. Even better, the decorating stays simple enough for casual bakers. Little touches make the biggest impact here. They create a holiday moment without requiring advanced skills.
Living in Orlando means my Christmas season doesn’t come with snow, so treats like this help me add festive mood to my kitchen without relying on winter weather. I’ve found that cute presentation goes a long way in creating holiday atmosphere.
These tiny gift boxes also photograph beautifully. When you arrange them in neat rows, the pattern feels satisfying. That’s why they perform so well on Pinterest. They create scroll-stopping color and shape in the simplest way. Sharing them feels natural because the idea works for gifting, parties, and dessert nights.
I like to end with something useful, so here it is: you don’t have to be stressed out about giving a presentation. Charming treats can stay simple. These gift-box fudge cubes bring joy without adding chaos to your schedule. They’re small, sweet, and fun. And they always spark conversation thanks to that cute little ribbon on top.
Let them brighten your holiday table and remind you that creative ideas can feel easy too.