Easter always seems to catch me off guard! One minute I’m putting away Christmas decorations, and the next, I’m standing in the grocery store looking at dye kits. Every year, I tell myself I’ll get creative with Easter egg decorating. Then I toss some dye tablets in a cup and call it done. But it doesn’t have to be that way. Decorating Easter eggs can be simple, fun, and creative without making a giant mess.
In this post, I’m sharing easy ways to help your eggs stand out. No fancy tools are needed. You also won’t spend hours cleaning up. These ideas are kid-friendly and fun for adults too. Whether you love bright colors or soft, natural tones, I’ve got you covered. I like things that actually work. No cracked shells or color rubbing off right after drying. These techniques will stick and last.
There’s something fun about setting out bowls of color and letting creativity take over. The kitchen table turns into an art project. Watching the eggs dry is the best part. Each one turns into its own surprise. You’ll see marbled swirls, speckles, and soft shades. I’ve got simple tricks to help the color last too.
I’m going to show you how to use things already in your kitchen. Cool whip? Yes! Oil and vinegar? Definitely. Natural ingredients from your fridge? Absolutely. And all of it is easy. These ideas won’t leave stains on your hands or mess on your counters. Let’s make Easter egg decorating simple, fun, and totally stress-free.
This site includes affiliate links; you can check the disclosure for more details.
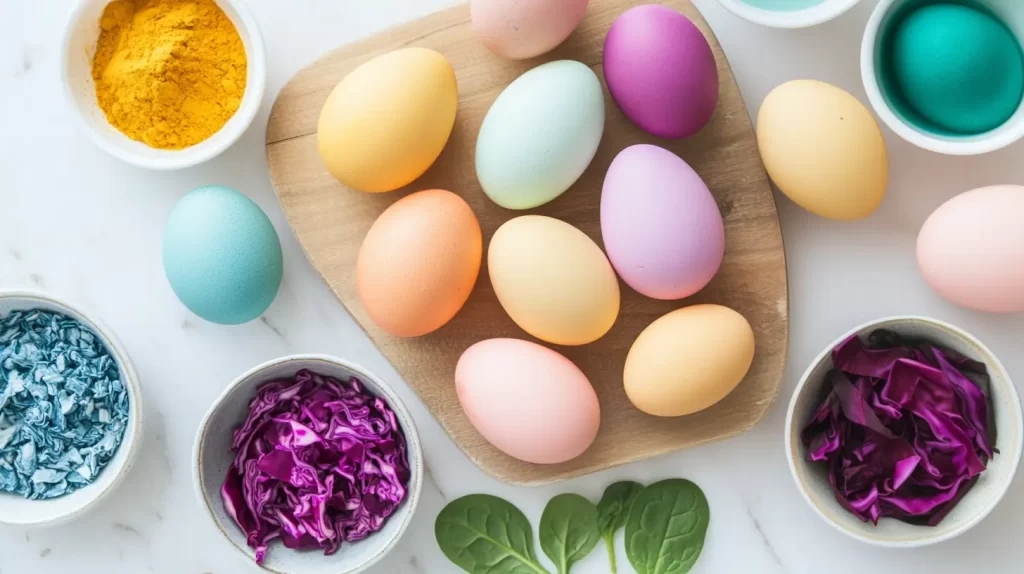
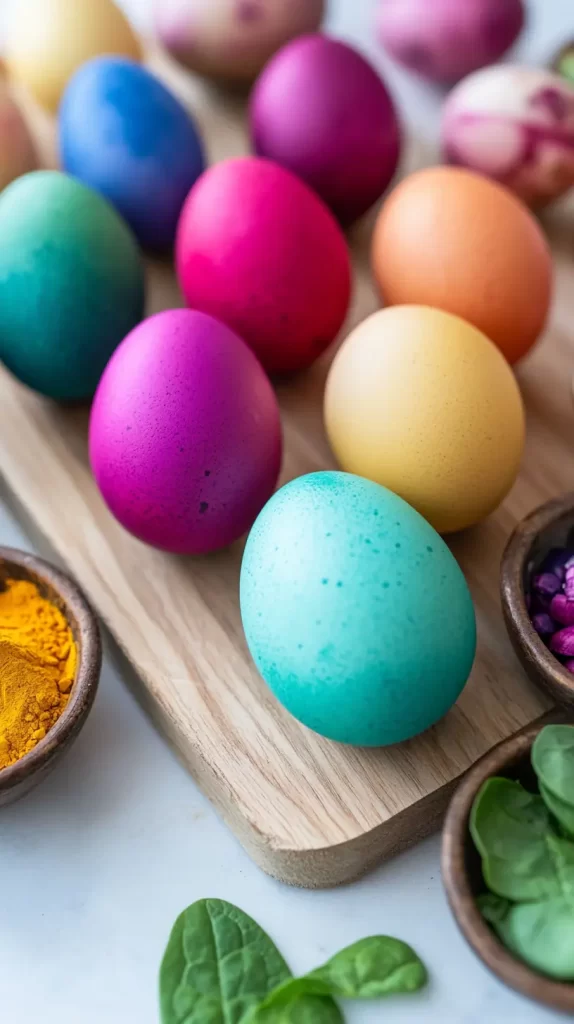
Naturally Dyed Easter Egg Decorating
Natural dyes feel old-fashioned in the best way. You don’t need chemical-filled kits. You can make gorgeous colors using food you already have. Plus, they give the eggs a soft, earthy look that feels special.
Here are easy items you can use for natural Easter egg decorating:
- Red cabbage (blue eggs)
- Yellow onion skins (orange eggs)
- Beets (pink eggs)
- Spinach (green eggs)
- Turmeric (bright yellow)
How to make the dye:
- Add two cups of water and one tablespoon of white vinegar to a pot.
- Add your dye ingredient.
- Bring it to a boil, then simmer for 30 minutes.
- Strain the liquid into a bowl and let it cool.
Once the dye is ready, gently place the eggs inside. The longer they soak, the deeper the color. I usually leave them in for at least 30 minutes. Some people leave them in overnight in the fridge for richer colors.
Tips for success:
- Start with white eggs for the brightest colors.
- Wipe the eggs with vinegar before placing them in dye.
- Use tongs or a slotted spoon to move the eggs.
- Let them air dry. Don’t touch them until they’re fully dry.
The best part of naturally dyed eggs is the surprise. You never know exactly what you’ll get. The colors are soft and uneven in the prettiest way. Each egg looks like it came from a fancy craft store.

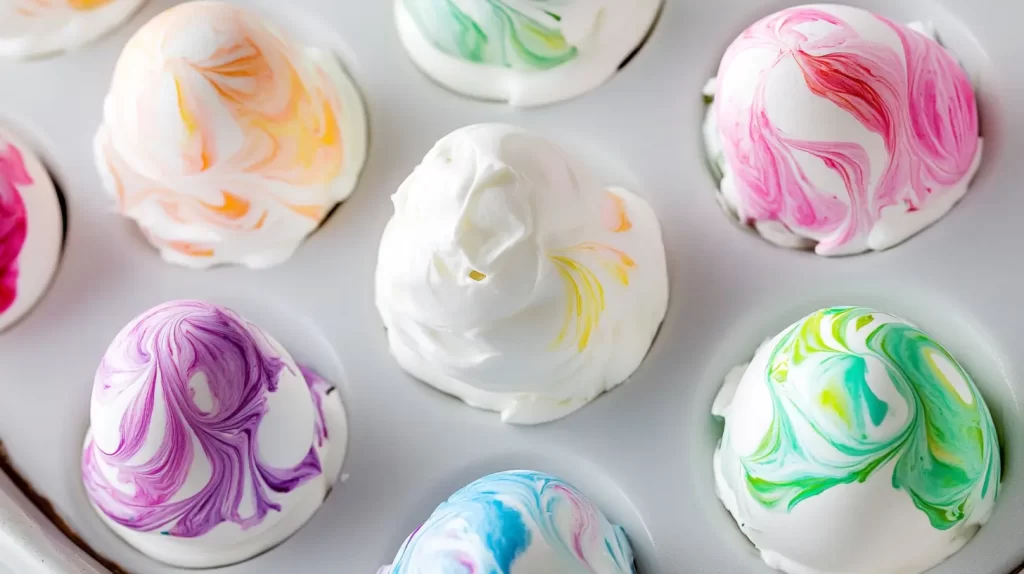
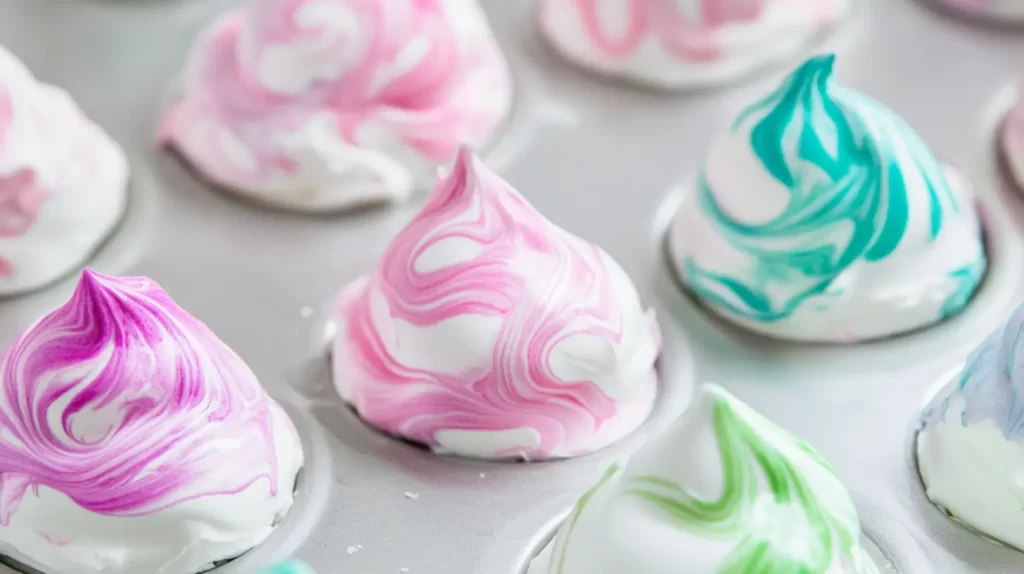
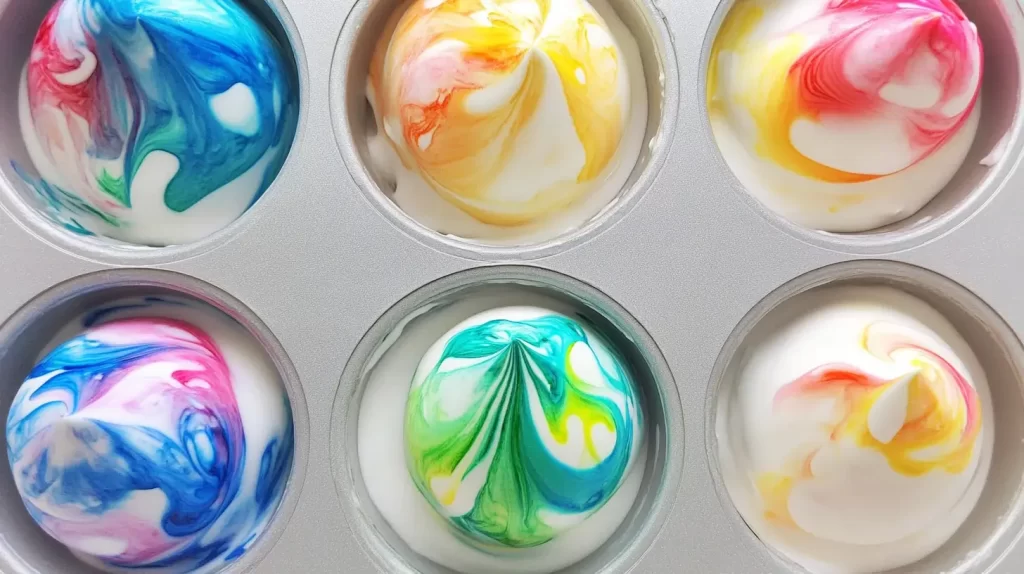
Cool Whip Easter Egg Decorating
Cool whip eggs are so much fun. This method is perfect if you like swirly, marbled designs. Plus, it’s super kid-friendly. If they lick their fingers, it’s fine. It’s just whipped topping and food coloring!
What you need:
- A tub of Cool Whip (or any whipped topping)
- Gel food coloring
- White vinegar
- Hard-boiled eggs
- A shallow dish
How to do it:
- Spread the Cool Whip in your dish.
- Add drops of gel food coloring on top.
- Swirl the colors with a toothpick or knife.
- Roll each egg in the colorful mixture.
- Let them sit for 15 minutes.
- Rinse under cool water and pat dry.
Tips to help the color stick:
- Wipe each egg with vinegar first.
- Don’t roll the eggs too much; it smudges the design.
- Use gloves if you don’t want colorful fingers.
- If the colors seem dull, add more food coloring.
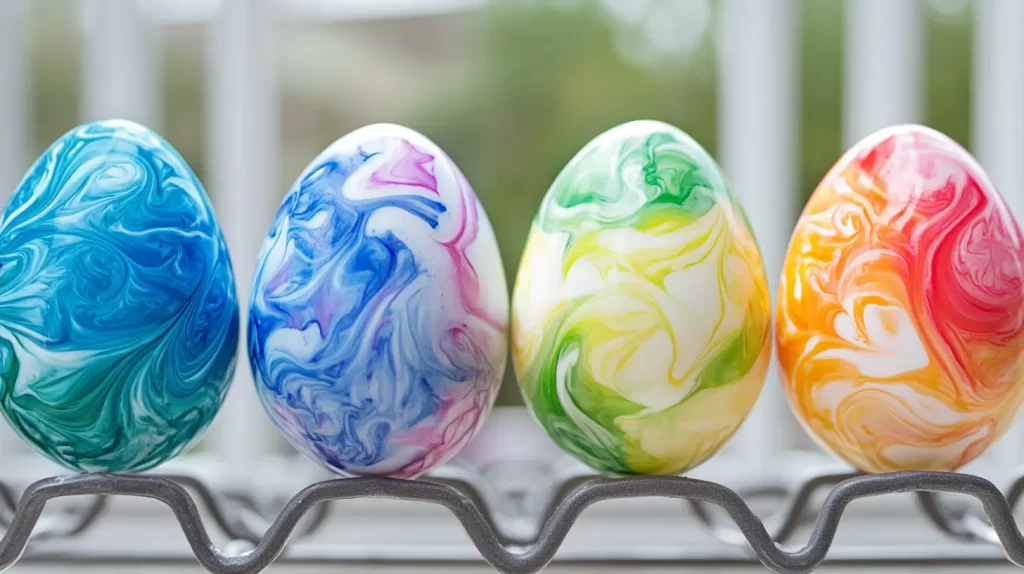
These eggs come out with soft swirls and pretty pastel tones. It feels like magic watching the patterns appear. They look almost tie-dyed. It’s an easy project that leaves little mess and lots of smiles.
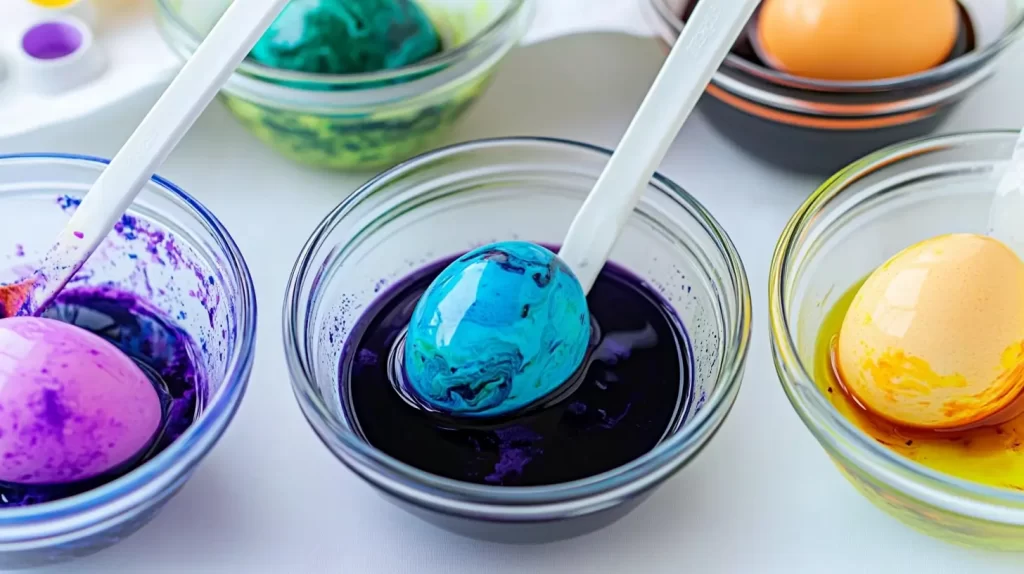
Oil and Vinegar Easter Egg Decorating
This method gives you that marbled, water-like effect. It’s simple and uses ingredients from your pantry. The combination of oil and vinegar keeps the colors from fully mixing, leaving those dreamy patterns.
What you’ll need:
- Bowls for each color
- Water
- Food coloring
- White vinegar
- Vegetable oil
- Hard-boiled eggs
Steps to follow:
- In each bowl, mix one cup of water with one tablespoon of vinegar.
- Add a few drops of food coloring.
- Add one tablespoon of vegetable oil.
- Gently stir, but don’t mix it completely.
- Dip an egg and roll it around.
- Let the egg sit for a minute or two.
- Remove and let air dry.
Helpful tips:
- Oil creates the marbling. Less stirring means bolder patterns.
- Use a spoon to move the egg gently.
- Don’t wipe the eggs. Let them dry naturally.
- Repeat with different colors for multi-colored effects.
These eggs end up looking elegant and a little fancy. But they take almost no effort. The oil makes the color pool in certain spots, giving each egg a unique design. You’ll feel like a pro with minimal work.

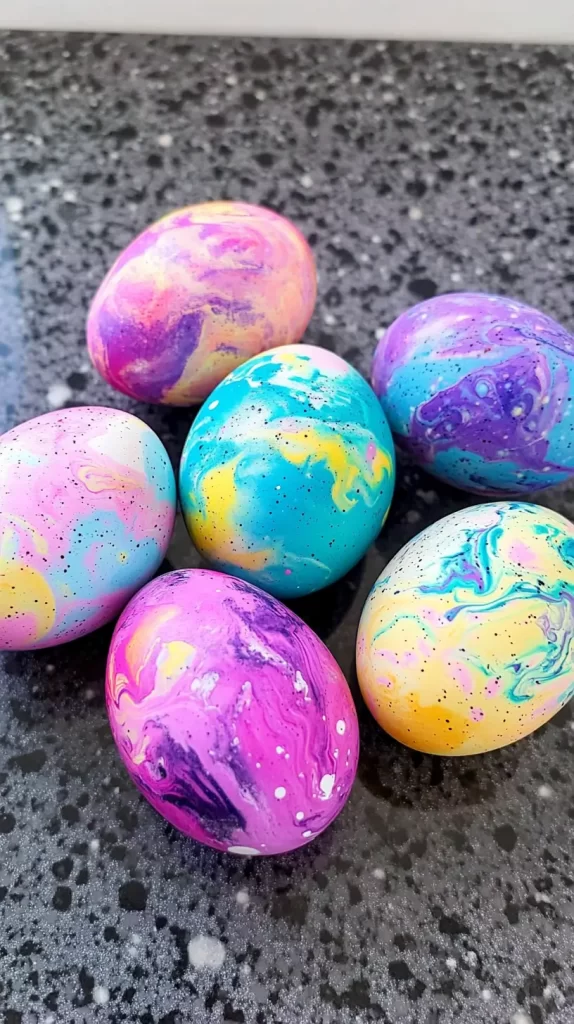
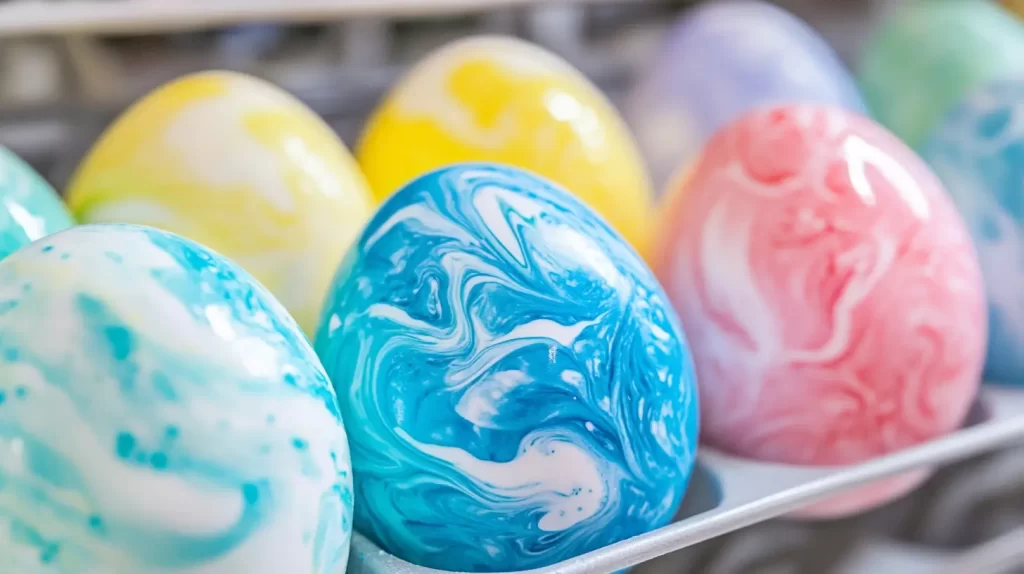
Marble Easter Egg Decorating
Marble designs never go out of style. They look sophisticated but are surprisingly easy. You can marble eggs with nail polish or shaving cream, but I recommend shaving cream for safety and cleanliness.
What you need:
- Shaving cream (not gel)
- Gel food coloring
- White vinegar
- A baking sheet
- Hard-boiled eggs
Steps to marble your eggs:
- Spray shaving cream onto the baking sheet.
- Drop food coloring in different spots.
- Swirl gently with a toothpick.
- Roll each egg through the mixture.
- Let them sit for 10 minutes.
- Rinse under cold water and pat dry.
Pro tips:
- Wipe eggs with vinegar first to help the color hold.
- Don’t over-swirl; it ruins the marble effect.
- Use gloves to keep your hands clean.
- Add more color drops for bolder designs.
Each marble egg comes out a little different. You get gorgeous patterns without stress. This method is great for older kids or adults who want something fancy. The end result looks way more complicated than it really is.
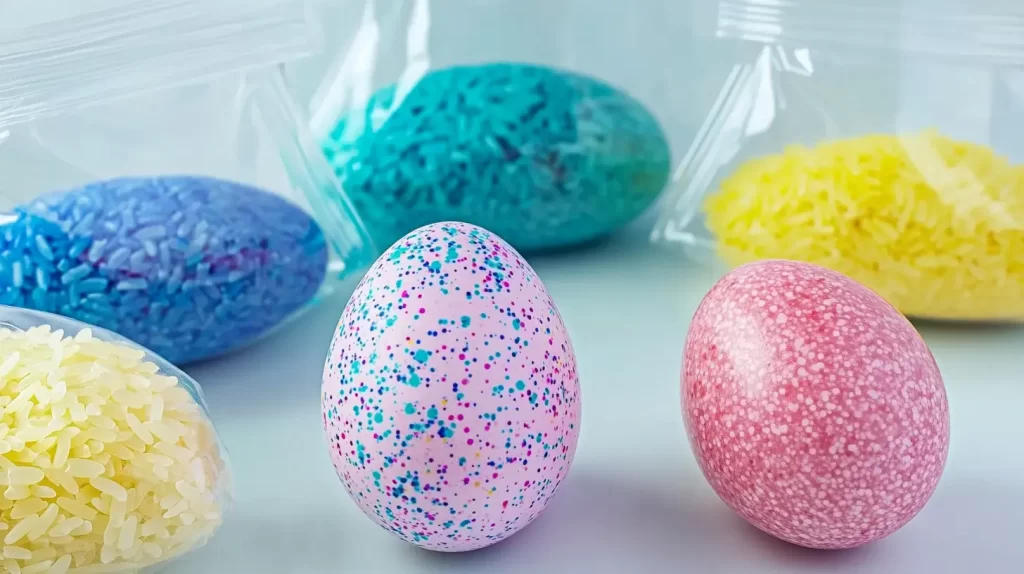
Rice Shake Technique
This is one of my favorite fun ideas for Easter egg decorating. It’s simple, not messy, and gives a cool speckled effect. You don’t need anything fancy. Plus, kids love shaking the container. It turns decorating into a game!
Here’s what you’ll need:
- Dry white rice
- Gel food coloring
- Hard-boiled eggs
- Zip-top bags or small containers with lids
How to do it:
- Add about half a cup of dry rice to a zip-top bag.
- Put in a few drops of gel food coloring.
- Close the bag and squish it around to coat the rice.
- Drop a hard-boiled egg into the bag.
- Seal it tight.
- Shake the bag gently for about 30 seconds.
- Take the egg out and let it dry on a rack.
Helpful tips:
- Use one color per bag.
- Add more food coloring for brighter speckles.
- Don’t over-shake, or the color will smear.
- Start with white eggs for best results.
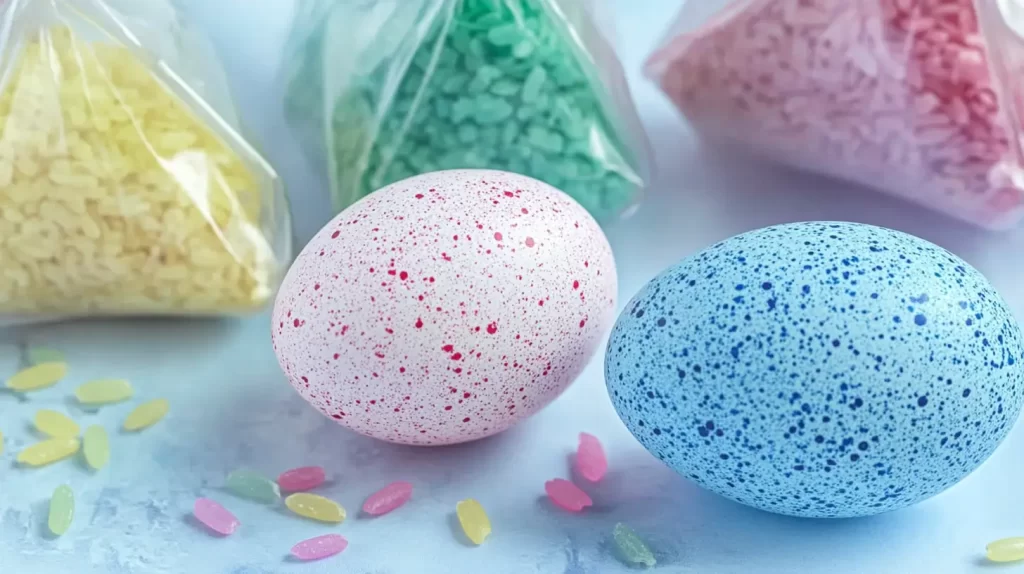
What I love about this Easter egg decorating method is how playful it feels. Kids giggle while shaking the bags. It’s fun for adults too. The speckled look is super cute. The eggs come out with bright little dots, almost like they were splattered with paint. You can mix different color speckles by shaking an egg in one bag, letting it dry, then doing it again in a second color.
Cleanup is easy too. No bowls to scrub, and no dye stains on your table. If you want easy, colorful eggs without fuss, this is one technique to try. Every egg looks different, and it’s always a surprise when you pull it out of the bag.

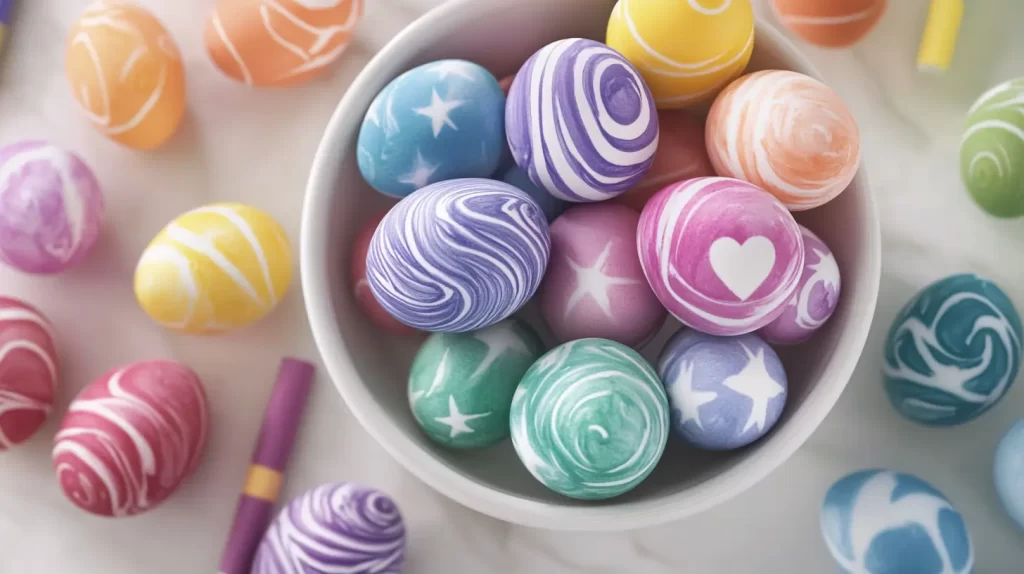
Crayon Resist Method
If you want to add designs and patterns, this crayon resist method is perfect. It makes Easter egg decorating creative and fun. All you need are plain eggs, crayons, and dye.
Start with hard-boiled eggs that have cooled. Before you dye them, take crayons and draw on the eggshell. White crayons work best, but any color will do. You can make stripes, zigzags, hearts, or even write names.
Here’s how it works:
- Draw on the egg with crayon.
- The wax creates a barrier.
- When you dip the egg in dye, the color won’t stick where the wax is.
- You’ll see your design pop out!
Tips to make it fun and easy:
- Press firmly with the crayon.
- Use lighter colors of dye for dark crayon lines.
- Use darker dye for white crayon designs.
- Rotate the egg slowly in the dye for even color.
- Let the eggs air dry after dyeing.
Ideas for designs:
- Polka dots
- Flowers
- Swirls
- Initials
- Little stars
The best part is watching the designs appear when you pull the egg out of the dye. Kids love this! Adults do too. You can also layer colors. Draw with crayon, dip in one color, then draw more and dip in another. The crayon resist technique makes Easter egg decorating more personal and creative without adding mess or stress. Every egg becomes its own little masterpiece.

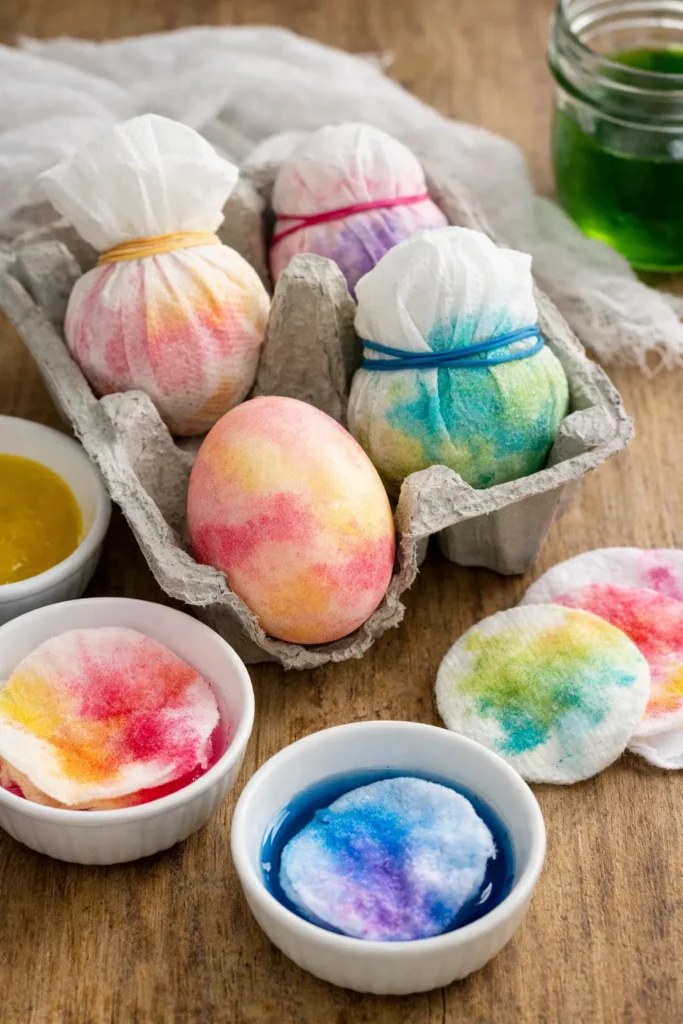
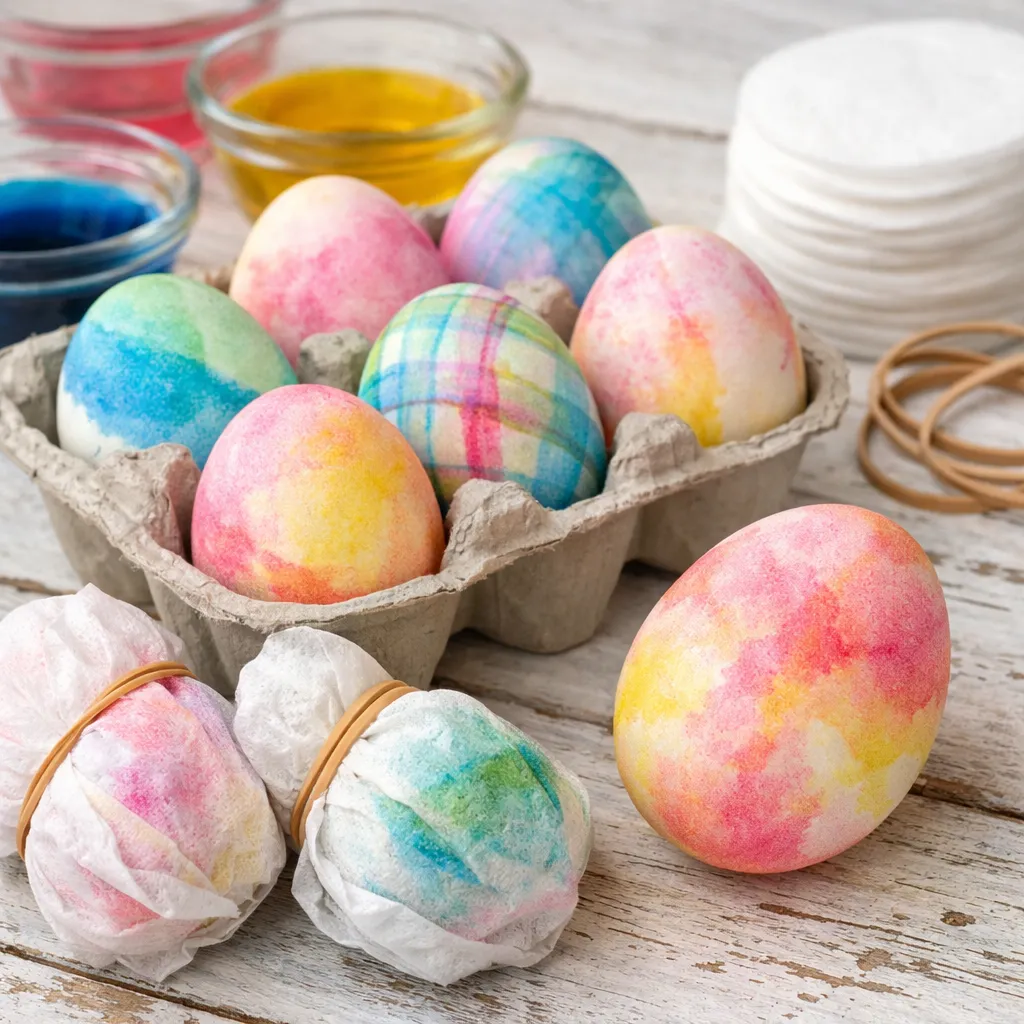
Velvet Wrap Easter Egg Decorating That Looks Hand Painted
I’ve found that dip dyeing is great, but it gives me less control than I want. Sometimes I want color in one exact spot, not all over. That’s why I love velvet wrap Easter egg decorating for soft, layered color. It uses cotton rounds or paper towels instead of a full dye bath.
The result looks airy, hand painted, and a little expensive in the best way. First, make a few small bowls of strong dye with hot water, vinegar, and gel food coloring. Next, dab cotton rounds into different colors until they’re wet but not dripping. Then, press the dyed rounds against a dry hard-boiled egg in sections.
Wrap the egg loosely in a paper towel, then secure it with two rubber bands. As the egg rests, the color blooms slowly and stays where you placed it. Meanwhile, set the wrapped eggs in a carton so the wet color stays put. What makes this version of Easter egg decorating so good is the control. You can place yellow near pink for a peachy blend.
Or keep blue on one side and green on the other. If you angle the cotton rounds, you get soft diagonal stripes. When you overlap smaller pieces, you get a watercolor plaid look that feels fresh. After fifteen minutes, unwrap the egg and let it dry fully.
Later, buff it lightly with a dry paper towel for a softer painted finish. I tend to notice these eggs look prettier than standard dunked ones because the color has shape. They also hide tiny shell marks better, which is oddly useful. If I wanted a technique that looked custom without extra mess, this would be it.

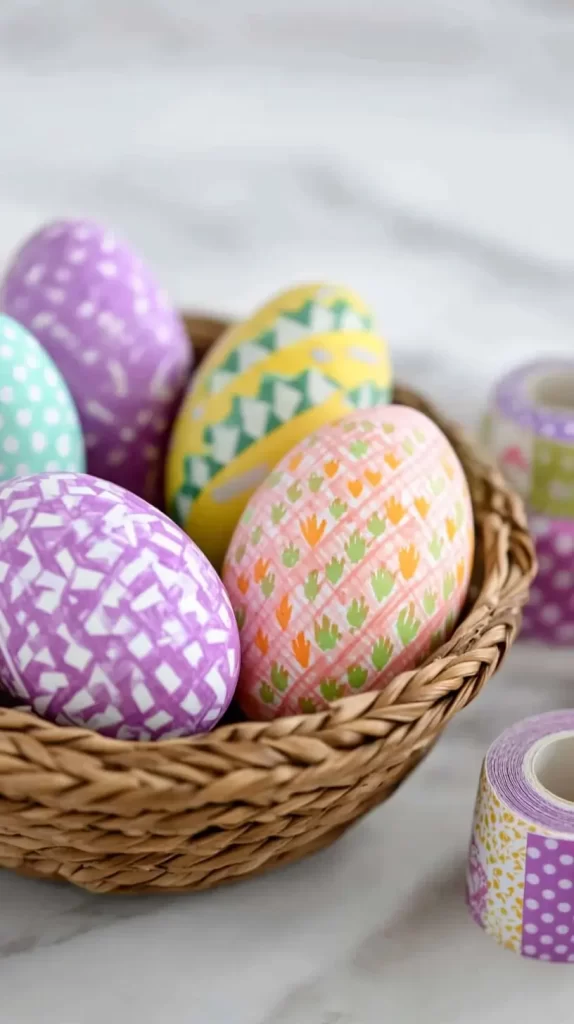
Washi Tape Easter Egg Decorating
I love using washi tape for Easter egg decorating. It’s fast, mess-free, and great when you don’t feel like dealing with dye. Plus, washi tape comes in so many patterns and colors. You can really get creative.
What you need:
- Hard-boiled eggs (room temperature)
- Washi tape in different patterns and colors
- Scissors
How to do it:
- Cut small strips or shapes of washi tape.
- Stick them onto the egg.
- Press down gently so they stay put.
- You can make stripes, chevrons, or random patterns.
- Mix and match tape colors for fun designs.
Ideas to try:
- Cover the whole egg in small squares of tape like a mosaic.
- Wrap tape around the egg in rings.
- Make tiny flags with tape and toothpicks to stick into egg cartons for display.
Helpful tips:
- Start with dry, cool eggs.
- If tape edges lift, press again firmly.
- Don’t overlap tape too much, or it will peel.
- Washi tape peels off easily, so you can reposition if needed.
This Easter egg decorating method is perfect for those days when you want cute results with no cleanup. It’s also great if you’re short on time. You can display these eggs in baskets or on a tray. The colors and patterns pop and make your Easter table extra pretty.

Easter Egg Decorating FAQ
How do I get Easter egg color to stay on better?
I’ve found that vinegar makes the biggest difference. It helps the dye stick to the shell instead of sliding around. I also like to wipe eggs with vinegar before coloring them. Letting the eggs air dry matters too. If I touch them too soon, the color can smear.
Should I use white eggs or brown eggs for Easter egg decorating?
White eggs usually give brighter, clearer colors. Brown eggs can still look pretty, but the shades turn out deeper and moodier. If you want soft pastels, white eggs are the easier choice. If you like rich, earthy tones, brown eggs can look really good.
Can I dye eggs with natural ingredients instead of a kit?
Yes, and it actually works better than some people expect. Red cabbage, turmeric, onion skins, and beets can all color eggs. Naturally dyed eggs usually have softer shades, not neon ones. I think that’s part of the charm.
Why do my Easter eggs look blotchy?
Blotchy eggs usually happen when the shell has oil or moisture on it. I like to dry the eggs well first and wipe them with vinegar. Overcrowded dye cups can cause weird spots too. Giving each egg a little room helps a lot.
What is the least messy Easter egg decorating method?
Washi tape is probably the cleanest option. Rice shake eggs are also pretty easy to manage. If you want color without bowls of dye everywhere, those two methods are solid. Cool whip is fun, but it can get messy fast.
How long should eggs stay in dye?
That depends on the look you want. A few minutes gives lighter color. Longer soaking gives deeper shades. For natural dye, I tend to leave the eggs in much longer because the color builds more slowly.
Can I eat Easter eggs after decorating them?
Yes, as long as the eggs were handled safely and stayed refrigerated when needed. Food-safe dye methods are best if you plan to eat them. I would skip eating eggs decorated with shaving cream or craft materials. Those are better for display.
What are the best Easter egg decorating ideas for kids?
Cool whip eggs, rice shake eggs, and crayon resist eggs are great for kids. They’re easy to understand and fun to watch. The results look exciting without needing perfect hands. That’s always a win.
Last Ideas
Decorating Easter eggs can be super fun and totally chill! With just a few simple ingredients, you can make stunning designs. Whether you like soft, natural colors or bold, swirly patterns, there’s something here for everyone.
We covered natural dyes for that soft, rustic look. I showed you how to use Cool Whip for easy marbled eggs. Oil and vinegar gave us another fun marbling technique with simple pantry staples. Then we finished with shaving cream marbling for those classic patterns that look like you spent hours on them.
All of these methods are easy to follow. They don’t make a mess or require fancy tools. You probably have most of what you need already. The best part? The results will make everyone ask how you did it.
Decorating Easter eggs can be a bit much sometimes! But once you know these tricks, it becomes something fun and relaxing. Set out a few bowls, grab your eggs, and let creativity take over. Watching the designs appear is part of the fun.
Don’t forget to take pictures. These eggs will look amazing on your holiday table or in your Easter baskets. Plus, you can save the photos for future ideas. Maybe even share them on Pinterest to inspire others.
I hope these ideas help make your Easter colorful, easy, and fun. Simple methods can bring big results. You don’t need to stress. Just enjoy the process and let each egg be its own little masterpiece.