There’s something so satisfying about making homemade dog treats for your pup. It’s like baking cookies for family, but instead of picky eaters, you get an enthusiastic tail wag and maybe a little drool. Store-bought snacks are fine when you are in a hurry, but they usually have some funky ingredients and preservatives. Who needs all that when making your own is so easy?
If you’ve ever looked at the back of a treat bag and thought, “What even is half of this stuff?” then you’re in the right place. Making treats at home lets you pick the best ingredients and avoid unnecessary fillers. You don’t need to be a pro baker either—just a handful of pantry staples and a few minutes in the kitchen.
I’ll walk you through some easy, dog-approved recipes that even beginner bakers can handle. There’s no fancy equipment needed, just simple steps that result in happy pups. Whether you want crunchy biscuits, soft chews, or frozen treats for hot days, I’ve got you covered. Plus, if your dog has allergies or a sensitive tummy, homemade is the way to go.
Not sure where to start? No worries! I’ve got ingredient tips, storage hacks, and fun ideas to customize your treats. Whether your pup loves peanut butter, pumpkin, or a little bacon flavor, there’s something here for them. So, grab an apron (or don’t—this isn’t a messy job), and let’s make some homemade dog treats that your pup will go crazy for.

This site includes affiliate links; you can check the disclosure for more details.
Why Make Dog Treats at Home?
There are plenty of reasons to whip up your own treats instead of grabbing a bag from the store.
- Better ingredients – You control what goes in, skipping the preservatives and artificial stuff.
- Healthier for your pup – Many store-bought treats are loaded with extra salt, sugar, and unhealthy fats.
- Great for allergies – If your dog has sensitivities, homemade treats let you avoid problem ingredients.
- Cost-effective – Buying treats can add up fast, but homemade ones cost way less.
- Tailored to your dog – Make treats with their favorite flavors or adjust recipes for their needs.
It’s also just fun! Watching your pup enjoy something you made feels pretty great. Plus, you can get creative with shapes, sizes, and flavors.
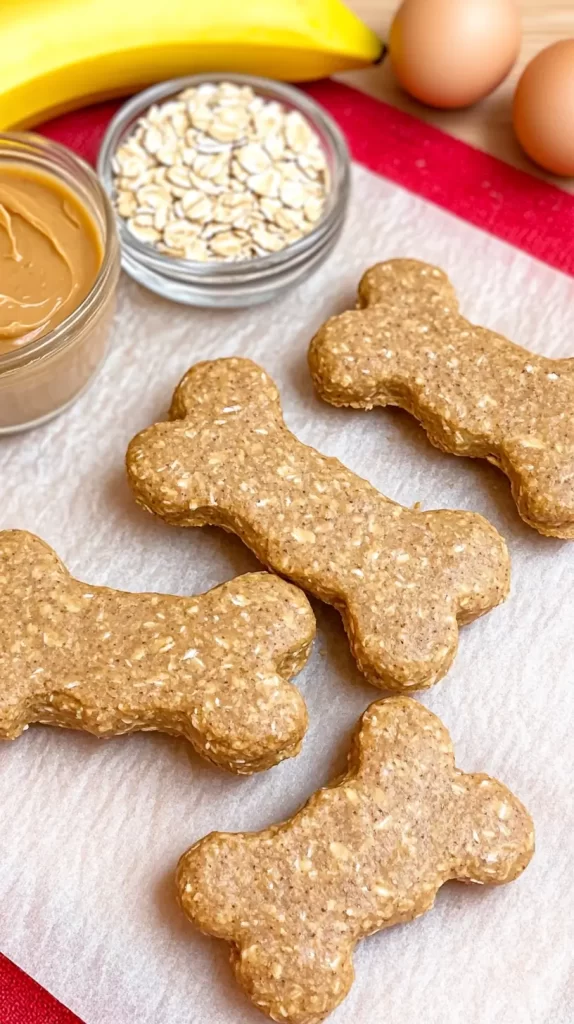
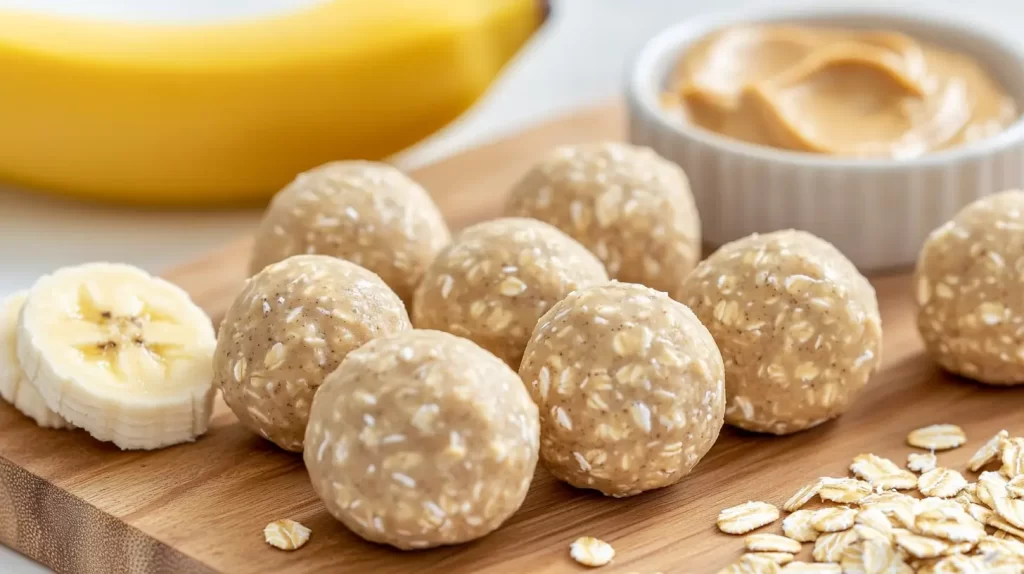
Easy Peanut Butter & Oat Treats
This is a classic, simple treat recipe. It’s perfect if you want something quick that your dog will love.
Ingredients:
- 1 cup whole wheat flour (or oat flour if avoiding wheat)
- ½ cup rolled oats
- ½ cup natural peanut butter (make sure it’s xylitol-free)
- ¼ cup unsweetened applesauce or mashed banana
- 1 egg
Directions:
- Preheat your oven to 350°F.
- Mix everything together in a bowl until a dough forms. If it’s too dry, add a splash of water.
- Roll out the dough and cut it into shapes or just make little balls.
- Place on a lined baking sheet and bake for about 12-15 minutes.
- Let them cool completely before giving one to your dog.
These treats store well in an airtight container for about a week. If you want them to last longer, freeze them!
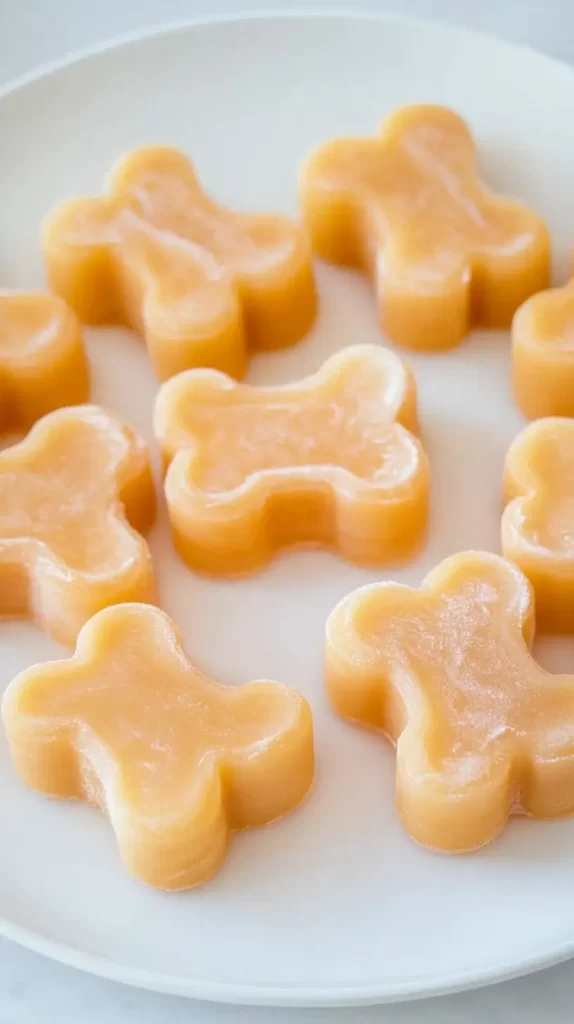
Simple Two-Ingredient Frozen Homemade Dog Treats
When it’s hot outside, frozen treats are the best. These are as easy as it gets!
You’ll Need:
- 1 cup plain yogurt (or unsweetened coconut yogurt for dairy-free)
- ½ cup mashed banana or pumpkin puree
Instructions:
- Mix the yogurt and banana (or pumpkin) together.
- Spoon the mixture into silicone molds or an ice cube tray.
- Freeze for a few hours until solid.
- Pop them out and serve on a hot day!
These are great for dogs who need something cool after playing outside. Plus, they take almost no effort to make.
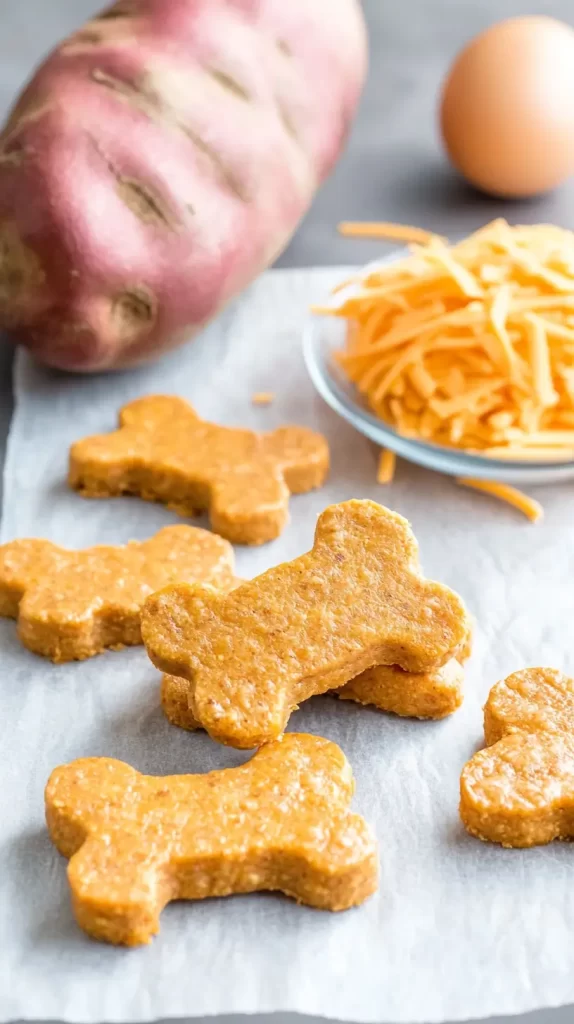
Cheesy Sweet Potato Dog Biscuits
Dogs love cheese, and sweet potatoes are packed with vitamins and fiber. These biscuits are crunchy, delicious, and easy to make.
Ingredients:
- 1 cup mashed sweet potato (plain, no butter or seasoning)
- 1 ½ cups whole wheat flour (or oat flour for a gluten-free option)
- ½ cup shredded cheddar cheese
- 1 egg
- 2 tbsp unsweetened applesauce or plain yogurt
Instructions:
- Preheat your oven to 350°F.
- In a mixing bowl, combine all the ingredients. Stir until a dough forms.
- Roll out the dough on a floured surface to about ¼-inch thickness.
- Cut into shapes using a cookie cutter or just slice into squares.
- Place treats on a lined baking sheet and bake for 20-25 minutes, or until firm.
- Let them cool completely before serving.
These store well in an airtight container at room temperature for up to a week. If you want to keep them longer, pop them in the fridge or freezer.
Banana Oat No-Bake Homemade Dog Treats
No oven? No problem. These no-bake treats are soft, chewy, and take just minutes to make.
Ingredients:
- 1 cup rolled oats
- ½ cup mashed banana
- ¼ cup natural peanut butter (xylitol-free)
- 1 tbsp coconut oil (optional, for extra healthy fats)
Instructions:
- In a bowl, mix all the ingredients until well combined.
- Roll the mixture into small bite-sized balls.
- Place them on a plate or tray and refrigerate for at least 30 minutes to firm up.
- Serve chilled!
These treats store well in the fridge for about a week. You can also freeze them for up to a month.
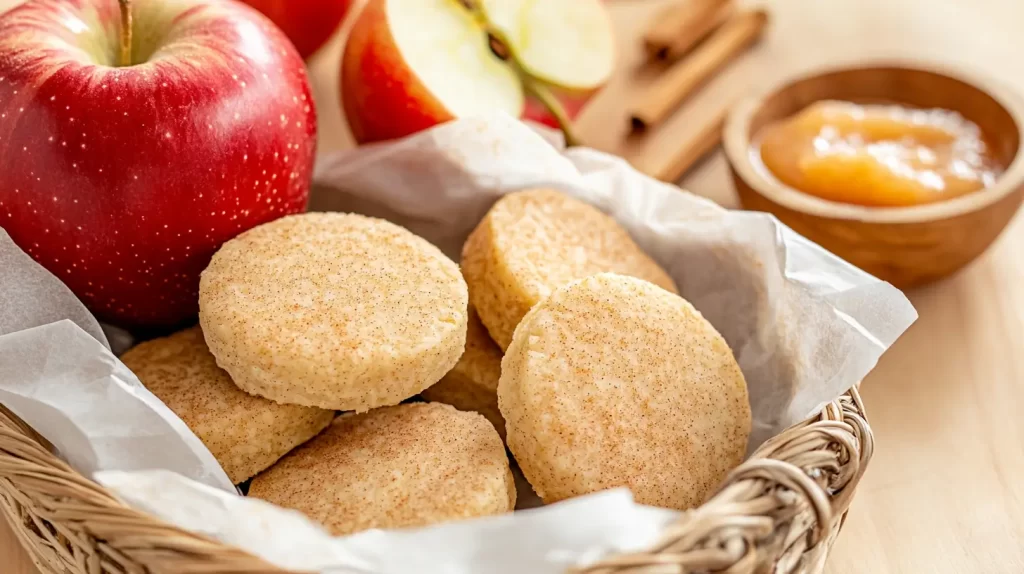
Apple Cinnamon Dog Biscuits
These smell so good while baking that you might be tempted to try one yourself! They’re full of fiber and have a hint of natural sweetness.
Ingredients:
- 1 cup whole wheat flour (or oat flour)
- ½ cup unsweetened applesauce
- ½ tsp cinnamon
- 1 egg
- ¼ cup water (or as needed for consistency)
Instructions:
- Preheat your oven to 350°F.
- In a bowl, mix together the flour, applesauce, cinnamon, and egg.
- Add water a little at a time until the dough holds together.
- Roll out the dough on a floured surface to about ¼-inch thickness.
- Cut into desired shapes and place on a baking sheet.
- Bake for 15-20 minutes or until firm.
- Let cool completely before serving.
These biscuits keep well for about a week at room temperature. Store extras in the fridge or freezer to make them last longer.
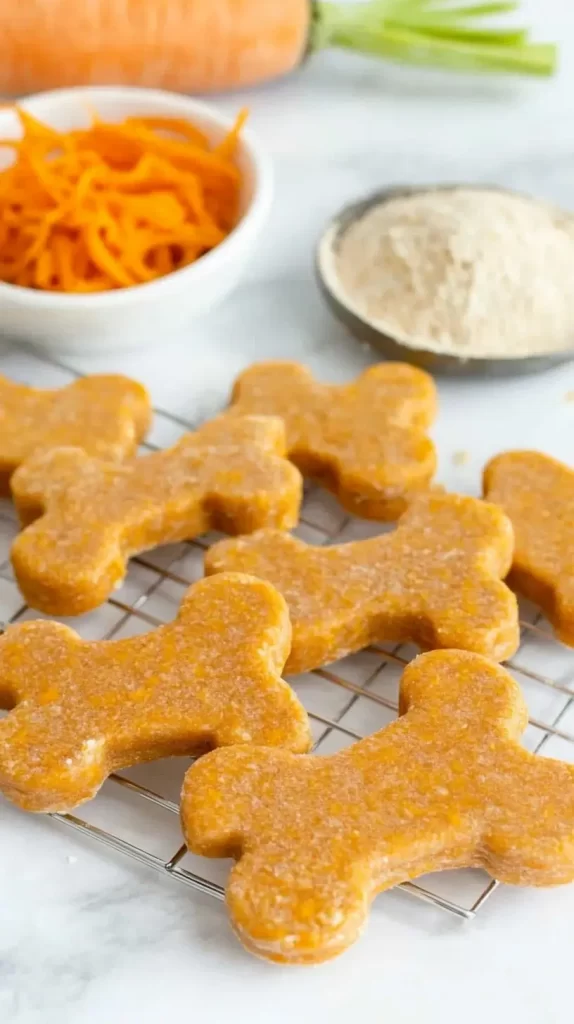
Pumpkin & Carrot Soft Chews Homemade Dog Treats
These soft treats are great for older dogs or pups that prefer something easier to chew. Pumpkin helps digestion, while carrots add a little crunch.
Ingredients:
- 1 cup pumpkin puree (plain, not pie filling)
- ½ cup shredded carrots
- 1 egg
- 1 ½ cups oat flour (blend rolled oats into flour if needed)
- ¼ cup unsweetened applesauce
Instructions:
- Preheat your oven to 350°F.
- Mix all ingredients in a bowl until well combined.
- Scoop small spoonfuls onto a lined baking sheet.
- Flatten each scoop slightly with a fork or spoon.
- Bake for 12-15 minutes until the treats are set but still soft.
- Let cool completely before serving.
These store best in the fridge for about a week. You can also freeze them and thaw as needed.
With these easy recipes, your pup will never run out of tasty, homemade treats!
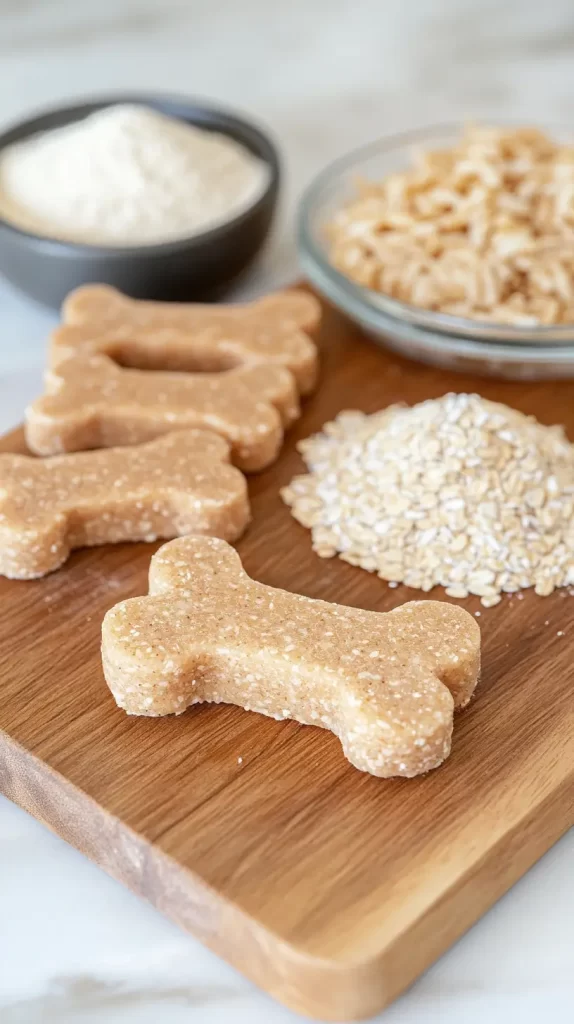
Chicken & Rice Dog Treats
If your pup loves the taste of chicken, these homemade treats will be a hit. They’re soft, easy to chew, and made with simple, dog-friendly ingredients. Plus, if your dog has a sensitive stomach, chicken and rice are a great combo.
Ingredients:
- 1 cup cooked chicken, shredded (plain, no seasoning)
- ½ cup cooked brown rice (cooled)
- ½ cup oat flour (blend rolled oats into flour if needed)
- 1 egg
- ¼ cup unsweetened applesauce
Instructions:
- Preheat your oven to 350°F.
- In a mixing bowl, combine the shredded chicken, rice, oat flour, egg, and applesauce. Stir well until it forms a dough.
- Scoop small spoonfuls onto a lined baking sheet. You can shape them into little patties or just drop them as-is.
- Bake for 15-18 minutes, until firm but still soft in the middle.
- Let them cool completely before serving.
These treats are best stored in an airtight container in the fridge, where they’ll stay fresh for about a week. You can also freeze them for up to three months. Just take out a few at a time and let them thaw before giving them to your dog.
Dogs love the natural flavor of chicken, and the rice makes these treats gentle on their stomachs. If your pup needs a softer treat or has food sensitivities, this is a great option!

Customizing Your Dog’s Treats
Making homemade dog treats means you can mix things up based on what your pup likes.
- Love crunchy treats? Bake a little longer for a crispier texture.
- Prefer soft treats? Add more moisture, like applesauce or a little broth.
- Want extra protein? Mix in a bit of shredded chicken or cooked salmon.
- Need a grain-free option? Use coconut flour or almond flour instead of wheat flour.
- Want to make them extra special? Sprinkle in some dried parsley for fresh breath.
Dogs have preferences too, so it’s fun to experiment and see what they love most.

How to Store Homemade Dog Treats
When you make dog treats homemade, you don’t have to worry about artificial preservatives. That’s great for your pup, but it also means they won’t last as long as store-bought treats. If you don’t store them right, they can go stale, moldy, or lose their crunch. Nobody wants that—especially not your dog.
Here’s how to keep homemade treats fresh:
- Soft treats – These have more moisture, so they need to be stored in an airtight container in the fridge. They’ll stay good for about a week. If they start feeling sticky or smell off, it’s time to toss them.
- Crunchy biscuits – If your treats are fully baked and dry, they can stay at room temperature in an airtight container. They should last about two weeks. Adding a piece of dry rice or a silica packet (from an old treat bag) can help absorb moisture and keep them crispy.
- Frozen treats – If you make treats with yogurt, pumpkin, or other fresh ingredients, the freezer is your best friend. Store them in a freezer-safe bag or container, and they’ll stay good for up to three months. Just let them thaw for a few minutes before giving them to your pup.
Extra tips for keeping treats fresh:
- Always let baked treats cool completely before storing them. Trapping warmth in a container can cause condensation, which leads to mold.
- Label containers with the date you made the treats, so you know when they need to be used.
- If you make a big batch, freezing extras is the best way to make them last. Just take out a few at a time, so they don’t go bad before your pup can enjoy them.
A little planning goes a long way in keeping your homemade treats fresh and tasty!
Final Thoughts
Making dog treats homemade is one of those little things that makes life better. It’s simple, fun, and your dog will be thrilled every time you pull out a treat. Whether you stick with peanut butter classics or try new flavors, you’ll know exactly what your pup is eating.
It’s also a great way to save money. Buying quality dog treats can get expensive fast, but with just a few ingredients, you can make something just as good—if not better. Plus, there’s something satisfying about baking up a batch of treats and seeing that happy tail wag.
If you’re on Pinterest, this is a great one to save. You can even share it with fellow dog parents looking for easy homemade treat ideas. Once you try making treats yourself, you might never go back to store-bought. Your pup will be a very happy taste tester!