Making Christmas cards is one of my favorite ways to add a personal touch to the holiday season. There’s something extra special about giving (and receiving) a handmade card that feels a bit more meaningful than a store-bought one. It’s an easy way to show someone you’re thinking about them, and it’s also a lot of fun to create. Plus, handmade cards can be as simple or as intricate as you like, which makes them a great project for anyone—whether you’re a seasoned crafter or just starting out.

This site includes affiliate links; you can check the disclosure for more details.
The Handmade Special Touch
Handmade Christmas cards show effort, care, and thought. In a world where so much is digital, receiving something you can physically hold and display is refreshing. There’s something comforting about knowing someone took the time to create a card specifically for you. It’s like giving a tiny piece of yourself along with the card, which makes it all the more valuable to the person receiving it.
Making Christmas cards also gives you a chance to slow down during a hectic season. Between all the shopping, decorating, and events, it’s nice to sit down with some supplies and just focus on creating something lovely. It doesn’t have to be complicated, either—simple designs can be just as beautiful as more detailed ones.
Crafting Basics for Handmade Christmas Cards
When it comes to making your Christmas cards, you don’t need to go overboard with supplies. A few key items will set you up for success without turning your home into a craft store. Here’s what you’ll need:
- Cardstock: This is the base of your card. It comes in many colors and weights, so you can choose one that fits your style.
- Scissors or a paper cutter: You’ll need these for cutting your cardstock to the size you want. A paper cutter can make things go faster, but scissors work just as well.
- Adhesives: Double-sided tape, glue sticks, or craft glue will do the trick.
- Markers or pens: These are for writing messages inside the card. You can also use them for drawing or adding details to the front.
- Stamps and ink pads: If you want to get a little fancy, stamps are a great way to add festive images without needing to draw them yourself.
- Embellishments: Think stickers, glitter, ribbons, and small decorative items that can be glued to your card. These are optional, but they can add a lot of charm.

Simple Christmas Card Layouts to Try
When you’re just starting, it’s best to keep your designs simple. You don’t need to create elaborate masterpieces to make beautiful cards. Here are a few easy layouts that even a beginner can handle:
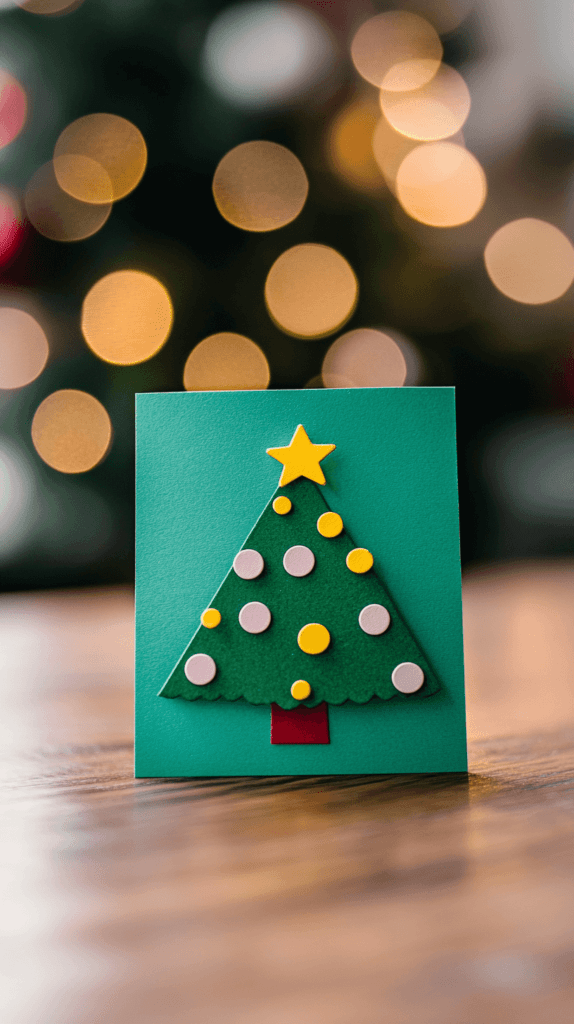
- Minimalist Tree: Cut out a triangle shape from green cardstock and glue it onto the center of your card. Add a small yellow star on top, and draw a simple tree trunk at the bottom. You can also use small circles to make “ornaments” if you like.
- Snowflake Cutouts: Fold a piece of white paper and cut out snowflake designs. Glue these to the front of your card for a wintery look. Pair it with a simple greeting like “Let it snow!” for a nice finishing touch.
- Gift-Wrapped Card: Use ribbon to create a “present” design on the front of your card. Simply wrap a piece of ribbon horizontally and vertically across the card, then tie a small bow where they meet in the center.

Christmas Card Photo Ideas
Photo cards are another great way to personalize your Christmas greetings. These cards give a glimpse into your year and are especially loved by family and close friends. Here are some fun ideas for incorporating photos into your Christmas cards:
- Family Portraits in Christmas Pajamas: This one is always a hit. Gather your family in matching holiday pajamas and snap a cozy photo by the tree or fireplace.
- Action Shots: Instead of a posed photo, try capturing a candid moment—kids decorating the tree, opening gifts, or playing in the snow. These are often the most memorable photos.
- Pets Included: If you have a furry friend, include them in the picture. Whether they’re dressed up in a little Santa hat or just sitting in front of the Christmas tree, pets can bring a fun and heartwarming touch to your Christmas card.

Tutorials for Handmade Christmas Cards
If you’re looking to take your card-making skills up a notch, there are plenty of easy-to-follow tutorials online that can show you how to create more intricate designs. Many of these tutorials are free and include step-by-step instructions, often with photos or videos to help you along the way.
Here are a few ideas for more detailed card designs that might take a little more time, but are definitely worth the effort:
- Pop-Up Cards: Pop-up cards add an element of surprise to your greeting. You can create a pop-up Christmas tree, Santa, or even a snowman. These are great for kids, who love the interactive aspect of the card.
- Shaker Cards: These cards feature a small “window” on the front filled with tiny sequins or glitter that move when you shake the card. They’re festive, fun, and easier to make than you might think.
- Layered Cards: Use different layers of cardstock or patterned paper to create depth and texture on your card. You can cut out shapes like trees, stars, or ornaments and layer them on top of one another for a 3D effect.
-
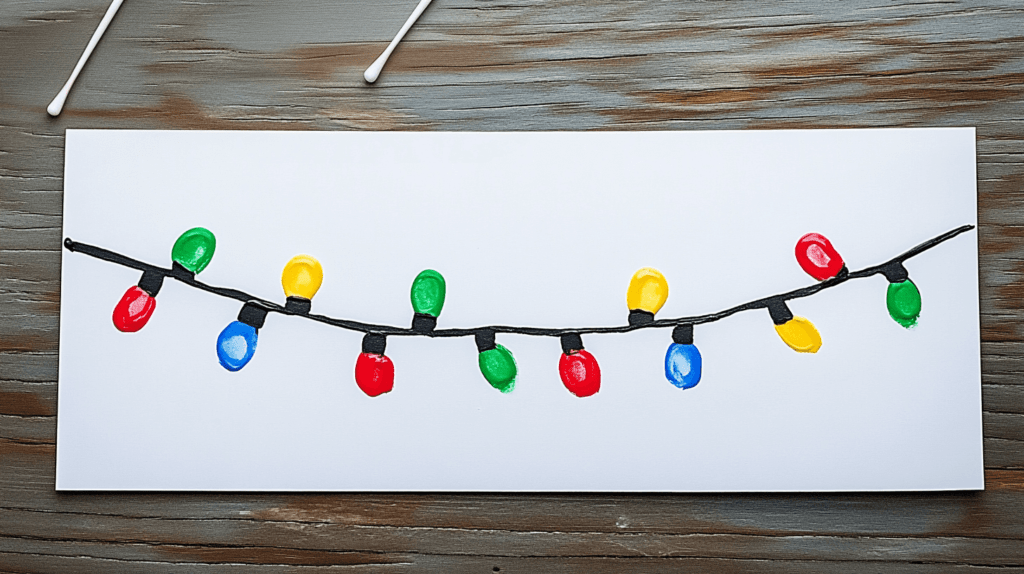
Q Tip Painted Cards: Hand-painted Christmas cards are a fun way to add a personal touch, and creating colorful Christmas lights with just a Q-tip is easy. Start by dipping the tip of a Q-tip into your choice of paint—red, green, yellow, or blue—and gently press it onto the front of your card. Each dot will become a tiny Christmas light. Continue dipping into different colors, one at a time, creating a string of lights across the card. You can draw a simple black line connecting the “lights” with a marker to give it a festive look. It’s quick, simple, and adds a cheerful, homemade touch!

Personalized Messages for Christmas Cards
A big part of creating a memorable Christmas card is the message inside. While a store-bought card gives you a pre-printed sentiment, handmade cards allow you to write something personal. This could be a sweet holiday wish, a funny inside joke, or just a warm greeting to let someone know you’re thinking of them.
Here are some simple message ideas to get you started:
- “Wishing you a season full of joy, love, and laughter!”
- “May your Christmas be merry and bright!”
- “Sending warm holiday wishes from our family to yours.”
- “Here’s to a cozy and joyful holiday season!”
The message doesn’t have to be long. Sometimes just a few heartfelt words can make all the difference. If you’re creating multiple cards, you can customize the message for each recipient to make it feel more personal.
Keeping It Budget-Friendly
Crafting doesn’t have to be expensive. In fact, making your own Christmas cards can often save you money compared to buying them at the store. If you’re looking for ways to cut down on costs while still making beautiful cards, here are some tips:
- Use what you have: Look through your existing craft supplies before heading to the store. You might already have markers, scissors, or ribbon you can use.
- Repurpose old cards: If you have old Christmas cards lying around, cut out the pretty designs and use them as decorations on your new cards. It’s a great way to recycle and create something new at the same time.
- Buy in bulk: If you plan on making a lot of cards, buying supplies in bulk can save you money in the long run. Look for multi-packs of cardstock, markers, or embellishments.
Including a Family Update
Many people like to include a short family update in their Christmas cards. This doesn’t have to be a lengthy newsletter—just a few sentences about what your family has been up to over the past year. It’s a nice way to share highlights with loved ones who might not live nearby.
Here are some ideas for what you might include:
- Any major life events (a new baby, moving, a new job)
- A fun vacation or family trip
- A milestone your child reached this year
You can also keep it lighthearted and fun. For example, if your dog learned a new trick, or you discovered a new favorite family recipe, those little moments can be just as meaningful to share.
Final Touches for Your Christmas Cards
Once your cards are complete, there are a few final touches that can really make them stand out. Here are a few ideas:
- Envelope decoration: You can stamp or draw small images on the envelope to give it a festive look.
- Wax seal: A wax seal adds a classic, old-world charm to your card. It’s a small detail, but it makes a big impression.
- Handwritten addresses: If you have the time, writing out the addresses by hand adds a personal touch that printed labels just can’t match.
Making your own Christmas cards is a wonderful way to spread a little extra joy during the holiday season. Whether you’re creating simple designs or more intricate ones, the thought and care that go into a handmade card are what truly make it special. So grab some supplies, get creative, and enjoy the process!


